Browsed by
Month: October 2018

Snowmen

Snowmen

A week or so ago, I submitted a card to the Use Your Stuff Enamel Dots challenge.

Since I still had enamel dots and plenty of paper, I decided to create a couple more cards.  Once I cut a sheet of paper, I like to use as much of it as possible to limit scraps as they accumulate quickly and end up just sitting in the scrap box unused.  For the challenge card I had cut the 12×12 inch sheet of snowman printed paper into a 12 x 5 3/8 inch strip so I still had enough of the strip to make 2 more cards.

I used sketch #165 from My Favorite Things for the next card.  I used some coordinating snowflake paper for the circle, added a strip of silver glitter washi tape and die cut a snowflake using the Cricut Accent Essentials cartridge.  In keeping with the challenge, I added a couple enamel dots to the snowflake paper and also the center of the die cut snowflake.

This card is based on sketch #157 from My Favorite Things.   To “soften” the sketch, I rounded all of the corners.  I used the snowflake paper for the background and added a small strip from the snowman paper.  The sentiment is stamped in VersaFine Onxy Black ink using the “Happy Holidays!” stamp from the Fiskars Merry and Bright stamp set.

I still have half a sheet of both the snowman and the snowflake paper.  Since I want to avoid partial snowmen, some of the smaller scraps are no longer useable.

Challenge – Yellow Photo

Challenge – Yellow Photo

I saw this challenge on the Addicted to Stamps and More blog and immediately thought of the lemon printed paper I have.

The printed papers and stamp are from the Recollections Coastal Village collection.  The yellow cardstock is from a Craft Smith yellow and orange 12×12 paper pad.  All of the layers are matted with Recollections black cardstock.  The sentiment is stamped with Memento Tuxedo Black ink.  As there is a little gold embossing on the lemon paper, I added a few gold sequins for a bit more shine.

Challenge – Fall/Autumn Mood

Challenge – Fall/Autumn Mood

I created this card for the Use Your Stuff fall/autumn mood challenge.

In the spirit of using my stuff, I pulled out some printed paper that has been in my stash for years.  I know it’s from Creative Memories, but have no idea when I got it.  I added some gold washi tape to the edges of the paper.  The “Fall” sentiment is from the Scrappy Cat Fall Icon set and is stamped with VersaMark ink and then heat embossed with gold embossing powder.  To finish it, I added a couple gold sequins.

Autumn Cards

Autumn Cards

Autumn is my favorite time of the year.  I love all the colors and the cooler temperatures.

A few weeks ago I picked up a package of Bo Bunny autumn theme paper at a Tuesday Morning store.  The package included 25 sheets of 12×12 paper all the same pattern.  I wouldn’t normally purchase that much of the same paper, but…  As I’ll be donating most of the cards I make with this paper, having multiple cards using the same paper and layouts is not a problem.

With so much of the same paper, I looked for card sketches that use large pieces of paper for the focal point.

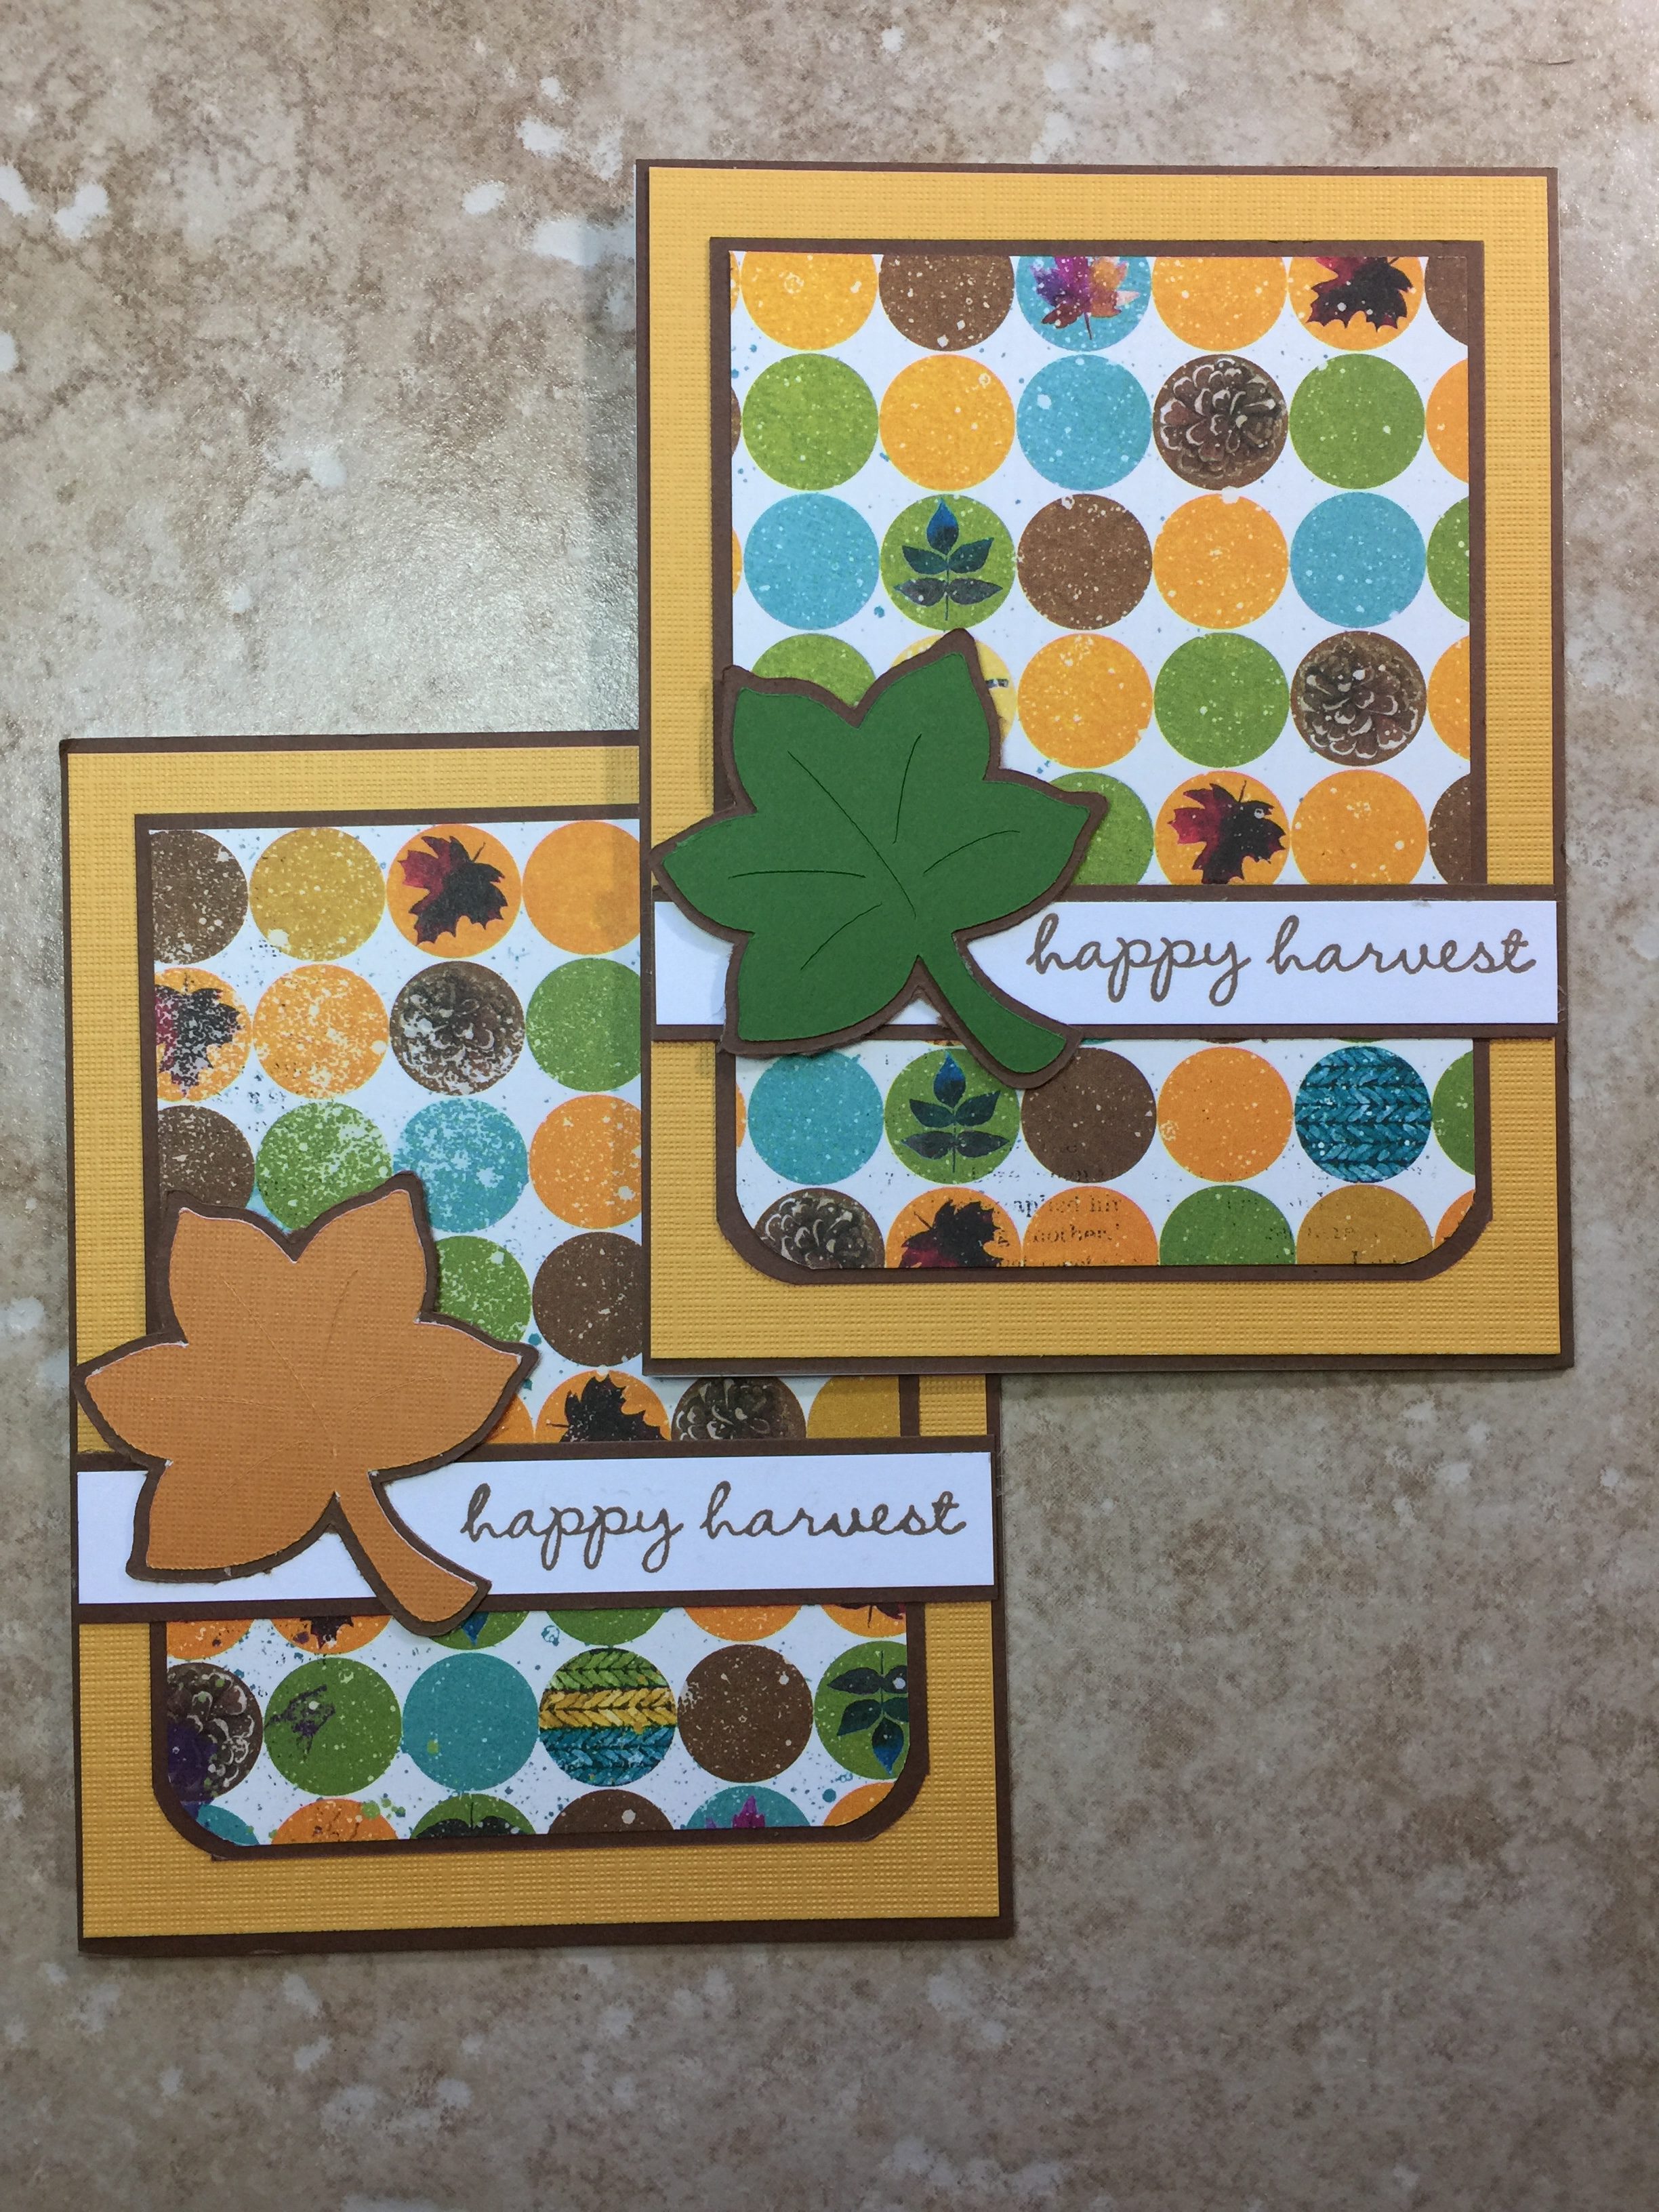
I used My Favorite Things card sketch #183 for the first card layout.  I modified the sketch a bit, changing the position of the embellishment and the length of the sentiment strip.  The embellishment is a leaf cut using a Cricut cartridge.  The cardstock used for the leaves is scrap pieces from past projects.

Supplies include:

  • Cricut Speaking of Fall cartridge
  • Studio G “Happy Harvest” stamp
  • Corner rounder

For the second layout I used TSC222 card sketch #1.   This sketch also uses a larger piece of the pattern paper.  I could also make use some of the scraps of the yellow cardstock from the previous card.  Although the sketch doesn’t include it, I added a piece of ribbon between the cardstock and pattern paper.  The ribbon is scraps from my stash – some dark brown, a leaf print, and a green and yellow stripe.  I’m not sure of the brand of ribbon as I toss scrap pieces into a box and pull them out when just a small piece is needed.  The acorns are colored using colored pencil.

Supplies include:

  • Cricut George and Basic Shapes cartridge
  • Studio G “Happy Harvest” stamp
  • Scrappy Cat Fall Icons “Acorn” stamp
  • Ribbon
  • Scor-tape
  • Colored pencils

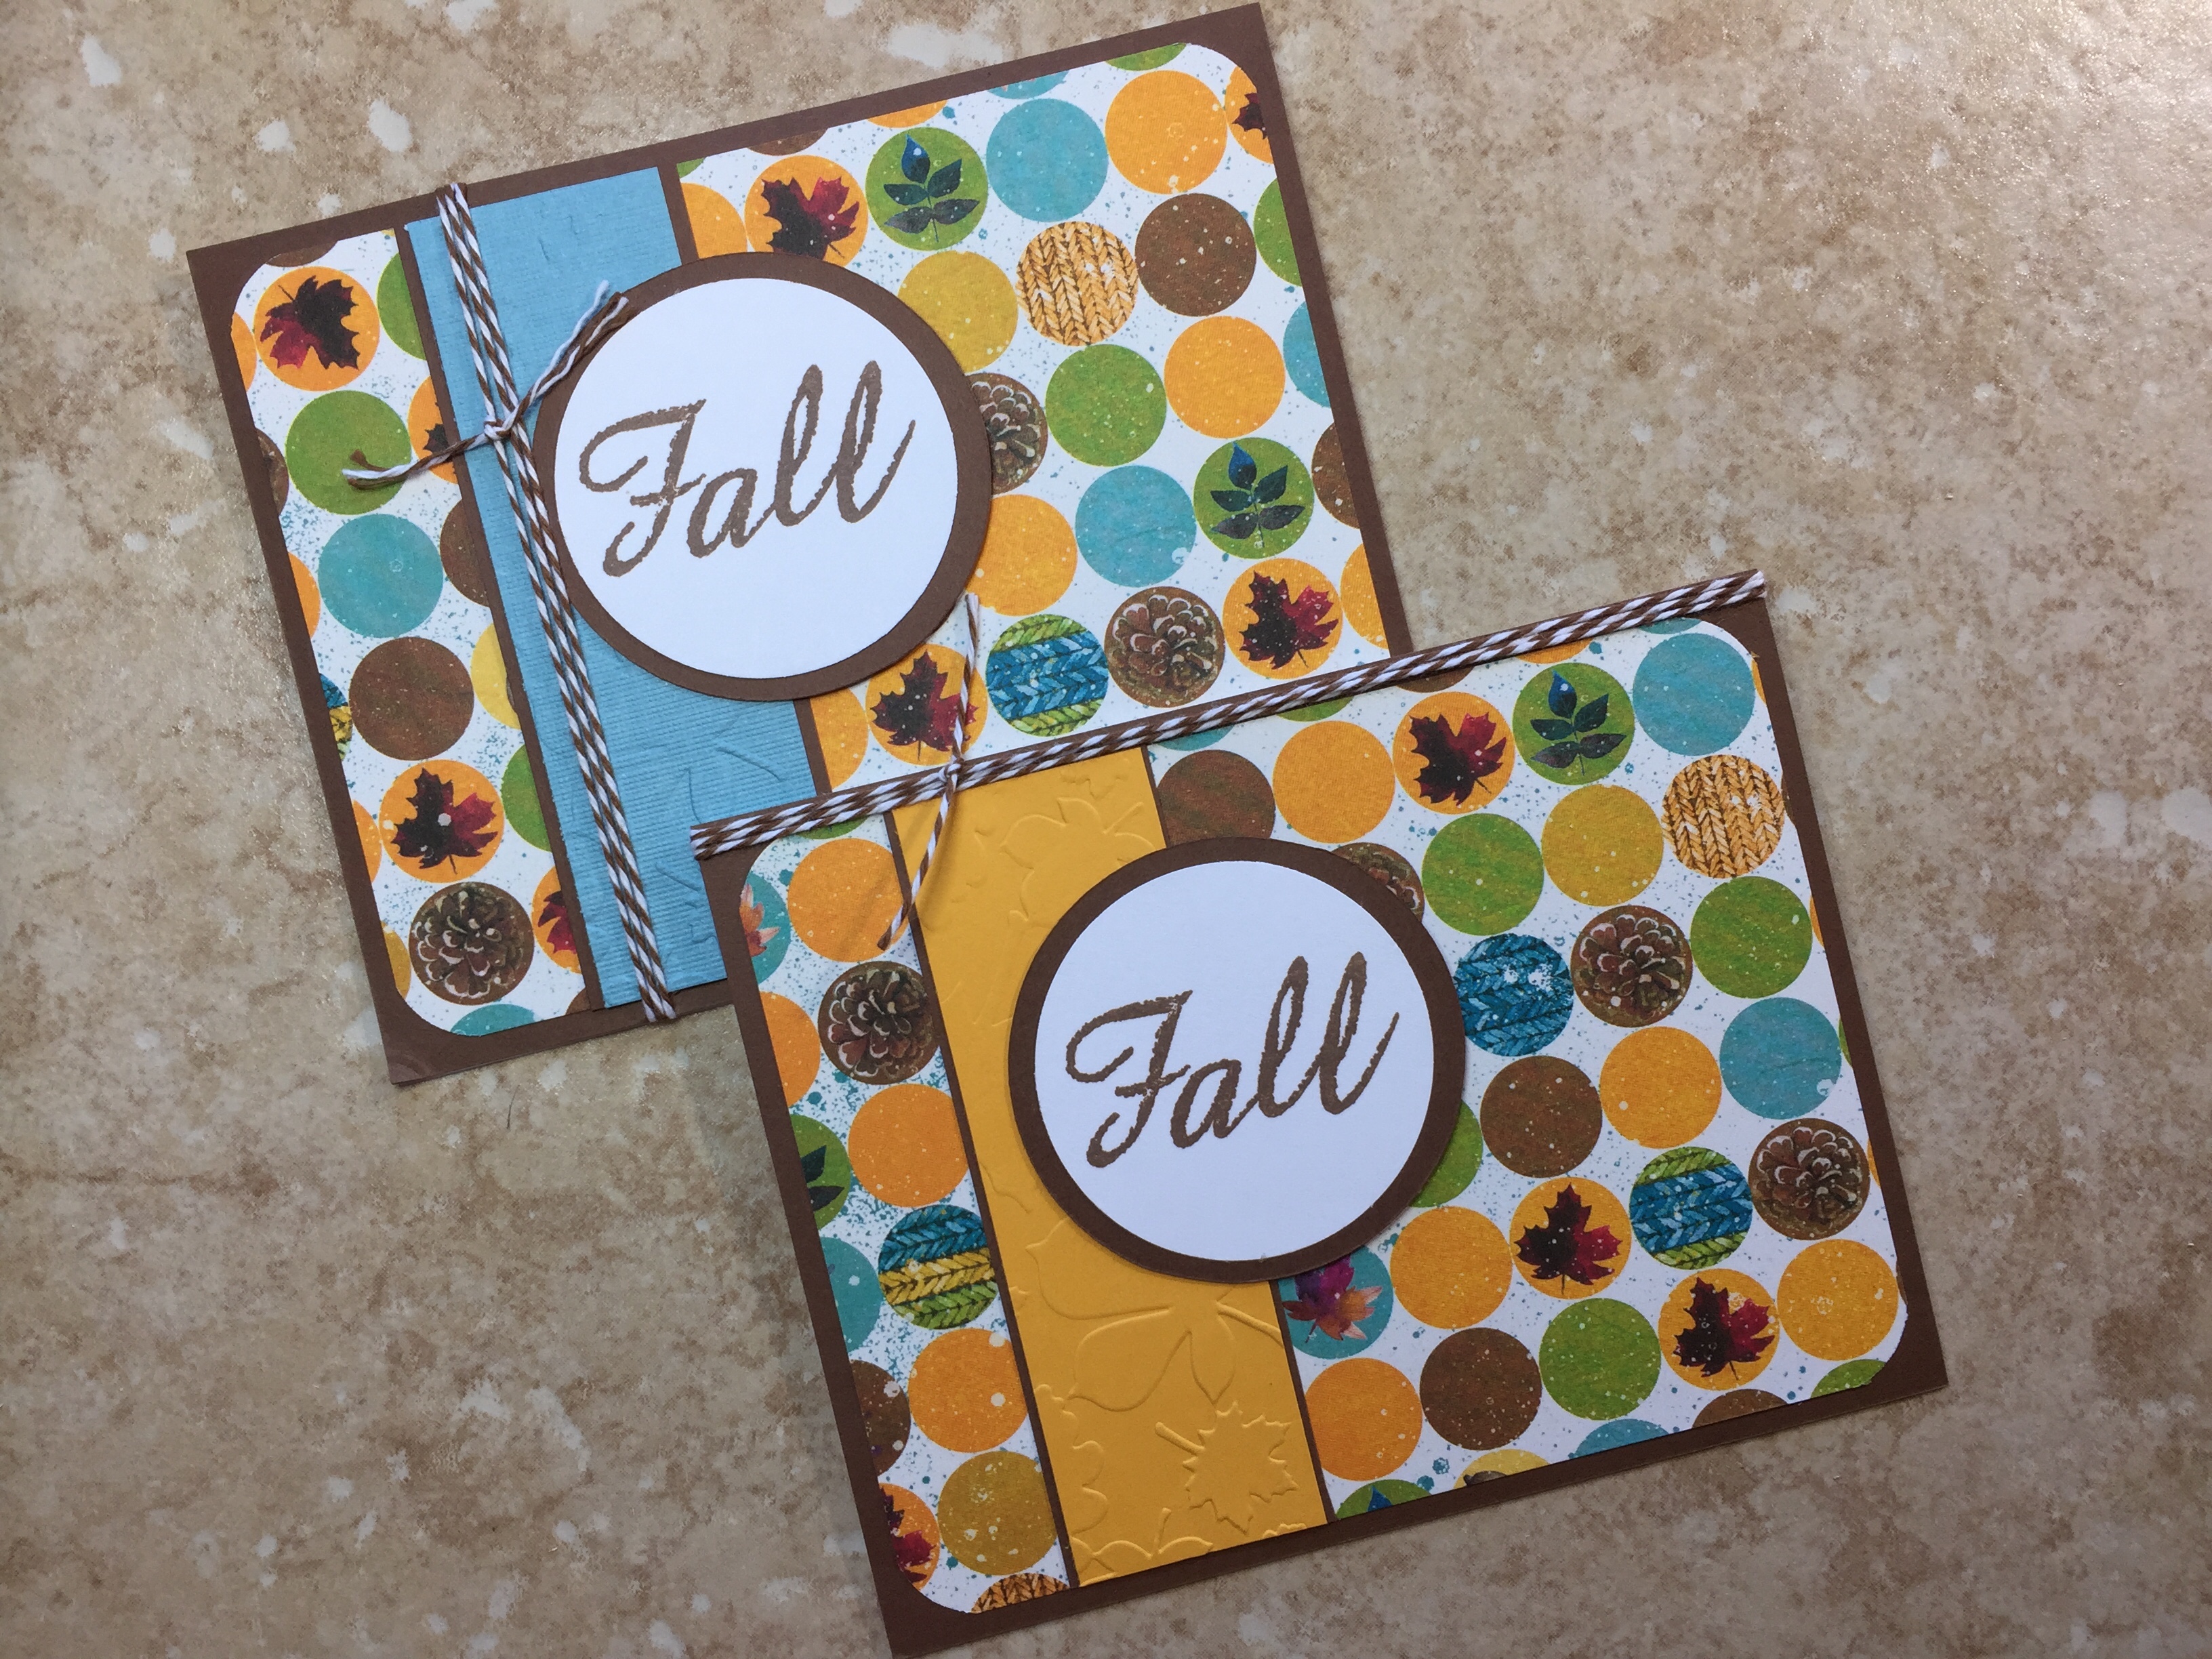
For the third layout I used My Favorite Things card sketch #346.   I used a 4 x 5 1/4 inch piece of the Bo Bunny pattern paper and rounded the corners to match the sketch.  The vertical strip is cardstock from past projects that I embossed using a leaf embossing folder.  Once assembled, I thought the card needed “something”.  For some of the cards I wrapped bakers twine around the fold of the card and for others I wrapped the twine around the vertical strip.

Supplies include:

  • Cricut George and Basic Shapes cartridge
  • Scrappy Cat Fall Icons “Fall” stamp
  • Recollections brown and white baker’s twine
  • QuicKutz Leaves embossing folder
  • Corner rounder

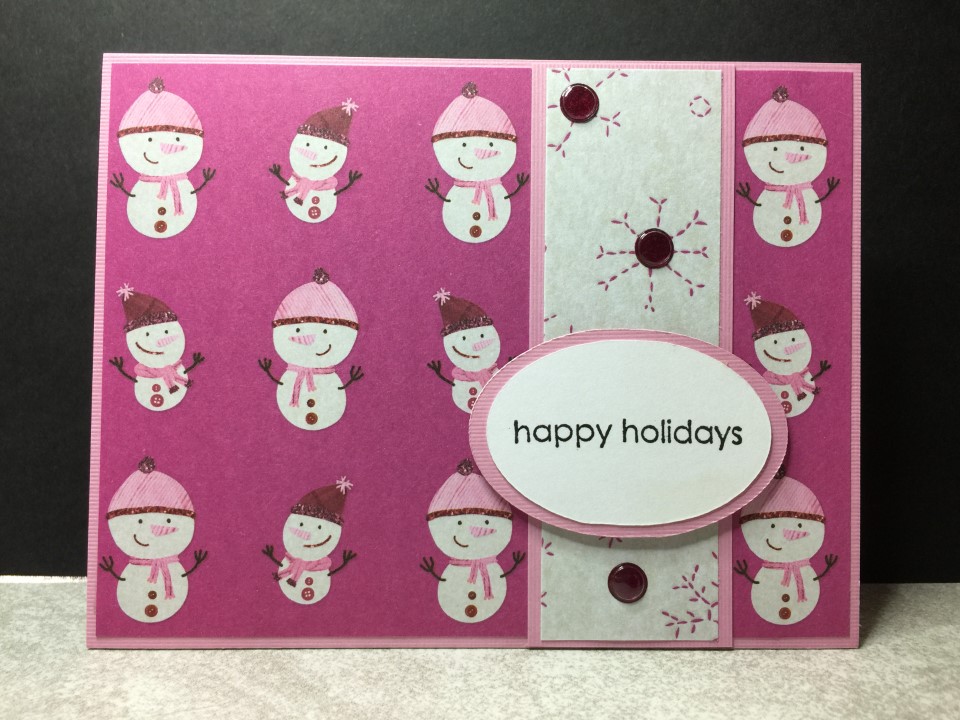
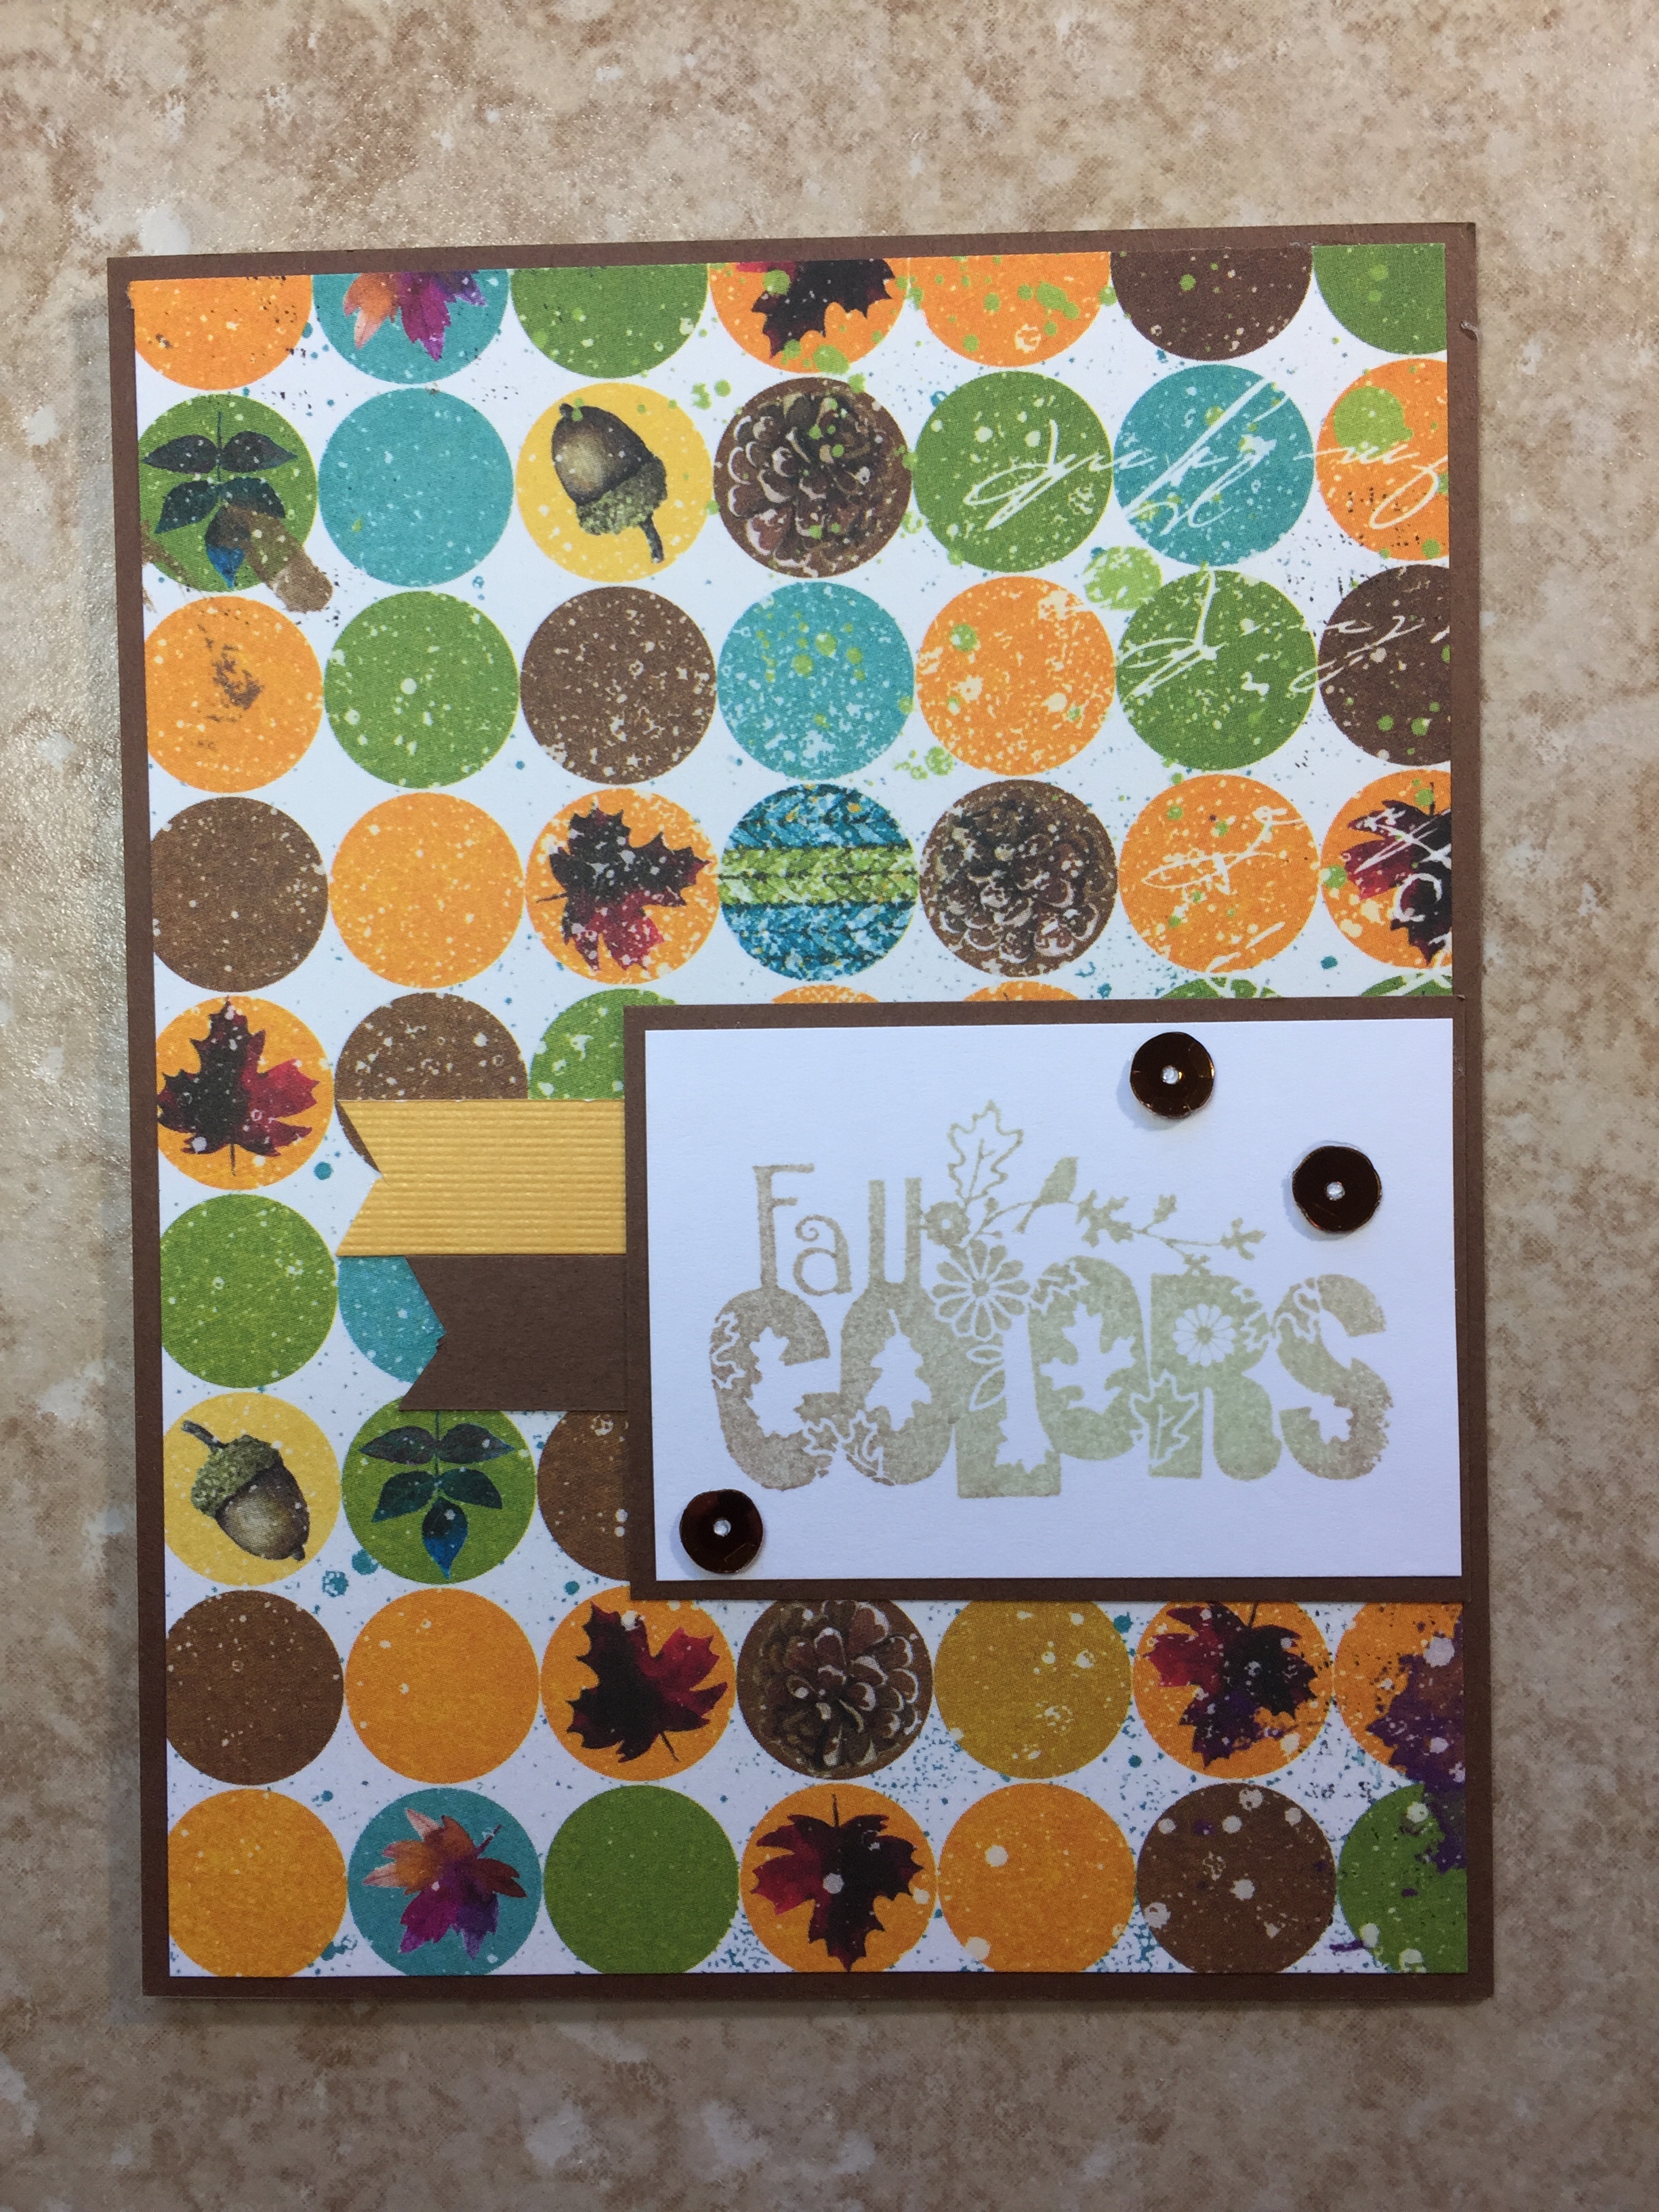
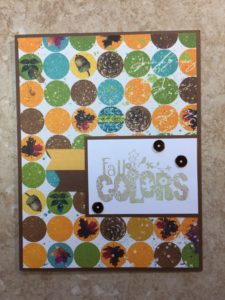
For layout #4, I used Freshly Made Sketches sketch #274.  I used a 4 1/8 x 5 3/8 inch piece of the Bo Bunny pattern paper.  The small banners are cardstock from past projects.  For a little sparkle I added a few sequins around the sentiment.  

Supplies include:

  • Inkadinkado Harvest Expressions “Fall Colors” stamp
  • Sequins

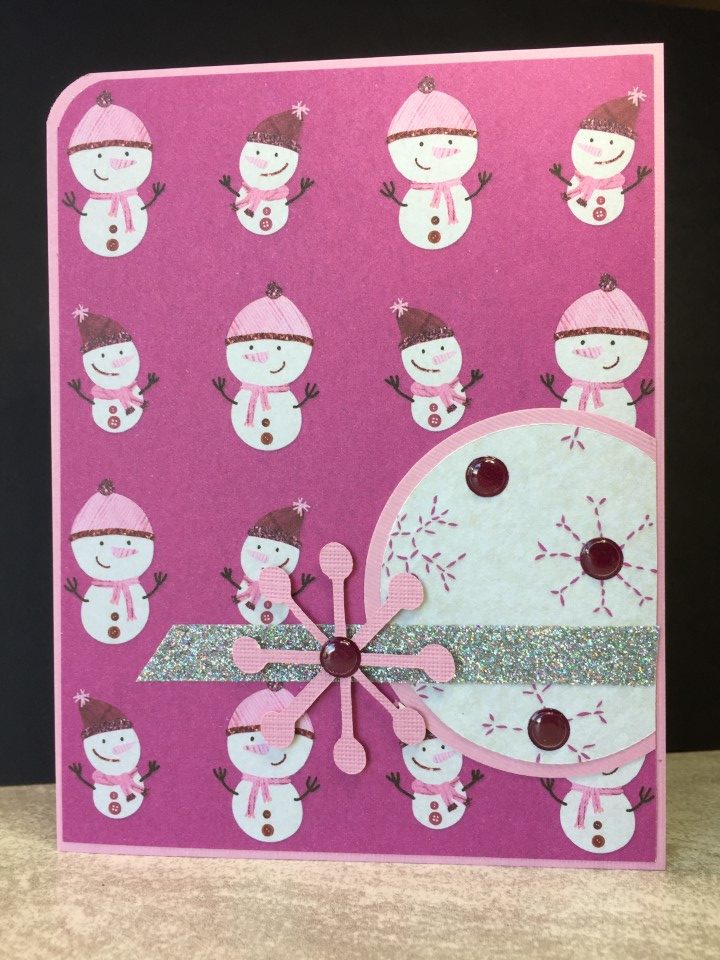
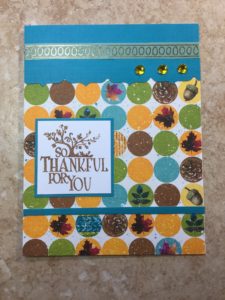
For layout #5, I used an older Mojo Monday card sketch.  I was getting a bit bored using the same paper, so decided to check my stash for some different supplies.  I found the teal cardstock and washi tape which I thought were good matches for the colors in the pattern paper.  To bring some of the teal color down on the card, I added the thin strip of cardstock at the bottom.  For some sparkle, I added 3 rhinestones to the top of the card.

Supplies include:

  • Inkadinkado Harvest Expressions “So Thankful for You” stamp
  • Fiskars Parentheses Border punch
  • Gold rhinestones
  • Recollections Washi tape

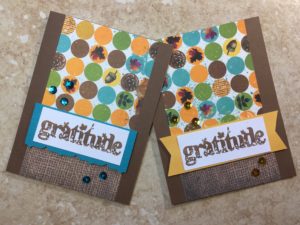
The last layout is based on Operation Write Home card sketch # 120.  I had a few scraps of the pattern paper that were the exact size (3 1/4 x 4 inches) shown in the sketch.  I used some burlap pattern paper for an additional print and threw on a few sequins for color.

Supplies include:

  • Inkadinkado Harvest Expressions “Gratitude” stamp
  • Sequins

Supplies and tools used on all cards include:

  • Bo Bunny Dreams of Autumn Sweater Weather paper
  • Recollections brown cardstock
  • White 110lb paper
  • Tsukineko VersaFine Vintage Sepia ink
  • Scotch Advanced Tape Glider (ATG)
  • Tonic Studios Tim Holtz 12.25 inch guillotine trimmer
  • Misti Precision Stamping tool

So far I’ve made 30 cards using the Bo Bunny paper.  I still have 20 full 12×12 sheets and several smaller pieces left.  I’ll probably make a few more cards if I find sketches that looks interesting.  If not, I’ll keep a few sheets of the paper for my stash and donate the rest.

Challenge – Enamel Dots

Challenge – Enamel Dots

This week I found the Use Your Stuff blog.  It seemed like a match since I end up with more stuff than I can possibly use.  This weeks challenge was to use enamel dots.  Here’s what I came up with.

The dots are from a package of multi-colored sparkly enamel dots.  I was able to use most of the enamel dots but was having trouble with the purple-ish dots.  The color is not a true purple, but somewhere between a purple and a dark pink.  I went through my paper collection and found some older Christmas paper from the Recollections Jingle Jolly collection.  The dots matched the hats on the little snowmen.  I used another piece of paper from the same collection for the vertical strip and added the dots to the centers of the snowflakes.

Challenge – Monochrome

Challenge – Monochrome

This week I decided to try the Always Fun Challenges “Monochrome” card challenge.

I really like the clean look of black and white cards and as Christmas is coming…  I decided to do a black and white Christmas card.

I’ve had the snowman stamp in my collection for several years and it is one of my favorites.  I think it looks great “plain” or also colored using Copic markers or colored pencils, depending on the look I’m going for.  The cardstock (black and white) and polka dot paper are from Recollections.  The swirl pattern paper is from The Paper Studio – B&W Intricate Swirls.  I used VersaMark watermark ink and white embossing powder to emboss the snowflake and sentiment which are from the Fiskars Merry and Bright stamp set.  I matted all the layers and finished by popping up the snowflake and sentiment using foam tape.

Challenge – Thank You and Pink/Grey

Challenge – Thank You and Pink/Grey

I had a lot of fun working on the last card challenge, so I thought I’d try a couple more.

The CAS on Friday challenge is to create a Thank You card and the CAS-ual Fridays challenge is to create a pink and grey card.  Since they are both “clean and simple” challenges, I thought I’d combine them.

Here is the card I created.

I used the Spellbinders Wagonwheel Kaleidoscope die to cut the bright pink paper and glued this to the card front.  I stamped “Thanks” in Tsukineko VersaFine Smokey Gray ink and then embossed it with clear embossing powder.  To add a bit more gray to the card, I cut a thin strip of gray cardstock and glued it to the left and right of the sentiment.

Challenge – Something Spooky

Challenge – Something Spooky

Now that I have a blog…

I thought I’d try a card challenge.  One of the card makers I follow on YouTube is a regular participant at Cards in Envy.  So, I thought I would check out their October challenge.  The challenge is to create a Halloween card with the theme “Something Spooky”.  As I had just finished making Halloween cards, I decided to submit a couple of those.

Both cards are based on Operation Write Home card sketches.  Neither card is very complicated, but both allowed me to make use of the paper cut-aparts.  I was also able to use some stamps that I hadn’t used before.

I liked the challenge since it gives me a theme/topic to focus on but doesn’t limit me to using specific products or brands.  I’ll be doing some searching for other card challenges to try.

Halloween Cards – Part 2

Halloween Cards – Part 2

As there are still several cut-aparts and plenty of paper left, I decided to make a few more Halloween cards.  I also used a few more Operation Write Home card sketches.

For the first card I used OWH sketch #20.  As most of the paper in the collection is a very busy print, I went through my paper stash to find a few sheets of solid color cardstock.  I think the orange cardstock, which has a pearl finish, tones down the busyness of the background paper and picks up on the orange in the sentiment cut-apart.  To finish the card, I added a few orange rhinestones in various sizes for a bit more color and sparkle.  I choose a very simple layout which I think offsets the busyness of the paper.

Supplies:

  • American Crafts Pearl Specialty paper
  • Recollections orange rhinestones

The second card is based on OWH sketch #61.  The small “Happy Halloween” cut-apart was just the right size for the sketch.  Since only the edges of the background paper would show, I was able to use more of the pattern paper without it being overwhelming.  For the matted layer in the center, I used some scraps of the bat paper left over from another card.  I added a strip of gold washi tape between the bat paper and the sentiment for some separation and a bit of shine.  The card was still a little “flat”, so I die cut a few small bats using the Cricut Wildcard cartridge.  I covered the bats with Glossy Accents and adhered them to the card with glue dots.

Supplies:

  • Cricut Wildcard cartridge
  • Recollections 3/8 inch gold washi tape
  • Ranger Glossy Accents
  • glue dots

For the third card I used OWH sketch #123.  Other than the size of the sentiment, the pieces are very close to the measurements provided with the card sketch.  The sentiment is part of a strip of sentiments included in the paper collection.  I simply cut the 12×12 sheet into strips and selected the individual sentiments I wanted to use.  The orange paper is some more of the pearl finish cardstock.  The final “touch” was to heat emboss a silver spider on the black banner.  I used an anti-static embossing bag to help ensure the powder only stuck to the stamped image.

Supplies:

  • American Crafts Pearl Specialty paper
  • Fiskars Creepy Crawlies spider stamp
  • Tsukineko Versamark Watermark ink
  • silver embossing powder

Tools and supplies used for all of the cards includes:

  • Recollections “Dead & Breakfast” printed paper
  • Recollections black cardstock
  • Recollections white cardstock
  • Scotch Advanced Tape Glider (ATG)
  • Tonic Studios Tim Holtz 12.25 inch guillotine trimmer
  • Cricut Expression Diecutting machine
  • white 110lb paper (for card base)

While I liked the individual papers in the collection, I found creating cards a bit challenging.  This was a 12×12 paper pad, so some of the prints were larger scale.  Also, the collection included many busy prints but no tone-on-tone papers.  It was difficult to combine multiple papers on a single card.  I do think the paper would be great to use for scrapbooking where pictures and larger scale embellishments would offset the busyness of the paper.

There is still plenty of paper left to make more cards.  However, as I don’t send very many Halloween cards, I have enough for this year and am moving on to autumn and Thanksgiving themed cards.

Halloween Cards

Halloween Cards

For my first “new” cards, I decided to do some Halloween cards based on a few Operation Write Home card sketches.  The OWH sketches include measurements, which I modified to accommodate the size of the cut-aparts in the Recollections Dead & Breakfast paper collection.  The cards are all A2 size – 4 1/4 by 5 1/2 inches.

For the first card I used OWH sketch #218.  I thought the haunted house cut-apart was perfect for this sketch.  It also gave me a chance to use the “Haunted House” stamp which has been in my collection for quite some time.  This is one of the numerous stamps that I had a great idea for at the store, but couldn’t quite make it work once I got home.  The key strip of paper is part of a 12×12 sheet made up of different stripes of pattern paper.  I was able to use these stripes in several cards.  To finish the card I added 3 gold brads to coordinate with the gold foil accents on the door, windows and moon on the cut-apart.

Supplies:

  • Studio G “Haunted House” stamp
  • gold brads

For the second card I used OWH sketch #165.  The strip of smiling pumpkins is another stripe from the 12×12 sheet.  I used a border punch to create a matted layer for the pumpkins which added some separation from the orange background paper.  I created a small tag (7/8 x 1 3/4 inches) for the sentiment and used a Crop-a-dile to set the black eyelet.  I wrapped the bakers twine around the card several times, added the tag and then tied the twine.  To ensure the sentiment is always visible, I added some tape to the back of the tag to hold it in place.

Supplies:

  • Fiskars “Trick or Treat” stamp
  • Recollections bakers twine
  • Fiskars Border punch – Bracket
  • We are Memory Keepers Crop-a-dile hole punch and eyelet setter

For the third card, I choose OWH sketch #158.  I wanted to use the “creepy” cut-apart but couldn’t find a background paper I liked.  I settled on the white and black spiderweb paper but thought it seemed too stark.  I used a sponge dauber intending to just ink up the edges of the paper, but once I started I liked the look and decided to ink the entire piece.  I think it gives the card a more “Halloween” feel.   I stamped and fussy cut a couple spiders which I popped up on the card using foam tape.  I kept the layout simple as the paper is very busy.

Supplies:

  • Archiver’s Stamp Duo for larger spider stamp
  • Studio G for the small spider stamp
  • Scotch double sided foam tape

Tools and supplies used for all cards include:

  • Recollections “Dead & Breakfast” printed paper
  • Recollections black cardstock
  • Recollections white cardstock
  • Tsukineko VersaFine Onyx Black ink
  • Scotch Advanced Tape Glider (ATG)
  • Tonic Studios Tim Holtz 12.25 inch guillotine trimmer
  • white 110lb paper

There is still a lot of paper left from this 12×12 paper pad, so I’ll probably make a few more cards.