Echo Park Fine and Dandy Collection Kit
After all the oranges and browns in the last batch of cards I decided to do something bright and cheerful. The colors and images in the Fine and Dandy collection were perfect. The kit included 12 12×12 sheets of paper and 2 sheets of stickers. I’ll probably not use the sheet of alphabet stickers but I did use quite a few of the image stickers. I made over 30 cards and still didn’t use up all of the paper. I ended up putting the remaining sheets and leftover scraps back into the packaging and will pull it out later when I’m looking for a small project.
For the first set of cards I used the bumble bee paper. I knew it would be perfect with the “be Happy” stamp. Using colored pencils I colored the stamped image to match the paper. As a final touch I used a Wink of Stella pen to highlight all of the bumble bee wings.
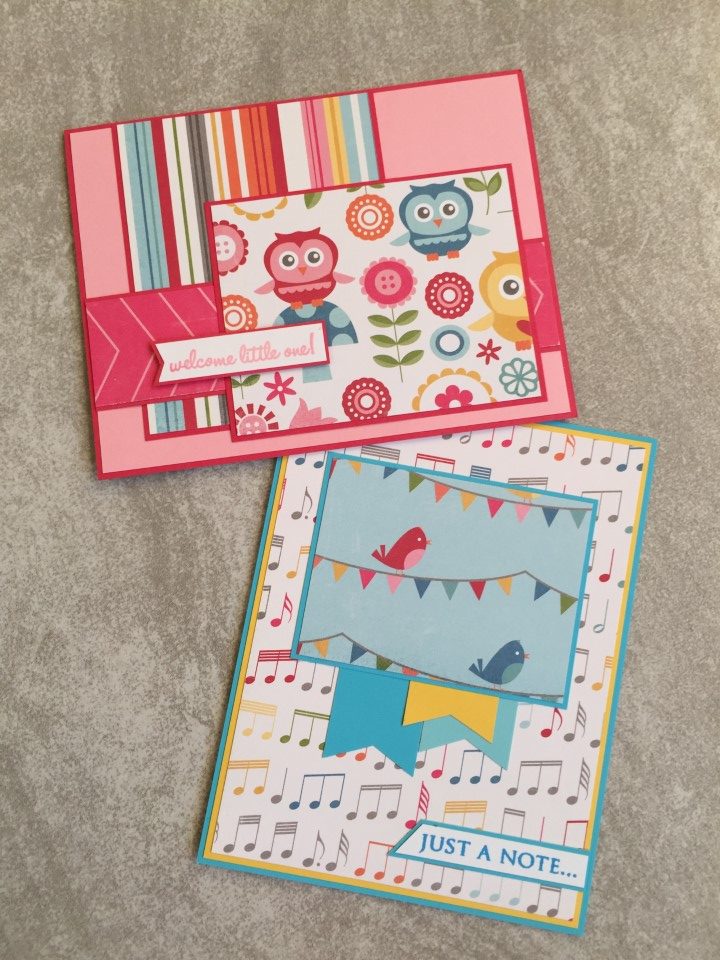
One of my favorite prints were the owls which I thought were very cute. The background is a bright pink chevron print. For the strip across the card I used a few different colors of cardstock which I edged with Love from Lizi clear iridescent glitter peel-offs. To keep the cards usable for multiple occasions, I used several of the coordinating image stickers instead of a sentiment.

When I saw the birds perched on bunting paper, I immediately pulled out the “a little birdie told me…” sentiment stamp. I only use the stamp when I have paper with birds on it, so not very often. To mimic the draped shape of the bunting I used a die to create a scalloped edge on the paper. To keep the card nice and bright I used a striped paper for the bottom of the card. To ensure the sentiment didn’t blend it too much, I matted it in bright pink cardstock and popped it up with foam tape. For a little sparkle I added a few Queen and Company goosebumps.
The red and white gingham print was quite bold so I wanted to pair it with a more toned down print. With a white background the less busy floral paper was a nice match. Placing the sentiment panels, some coordinating stickers and others stamped, on the lower portion of the card also helped tone down the gingham print.

I wasn’t a fan of the yellow paper. I’m not sure if it was the pattern or the color but since the print on the opposite side was too large for cards… I decided to use the yellow paper as a background and paired it with more of the floral print. A blue scalloped border was added to one side of the floral panel for some contrast and Love from Lizi gold holographic peel-offs were added to the other.
One of the last papers I used was the mason jar print. By this point I had used up most of the papers that I thought would work for a background. So instead of putting the paper aside I decided to try some white shimmer paper as the background. Adding a scalloped cardstock strip and bright yellow ribbon across the card added some more color and broke up the solid background. A small “miss you” sentiment popped up on the bottom of focal panel finished the card.

Although it’s not a “baby” themed paper, I thought the owl print would make a nice baby card. Paired with a light pink background, bright stripes and a leftover strip of pink chevron paper made for a bright happy baby girl card. While I didn’t think about it at the time, fish-tailing the sentiment strip matched the chevrons on the bright pink strip across the card.
Another nice paper/sentiment combination was the music note paper and the “Just a Note”… stamp. I cut the music note paper to 4 x 5 1/4 inches, which allowed me to get 6 background panels from 1 12×12 sheet of paper. Instead of a single matted layer I double matted the background first with yellow and then blue cardstock. For the focal panel I used the rest of the bird/bunting paper. The flags under the focal panel were cut from the cardstock scraps from earlier cards.
For my last 2 projects, a 6×6 paper pad and a collection kit, I was able to make a lot of cards. However, towards the end of each project I was getting a bit bored. My next project was something smaller with motivation provided by a cardmaking video I saw online.