Browsed by
Month: March 2021

My New Adventure

My New Adventure

I don’t have any new cards to post this week since I’ve been getting ready for my new adventure.

I’ve thought about trying to sell some of my handmade cards but wasn’t sure how I wanted to go about it.  I had tried a craft show several years ago and although I made some sales and have a couple repeat customers, craft shows are just not my thing.  I know a lot of people sell cards online but the packaging and shipping doesn’t really appeal to me.  This narrows down my options to selling at a local shop.

After a recent visit to the Touch of Country Mall in Howell, Michigan, I decided to rent a small booth.  The store is really cute and has a great mix of antiques, collectibles and handcrafted items.  Also, everyone that I’ve met there has been very friendly and helpful.

As this is a first attempt, I didn’t want to over do it and decided to start by renting some wall space.  Then it was just figuring out a way to display the cards.  I wanted it to be easy for customers to see what is available and to remove a card from the display.  I had recently added some chicken wire to an old window frame as home decor and thought something like this could work for my booth.  I didn’t have a large enough window on hand so my husband built a large frame, which we stained and then added chicken wire.  I can easily attach the cards using small clothespins and customers can just unclip the card they would like to purchase.

To fill in the empty space next to the frame, I decided to add a “featured” cards section showcasing a specific holiday or sentiment.  Since the theme would change every few weeks, the display needed to be somewhat generic.  Some burlap ribbon and a chalkboard work for now.  I can clip cards to the ribbon and easily change the message and colors on the chalkboard to match the theme.

Here is a picture of my booth.  I think it fits well with the look and feel of the store.  I’m sure it will evolve as I figure out what works best but I think this was a good start.

I’ll still be donating cards to the Cards for Soldiers Program but this will be something new and fun to try.

Craft Smith Palm Springs 12×12 Paper Pad

Craft Smith Palm Springs 12×12 Paper Pad

If you’re like me you can’t pass up a cute paper pad.  That’s how I ended up with the Craft Smith Palm Springs paper pad.  The colors are gorgeous, the prints are fun and it was on sale.  My inability to pass up cute and sale, was even worse with this paper pad since there was also a coordinating tube of washi tape.

Unfortunately not passing on cute paper pads mean I have more paper than time to use it.  In an effort to thin down my printed paper stash, I’m pulling out older paper pads that I haven’t gotten around to using or have only used a couple of sheets.  I plan to make a few sets of cards from each paper pad and whatever I can’t/don’t use I’ll be adding to the “for sale” stack.

As I was gathering supplies to get started I ran across my container of brads, not to be confused with a package of brads.  This container holds 20+ packages of brads with 80-100 brads per package.  Yes, there was a sale incident where each package was only 25 cents.  How could I pass that up?

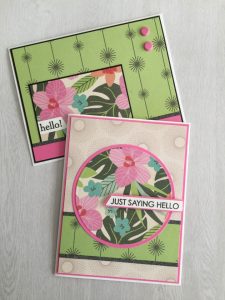
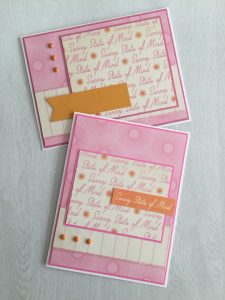
So with an abundance of paper, washi tape and brads, I got started on my first set of cards.  I made at least 3 cards with each paper/layout combination.  The first set of cards used one of my favorite sketches, #218 from OWH.  I liked the paper combo so much I decided to make another set of cards using the same paper but switching to OWH sketch #227.  The orange “Sunny State of Mind” sentiment is some of the coordinating washi tape that I placed on white paper and then cut to size.

OWH sketch #218 worked so well that I decided to just switch up the colors of the background, matting and brads and make another set of cards.  This time using the washi tape for the small banner.  After making a set of 3 cards I ran out of the “Sunny State of Mind” paper but since there was still enough of the orange background paper for a more cards I pulled out a floral print and kept going with the same sketch.  I decided to skip the brads on this set of cards since the floral focal panel is quite busy.

There was now a partial sheet of the floral paper so I thumbed through the paper pad and found the green starburst print to pair it with.  This set of cards uses new-to-me sketch #259 from OWH.  For a punch of color I used bright pink cardstock for the strip across the bottom of the card and the brads in the upper right corner.  There was still some of the floral print paper left.  So for the next set of cards I paired it with an off-white print and the leftover strip of green starburst paper.  I used another OWH sketch also labeled #227.

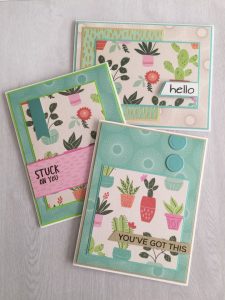
For the last 3 sets of cards I pulled out a cactus print paper to use for the focal panels.  The first set (OWH sketch #20) uses the rest of the off-white print for the background and a gold foil print paper also from the Palm Springs paper pad.  The last 2 sets of cards (MFT sketches #516 and #503) use a turquoise print paper for the background and feature turquoise satin mirror paper for the banner and circle embellishments.

I ended up making 30 cards using the Palm Springs paper before I got bored.  There are still some papers that I’d like to use, but I did find several sheets that I know I won’t use so I’ve put those aside to sell.

Scrap Cards

Scrap Cards

After struggling with the last batch of cards I decided to work on something really easy.  Scrap cards!

I’ve used this layout several times in the past and it’s great for using up scrap paper.  To get started I quickly sorted through the pattern paper scraps and pulled out the pieces that could work (i.e. were at least 4 inches long and 1 inch wide).  Once I had a pile of “possibles” I started pairing up papers that would work together.  I then flipped through my cardstock scraps for pieces that matched the pattern papers.

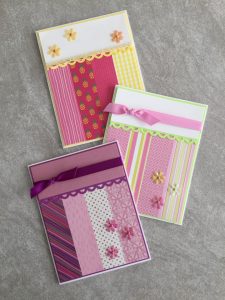
The process for assembling all of the cards was the same.  A coordinating cardstock was selected for the card base and cut to 4 1/8 x 5 3/8 inches.  The pattern paper, trimmed to 1 inch wide and no more than 4 1/2 inches long, were lined up and attached to the bottom of the card base.  Using a few different border punches, strips of the same cardstock were cut and attached to the bottom of the cardstock scraps which were then attached to the top of the card base.  That completed the basic assembly for all of the cards.

I thought the brown and rust colors in the first few sets of scraps would work well for masculine birthday cards.  I stamped the birthday sentiment directly on the cardstock scraps.  To embellish the card I added some bakers twine and coordinating brads.

The next few sets of scraps were bright and cheerful colors.  More bakers twine and ribbon were used.  Mini brads were used to attach the iridescent flower embellishments.

The last few sets of scraps were all blues and greens.  I added a “Thanks” sentiment to one of the cards but left the other 2 blank.  Some more brads and a few paper flowers were used for embellishment.

This was a quick and easy way to make several cards and use up some paper.  I also tried to use a few of the other supplies, ribbon, brads and other flower embellishments, that have been hanging around in my craft room for way too long.