Browsed by
Month: December 2023

Christmas Cards from 6×6 Paper Pads

Christmas Cards from 6×6 Paper Pads

I was still working on using up some partial paper pads.  These cards feature a mix of papers from several different paper pads – Authentique’s Colorful Christmas, My Mind’s Eye Cozy Christmas and Recollections North Pole News.  There was at least 1 other partial paper pad but I can’t remember the name or manufacturer.  I also added in papers from a couple American Crafts 6×6 paper pads to fill in where needed.

I know the background for this card was from the Authentique paper pad but I’m not sure where the floral paper was from.  As both papers were somewhat busy, I kept the layout simple by cutting the floral paper into a large banner and stamping a bold sentiment in bright green ink.  In an effort to use up older embellishments, I added 3 green brads under the banner.

The background for this card is also from the Authentique paper pad.  As it features non-traditional colors, I wasn’t able to pair it with paper from any of the other partial paper pads.  Instead I added a pink cardstock panel and snowflakes die cut from aqua satin mirror cardstock that matched the colors of the trees in the pattern paper.   A few aqua rhinestones added some more sparkle.

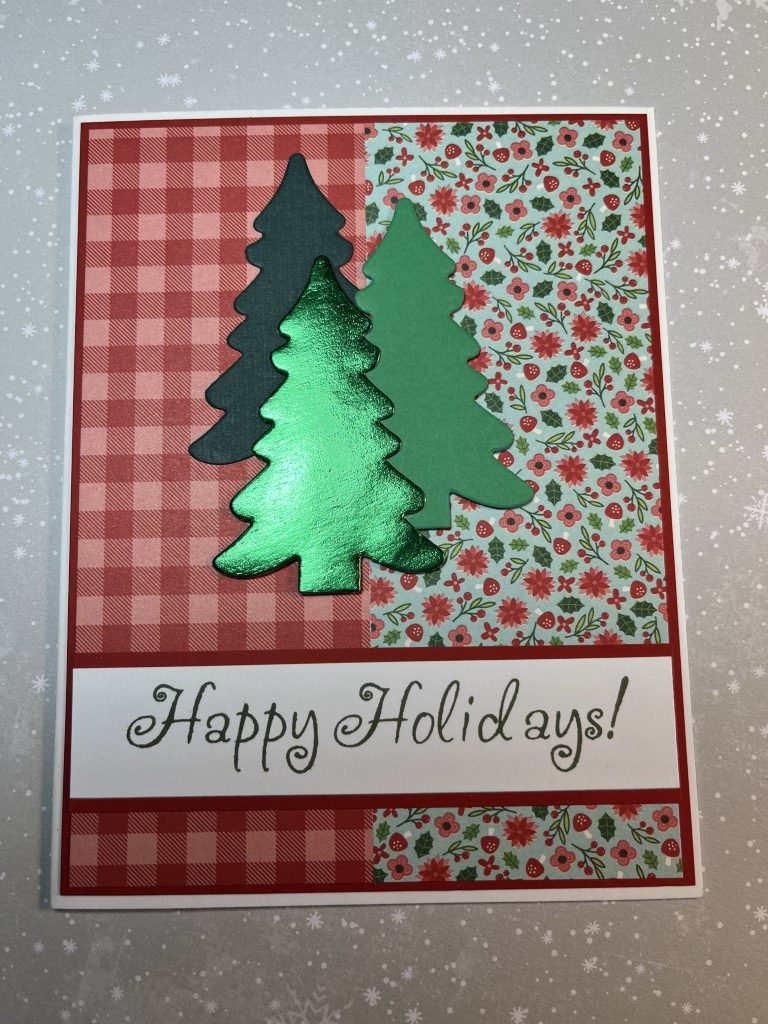
I’m not sure where either of the pattern papers on this card are from.  They may have been from the same paper pad, but if not they matched really well.  To keep the card from being too red, I used green glitter cardstock from an American Crafts paper pad and punched a scalloped border.  To bring in more green, the sentiment is stamped using Momento Pear Tart ink.  I also inked the edges of the sentiment tag instead of matting.

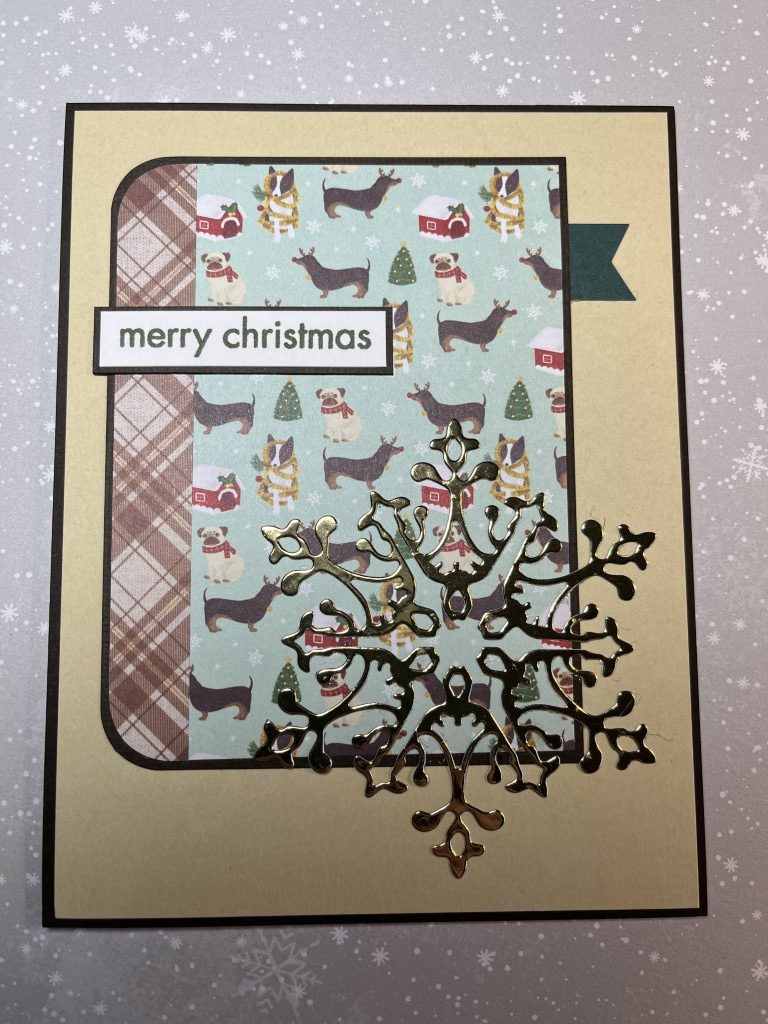
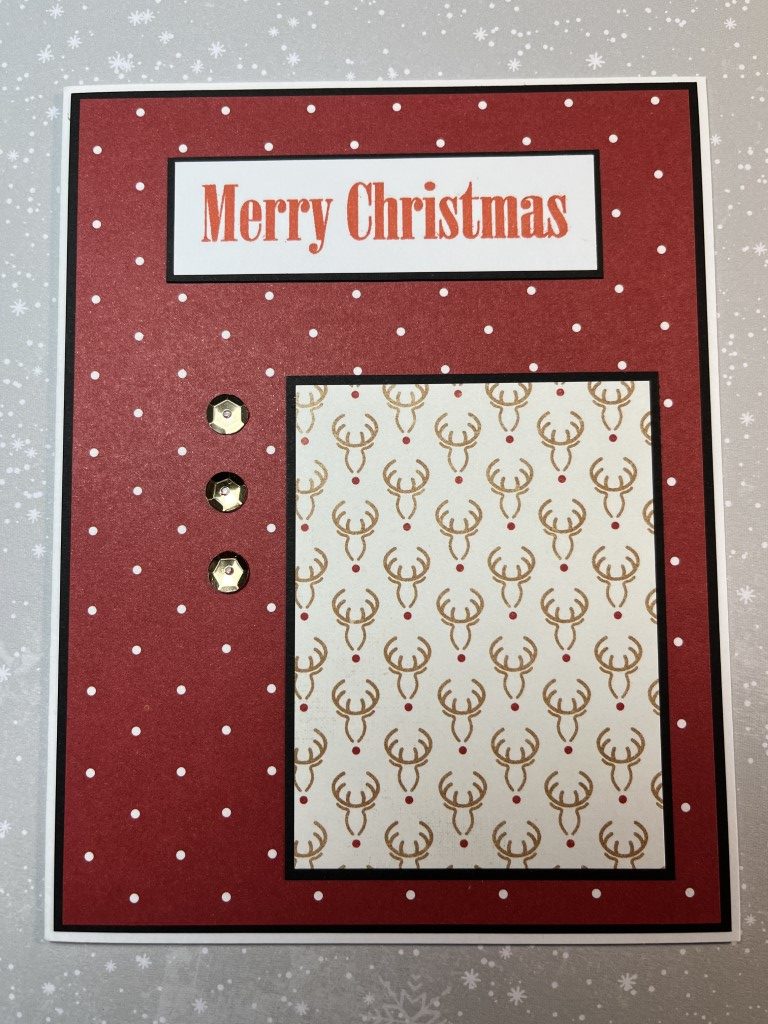
This is actually one of my favorite cards.  I like the clean uncluttered look.  There was only a small piece of the deer print from the Authentique paper pad but I couldn’t throw it away.  I paired it with a polka dot background that may be from an American Crafts paper pad.  A simple sentiment and a few gold sequins finished the card.

I’m not sure where these papers are from, but I belive they were from the same paper pad.  I don’t know why I hadn’t used the red tone-on-tone background paper before as it’s a great color and print.  With all the holiday sentiments on the focal panel, I skipped adding a separate sentiment panel.  A few snowflakes die cut from red mirror cardstock and several tiny red brads completed the card.

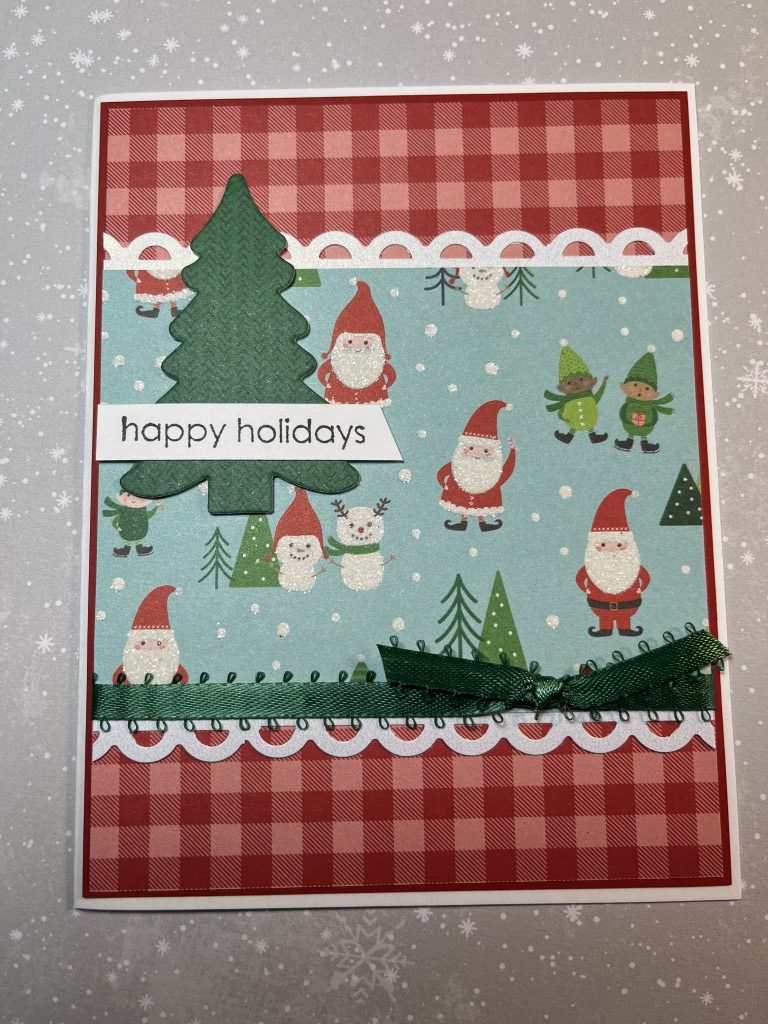
The newsprint paper and the garland border on this card both came from Recollections North Pole News paper pad.  I’m not sure where the plaid paper is from but the colors and faint text in the background were perfect with the newsprint paper.  Still trying to use up older supplies, I pulled out a Tattered Angels Glimmer Mist.  The colors had separated but after some shaking it was fine.  I stamped the sentiment and once dry sprayed the entire tag with glimmer mist.  The red isn’t a perfect match but I think it works.

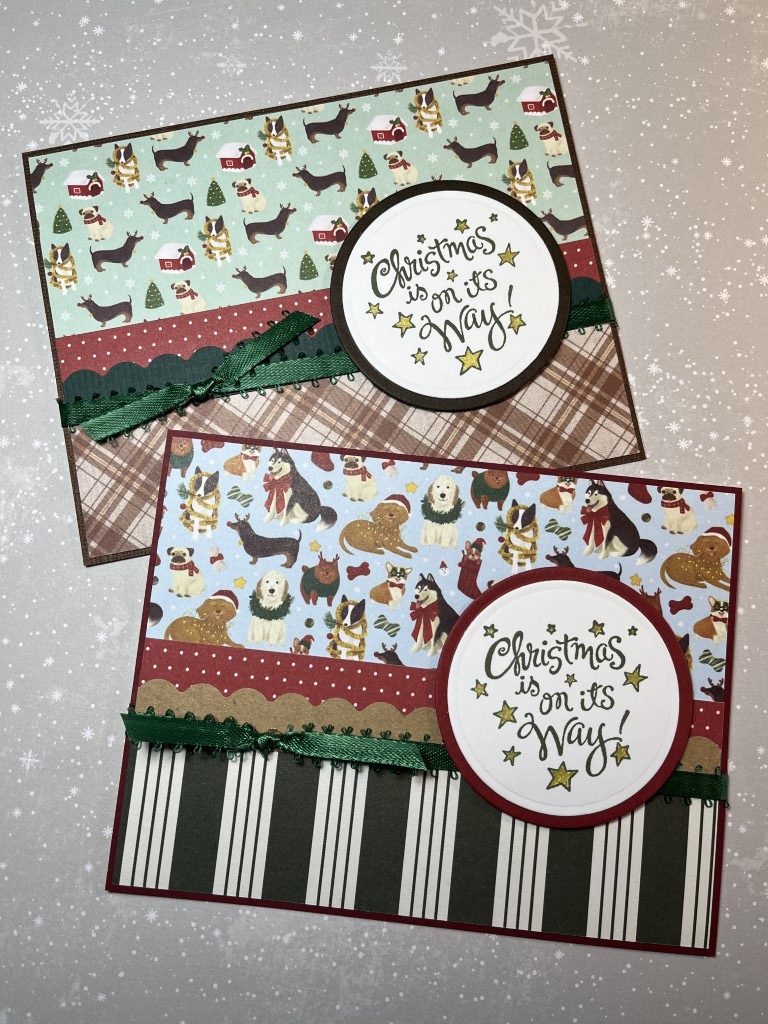
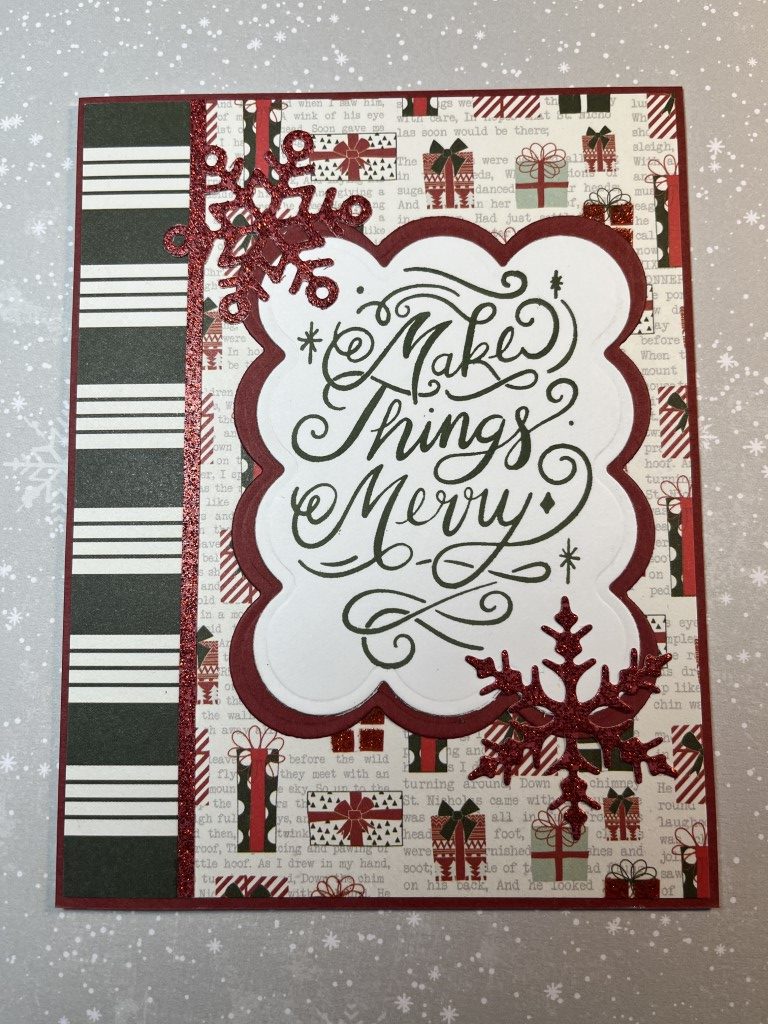
I believe these papers came from My Mind’s Eye Cozy Christmas.  To separate the 2 prints I used a thin strip of red glitter paper from an American Crafts paper pad.  The large sentiment panel is stamped in Versafine Olympia Green ink to match the striped paper.  A couple red die cut snowflakes finished up the card.

There are still a couple full sheets and some scraps from the various paper pads, but overall I think I did a pretty good job using up my supplies.  I could probably have made a few more cards, but with so little to choose from I put the paper away for now.  I’ll pull it out again when I’ve accumulated a few more partial paper pads to work with.

American Crafts Cozy & Bright 6×6 Paper Pad

American Crafts Cozy & Bright 6×6 Paper Pad

Continuing my goal to use up partial paper pads I pulled out the Cozy & Bright paper pad by American Crafts.  Since this was a larger 6×6 paper pad, 36 sheets instead of the usual 24, I knew I wouldn’t finish it but could at least thin it down some.  And, after the more muted tones of the Happy Pawlidays paper pad, the Cozy & Bright paper pad was a nice pop of traditional red and green Christmas color.

I like looking at card sketches and magazines for inspiration and pulled out an old Cards magazine (by Northridge Publishing).  I won’t be able to add the different layers and dimension featured on their cards (I need to keep my cards fairly flat) but I still find the magazine a great source of ideas.

I thought this layout would work well when using a busy paper for the background.  The size and the muted prints on the sentiment panel keep the holly pattern from being too overwhelming.  I also liked that the sentiment panel is easily modified to accomodate different sized sentiments.  I choose this sentiment as the font matched the whimsical feel of the paper pad.  It also worked for adding a small die cut heart, cut from red mirror cardstock and popped up with foam tape.

The paper pad has many cute prints including this Santa and elves.  The pattern would pair with almost any of the tone-on-tone prints but I went with my favorite, the red gingham.  Instead of just matting the printed paper, I used a punch to create the fun scalloped border.  A green satin bow added some texture and instead of matting the sentiment I placed it over the top of a die cut pine tree.

There were a few scraps of the Santa and elves paper left and I decided to pair it with green for this card.  The green tone-on-tone holly print was perfect.  The focal panel features a parentheses punched border, red satin ribbon and a few enamel dots.  As I was looking through my Christmas stamps for a sentiment, I realized I hadn’t used this snowflake stamp/die set.  I like that the snowflake is more solid and that I could stamp it to match the color of the sentiment.

As many of the cards will be donated, glitter is not allowed.  This card features two of the non-glitter pattern papers.  It is a very simple layout, but adding a trio of die cut pine trees adds interest.  Also, by popping up the trees with varying thicknesses of foam tape and including one tree die cut from green mirror cardstock there is nice dimension and a bit of shine.

With more paper to work with, I was able to make duplicates of some of the cards and multiples of all the cards just by varying the prints and patterns.  While this did slim down the paper pad there is still plenty of paper left to make many more cards.  I guess I’ll be revisiting this paper pad again next year.

Craft Smart Happy Pawlidays 6×6 Paper Pad

Craft Smart Happy Pawlidays 6×6 Paper Pad

I can’t believe it’s only a little over a week before Christmas and I haven’t posted any Christmas cards.  I have been busy making them.  I took the first batch to my little antique booth in early November and have made several more small batches to keep up with purchases.

I started making Christmas cards in late October/early November and found it hard to get into the holiday mood.  Since I work better with a project, I challenged myself to use up some of the partial 6×6 paper pads in my Christmas paper stash.  One of the first paper pads I pulled out was Happy Pawlidays by Craft Smart which features several fun cat and dog images.

Since there were still several full 6×6 sheets, I focused on layouts that included larger panels.  For the first card I used a tone-on-tone plaid for the background and a dog print for the focal panel.  As part of my “challenge” I had also pulled out some older supplies for embellishments which for this card was baker’s twine.  The tan and white matched the color of several of the dogs in the pattern paper and fit the feel of the card.  The sentiment is stamped with Versafine Vintage Sepia ink and popped up with foam tape to sit nicely over the baker’s twine.

One of the things I liked about this paper pad is that it included several papers that weren’t pet specific which made them easy to use by themselves or paired with non-pet prints.  For this card, the pine garland print was used as the background.  The large sentiment, stamped in Versafine Olympia Green ink, was made even larger by double matting it on red metallic paper and then again on dark green cardstock.  Embellishments on this card include some red satin ribbon and a few red rhinestones.

I wasn’t sure about this card.  There wasn’t a large enough paper from the paper pad to use for the background.  I tried some red and green cardstock from my stash but couldn’t find one I liked.  I also tried a white shimmer paper but it washed out the green pattern paper.  I ended up using a tan sandy color that coordinated with the brown plaid.  The card sketch featured a large embellishment in the lower right corner of the card.  I used my go-to Christmas embellishment –  a die cut snowflake.  The gold metallic paper added some much needed shine to the card.

I didn’t realize it until I was working on this post but this is the only card that featured a cat print.  I’m not sure if I had already used up most of the cat paper or if it just happened to be the flip side of the tone-on-tone papers that I used.  A kraft parentheses border separates the cat print and the tiny polka dot print.  In an effort to use some older embellishments, I also added a couple strips of washi tape that I’ve had in my craft room for years.  To keep the sentiment strip from just “floating” on the card, I tucked it behind a die cut pine tree.

I was now down to small pieces and longer strips.  After much rearranging, I was able to pair up several of the longer pieces to use for this simple design.  Along with the red polka dot print, a scalloped border and green satin ribbon separated the 2 busier prints.  To brighten up the sentiment panel, I colored the stars on the panel using a gold metallic pen.

At this point I’m calling the paper pad done.  There are a few smaller pieces that I’ll toss in my scrap box.  I may try and use them for some Christmas scrap cards but will more likely use the flip sides which are non-pet and non-Christmas prints like the polka dot and plaid for some general cards.