Browsed by
Category: General

DCWV The Pet Stack 12×12 Paper Pad

DCWV The Pet Stack 12×12 Paper Pad

As I was re-organizing a bit in my craft room, I came across the DCWV The Pet Stack paper pad.  It’s a 12×12 paper pad that I’ve had in my stash for years.  I’ve used it before but still have at least 1/2 the paper pad left.  The paper pad includes both cat and dog images but as I’m more of a dog person I decided to use those.

My favorite paper from the paper pad is the plaid print I used for the background.  I created the focal panel using a larger sentiment/image print and the bone print cut from the sheet of border strips.  To keep everything from being too rectangular, I used a border punch to create the parenthese edge on the focal panel matting.  I stamped the “just for you” sentiment using Versafine Vintage Sepia ink and added a few yellow glossy dots.

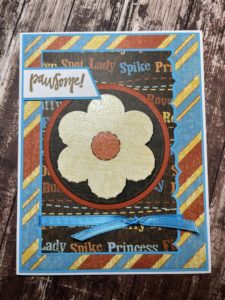
For the next card I was wanted to use a newer to me card sketch.  The blue and rusty red diagonal stripe wasn’t my favorite, but it paired well with the pet name pattern paper.  As I was working on the card I remembered I had a dog themed stamp set and pulled that out.  The set has a few short sentiments and for this card I used “pawsome!”.

For this card I used 2 printed papers and another border strip.  The tag and dog images were fussy cut from one of the pattern papers.  I had found the print too large to use as is, but the images were the perfect size for fussy cutting.  The polka dot paper and tag both feature a gloss finish which adds some shine to the card.  I used the “Yappy Birthday” and paw print stamps to create the sentiment panel.

I’ve taken all of these cards to my antique booth and there must be some dog fans as all of the cards have sold.  I’ll have to pull this paper pad out again and make a few more cards, maybe I’ll try a cat theme next time.

Recollections Warm Luxury 12×12 Paper Pad

Recollections Warm Luxury 12×12 Paper Pad

This batch of cards uses the Warm Luxury paper pad by Recollections.  It’s the 12×12 size but I thought the prints were small enough to work well on cards.  When I purchased the paper pad I liked that it included several purple/lavendar prints which I don’t come across that often.  Now, trying to find coordinating cardstock in my craft room has been a bit of a challenge.

I wanted to make just a few cards to have in my antique booth for spring.  The first card pairs a pretty floral with a fun geometric print.  I used a peachy orange cardstock for the matting and the scalloped strip across the card.  For contrast I stamped the sentiment in purple ink.  For embellishments I used peach satin ribbon, a Love from Lizi peel-off (along the top edge of the scalloped strip) and a few Queen and Co. bubbles.

I switched to a purple palette for the next card.  I really liked the swirling print as a background.  I paired it with the tassel garland print and a strip of striped paper from the cut-apart border sheet.  Both are matted on purple cardstock with a parentheses border created with a Fiskars border punch.  I used the same purple ink for the sentiment and a few more Queen and Co. bubbles for embellishment.

The next card paired another floral with a geometric print and used the same peachy orange cardstock fo the matting.  I used another Fiskars border punch to create the scalloped edge on the floral print.  The sentiment is stamped using Versafine’s Vintage Sepia ink.  For embellishments I used the same peach satin ribbon and a few small shiny peach buttons.

The last card is another purple card.  This time I paired several geometric prints together.  The small strip across the center of the card is another strip from the cut-apart border sheet.  I used some more of the peach satin ribbon and Queen and Co. bubbles for embellishment.

I made doubles of all 4 cards – 1 set for the booth and another set to donate.  I really liked how all 4 cards turned out and think they have a nice spring feel to them.

Honey Bee Stamps Autumn Stamp and Die

Honey Bee Stamps Autumn Stamp and Die

Honey Bee Stamps recently had a sale.  I had never ordered from them before but having watched a favorite card maker use their products I decided to place an order.  I purchased several stamp and die bundles.  With fall coming up I started with the Autumn stamp set and coordinating Honey Cuts Buzzword dies.

Since I still had the Pebbles Woodland Forest paper pad on my desk and it matched the autumn theme, I continued using that.  My goal was just to make a couple cards to see how I liked their products.  I have to say, I really enjoyed using their dies.  They cut beautifully.

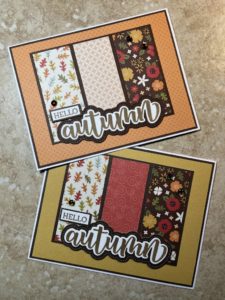
For the first pair of cards I used 2 of the dies – the “autumn” word die and the large background die.  To complete the sentiment I used the small “Greetings” from the coordinating stamp set.

For the second pair of cards I used the “autumn” stamp and the shadow die.  I have to say using a coordinating die to cut out the sentiment was great!  I’m not a fan of fussy cutting and along with being a time saver using the die was considerably less frustrating.

I really liked how both set of cards turned out.  I was very pleased with the quality of Honey Bee’s products and am glad that I purchased a few more stamp and die bundles that I will be trying out soon.

Scrap Cards

Scrap Cards

After the challenge of the Spellbinders card kit I wanted to do something quick and easy.  So, I picked a simple layout and pulled out my bins of scrap paper.  I tried to use larger pieces of printed scrap for backgrounds, but if nothing worked I used cardstock scraps.  Also, if there was enough paper I made multiples of each paper combination.  For all of the cards, I used Love from Lizi peel-offs along the edges of the horizontal strips.  It added some sparkle and shine and keeps the cards nice and flat.  Other than adjusting the background measurements to allow for a bit of the white card base to show, the rest of the measurements for the components are all the same.

The first 2 cards both used older 12×12 paper pads I had purchased at Michaels several years ago – DCWV’s Bahama Mama and Craft Smith’s Palm Springs.  I’ve used both paper pads several times in the past, but using up 12×12 paper pads can take a long time.  The first card pairs a large scale tropical print with a green starburst background.  To pick up on the pink in the tropical print paper, I used a tone on tone flamingo print for the horizontal strip bordered by clear iridescent glitter Love from Lizi peel-offs.

The second card uses a tone on tone orange print for the background and a cactus print for the focal panel.  The horizontal strip is a light aqua color with a gold foil print bordered by gold mirror Love from Lizi peel-offs.

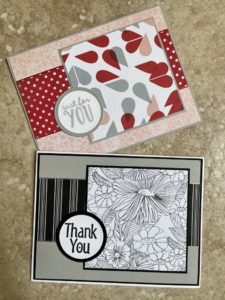
The next 2 cards truly use scrap paper.  I’m not sure where the paper was purchased or the brands but the paper combos were not part of actual collections.  The first card pairs a pastel floral print with a graphic red, gray and peach heart print.  The horizontal strip is a red/white polka dot bordered by a red mirror Love from Lizi peel-off.

For the second card gray cardstock is used for the background.  The focal panel is a black and white floral print.  The horizontal strip is a black/gray/white stripe bordered by a silver mirror Love from Lizi peel-off.

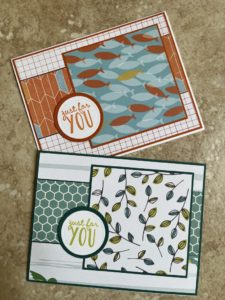
The next 2 cards both use scraps from individual Recollections 12×12 sheets – a fun fish print and a turquoise hexagon print.  The first card pairs the fish print with a white/orange grid as the background.  The horizontal strip is an orange and blue print bordered with a copper mirror Love from Lizi peel-off.

The second card pairs the hexagon print with a white and gray/green watercolor stripe for the background.  A turquoise and green leaf print is used for the focal panel.  A teal mirror Love from Lizi peel-off borders the hexagon print.

Although not planned, it turned out that there is a nice mix of colors and prints.  As all of the cards will be donated, I used general sentiments and kept the cards flat so no additional postage would be required for mailing.

Using Up Scrap Paper

Using Up Scrap Paper

Before starting on my next project I decided to use up some of my scrap paper.  The pencil box where I throw my smaller scraps is fairly empty since I’ve been using the scraps for price tags for my antique booth.  The scrap drawer, a 12×12 drawer in one of the rolling cards I have in my craft room, is another story.  It’s been awhile since I’ve done a batch of “scrap cards” so the drawer has quite a collection of paper.

I decided to keep it simple and use 1 layout for all of the cards, that way I’d know how many different papers I’d need for each card.  I settled on sketch 516 from MFT.  I’ve used this card sketch in the past and it’s an easy sketch to use for mass production.  Everything is straight lines with easy measurements and no die cutting required.  After flipping through the paper I ended up with 14 different paper combinations.  When there was enough paper, I made multiples of the same card.  Some will go to the antique booth for sale or as give-aways and the rest will be donated to Cards For Soldiers.

To get started I cut each paper combination to the sketch measurements.  I did adjust the measurements for a few of the horizontal banners to accommodate the paper available.  I then grouped the paper combinations by the color I planned to use for the matting.  I don’t work well in chaos so I only pulled out 1 color of cardstock at a time.  I went with the easiest paper/cardstock combo first which was black cardstock.  I then moved on to brown, orange, purple and rust cardstock.  The yellow, blues and green cardstocks were last as I needed to flip through several options to find a nice match to the pattern paper.  Once all of the cards were assembled I re-grouped them based on the sentiments I planned to use.

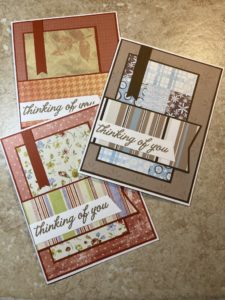
The first cards completed were the “Heartfelt Thanks” and “Thinking of You” cards.  Since they all used the same Versamark Vintage Sepia ink for the sentiment it was easy to stamp all the sentiments at once and then cut/assemble the final cards.  As there was enough paper, I made multiples of each card.


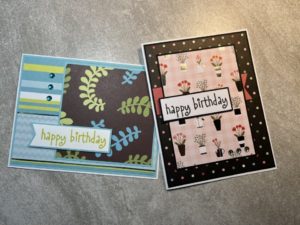
The next group of cards were birthday cards.  Since the papers all had a fun feel to them (donuts, polka dots and fish) I selected a “happy birthday” stamp which had a whimsical feeling font.  I used black, orange and lime green inks to coordinate with the papers.

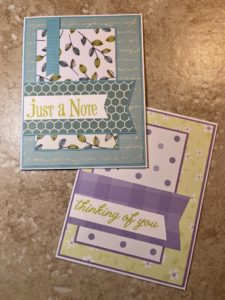
Since I had the lime green ink out, I used it to complete the final “Thinking of You” cards (I was able to make 2) and the “Just a Note” card.

I thought about using the lime green ink for the green/brown “Just Because…” cards but there wasn’t enough contrast against the green horizontal banner.  Instead I went with Versamark Vintage Sepia ink.  For the other “Just Because…” card I used Memento Love Letter ink to ensure it stood out against the bright red/white polka dot banner.

The horizontal banner on the next set of cards reminded me of confetti or fireworks.  I thought about doing another birthday card but since I have plenty of those I opted for the “Congrats!” sentiment.

By the time I got to the last set of cards I was ready to be done.  I pulled out a stamp set at random and selected the most appropriate sentiment.  Since the brown ink was still on my desk I went with that.

So, 25 cards complete.  When doing a mass batch of scrap cards I always enjoy the picking paper step and the cutting step always goes quickly.  But, by the time I get to adding the sentiment on the last cards I’m usually bored.  I thought about setting a few cards aside and completing them at a later date, but…  Based on past experience they would end up in the stack of “mostly” finished cards already sitting in my craft room.  LOL.


Spellbinders Truly, Madly, Deeply Card Kit

Spellbinders Truly, Madly, Deeply Card Kit

I decided I should get going on some Valentine cards, or at least something that had a “Love-ish” theme.  I started by pulling out a Recollections paper pad that I’m trying to use up, but…  the papers and colors (everything was pink and red) just weren’t working for me.  So after a couple cards I switched gears and pulled out a Spellbinders card kit.

Yes, I gave in and ordered Spellbinders Colossal Cardmaking bundle – 7 card kits!  By holding out a few more weeks, I was able to purchase the bundle at a reduced price.  Yay!  And since I know the kits come with a ton of ephemera I used the “extra” money to order a few paper pads (also on sale) that coordinated with some of the kits.

The January 2022 kit, titled Truly, Madly, Deeply, is a pretty pastel love-themed kit.  While there are pinks, hearts and a few February 14th references, the bulk of the kit is not Valentine specific and can be used any time for any audience (kids, adults, masculine, feminine).  This kit was one where I was able to purchase an extra paper pad.  So for my first batch of cards I decided to just focus on the ephemera and use the stamps and dies with the second paper pad.  As usual, I started by making one of the sample cards shown on the instruction sheet.  I’m guessing you can tell that the sample is the card on the left.  LOL.  First off, the background paper isn’t layered and secondly, there is a lot of ephemera (9 pieces!) used on the card.  I think it’s a beautiful card and the ephemera combination isn’t something I would have come up with.  The second card is definitely my creation.  It only uses 4 pieces of ephemera and a few sequins.  Also, all the paper is matted.  I like this card as well, it just has a “cleaner” look.

I used a couple card sketches for the next 2 cards.  Other than the Love from Lizi peel-offs along the bottom, I followed the sketch fairly closely for the first card.  There’s a chipboard sticker in the upper left corner and I dismantled one of the tag embellishments and used the glitter piece as a banner under the sentiment ephemera.  Even with the peel-offs, the bottom of the card looked a bit bare.  The paw print ephemera filled in some space and went with the paper theme.  For the second card I focused on the ephemera (7 pieces).  I think I picked out a mix of images that works well together in both color and theme.  To make this card Valentine specific, I added the small “Feb 14” banner.  To give the card a little dimension, I added some foam tape under a few of the ephemera pieces.  The Spellbinders kit includes foam squares but I opted to use foam tape from my craft room that is a bit thinner to ensure the card can be mailed without requiring extra postage.
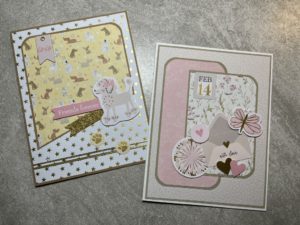
For the next set of cards I decided to skip some of the matting, like with the sample card.  I choose paper combinations where the colors and prints provided good contrast.  I continued practicing my use of ephemera and included at least 7 pieces on each card along with a few sequins.  Both cards turned out well with enough ephemera for interest but not too much to make them over the top.  I especially liked the ephemera collection on the card on the right.  To me it felt most like the sample card.

At this point I had several 2×6 inch scraps of paper.  Instead of saving them to the end of the paper pad I decided to find a sketch to use them now since I had already worked with some of the paper combinations.  I ended up selecting a simple layout that would lend itself well to adding several pieces of ephemera.  For both cards I went with the “more is more” approach and added more ephemera and embellishments than the sketch indicated.  I quite like how they both turned out, with the card on the right being one of my favorites.

I have discovered that using ephemera requires a different mind set.  I wouldn’t describe my style as clean and simple, but I do think it has a more streamlined, linear look.  Figuring out how and where to add ephemera so that it doesn’t look contrived and overdone is definitely a skill requiring practice.

As I worked through about half of the paper pad, I began to find it harder to work with the remaining paper and ephemera.  Instead of “forcing” the process, I decided to put the kit away for now and can go back to it another time.  Afterall, I still have 1 complete paper pad and even though I used multiple ephemera pieces on each card I still have most of the tag embellishments, glitter foam stickers, chipboard embellishments, sequins and about 1/2 of the die cuts left.  And I haven’t even used the stamps and dies.

Personalized Note Cards

Personalized Note Cards

As I was finishing up the birthday cards, I found a new sketch that looked interesting.  I figured a couple note cards for my sister and niece would be a good opportunity to try it out.

Well…  Once I got started mixing and matching different colors and prints I was having so much fun I ended up with another 20 cards.  Most of the cards are light and bright with some fun summer themes (popsicles, bikinis, etc.) but there are a couple more serious colors and prints as well.

I used the same sketch for all the cards and it was easiest to cut all of the pieces before starting assembly.  Since they are note cards and could be used for any occasion, I didn’t want them to be “over done”.  I popped up the sentiment circles but otherwise kept embellishments to a minimum, only added a few Love from Lizi peel-offs on a couple of cards.

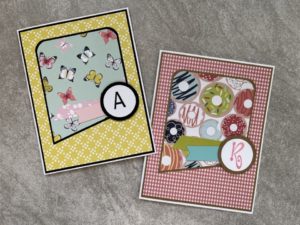
I really liked some of the paper combinations I had used for the birthday cards and decided to use them again.  I paired the yellow chartreuse background print with more of the butterfly paper.  Both are from the Echo Park I am Mom collection.  The second card uses more of the gingham and donut (by Recollections) prints.  For the initials, I used a more traditional font for my sister and a fun swirly font for my niece.

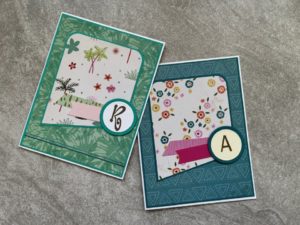
The card for my sister pairs a watercolor stripe with multi colored popsicles.  Both papers are from the Echo Park Summer Dreams collection.  To keep it nice and bright I used orange ink to stamp the “A”.  The card for my niece uses more of the brown/green branch paper, this time paired with a tiny floral print in green and white.

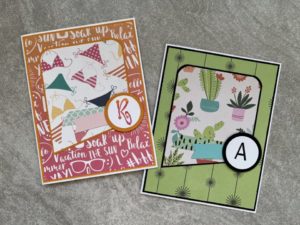
The card for my niece uses paper from the Craft Smith Palm Springs 12×12 paper pad.  I added a few Love from Lizi peel-offs across the bottom of the card.  The background is a busy palm frond print but for some reason seemed to “need” something.  The card for my sister uses paper from the Craft Smart Llama Love 12×12 paper pad.  No llamas on the card, just a fun tone-on-tone blue background and a small floral print with a few gold foil accents.

The card for my niece is a bit busy, but I really love the bright colors.  Both papers are from the Echo Park Summer Dreams collection.  To match the background, I used the variegated orange to pink ink pad from Recollections Backyard Table collection to stamp the “R”.  For my sister I used more of the Craft Smith Palm Springs paper, pairing a fun cactus print with a green and black retro starburst background.

Since I had the paper pad out, I used some more of the Craft Smart Llama Love paper on the card for my niece.  Again, no llamas just a nice boho feeling note card.  On the card for my sister I paired a brown/cream/blue stripe with a distressed brown/blue print.  I like the look of the tailored stripes with the more casual feel of the patchwork pattern.

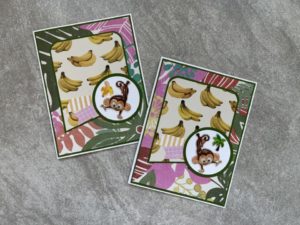
For the last note card, I thought I’d skip the initial and do something funny.  I had 2 puffy monkey stickers left from another project and thought they would be cute.  I used the same layout, with a larger “sentiment” circle, swapping the initial for the monkey.  The background is a large scale print, but I think pairing it with the bananas kept it from being too overwhelming.  The papers are all from the DCWV Bahama Mama 12×12 paper pad.

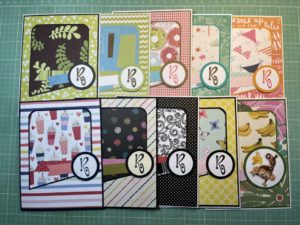
Here’s a look at all of the note cards for my sister…

and for my niece.

Now to find a new project to work on.

Birthday Cards Part 2

Birthday Cards Part 2

And now for the feminine themed birthday cards…

Again I tried to use a good mix of colors, prints and themes to ensure the cards work throughout the year.  I tried to limit the amount of pink and flower papers but a few did sneak in.

One of my favorites is the blue and green card.  They are my favorite colors and I used one of my favorite card sketches.  For some shine, I added Love from Lizi peel-offs along the edge of the blue scallop print paper.  The second card has some pink and flowers but I think the black background keeps it toned down.  The polka dot paper might be from SEI and the floral print is from Recollections At the Barnyard.  For both cards I added a few bubble embellishments from Queen and Co.

The first card uses paper from 3 different companies.  I always have fun pairing up different colors and patterns.  The green polka dot background paper is fairly new, but the stripe and scribble circle paper have been in my craft room forever.  A few bubbles for embellishment and the card is done.  The second card pairs a pink-ish gingham with a fun doughnut print by Recollections.  Bubbles didn’t seem like the right embellishment and after some searching I found some enamel dots that were the perfect pink-ish color.

I was trying to stay away from pink and flowers but I really liked the stripe and floral papers on the first card.  Both papers are from American Crafts Metropolitan collection.  I added a few yellow/gold sequins as embellishment.  I think one super girly pink card is OK.  The second card uses paper from the Bo Bunny Stay Awhile collection.  To soften all the straight lines I rounded the upper right corner of the background and focal panel.  Hard to see in the picture, but I used a strip of gold toned washi tape to separate the 2 background papers.

Yes, another pink floral card but I think the colors and prints give it more of a boho feel.  The background woodgrain print done in pink and orange is a bit unexpected.  The second card uses another not so common color combination – lime green and orange.  I tried a few different embellishments, but decided to keep it simple with orange/white bakers twine.

The last 2 cards both feature a floral print but have very different feels to them.  With the yellow distressed background, the first card has a more country feel.  Adding several brown brads around the sentiment picks up on the brown in the flowers.  I think the second card, which uses more paper from the Stay Awhile collection, has a more tailored feel with the subtle polka dot and stripe prints.  Adding a few off-white enamel dots finished the card.

So, 20 birthday cards complete.  Now to find a new project to work on.

Birthday Cards Part 1

Birthday Cards Part 1

After my last post I was all set to get going on some spring themed cards, but…

An opportunity to help out at the store where my antique booth is located came up.  They were looking for someone to take over the website.  It sounded like fun and would provide another creative outlet.  After a bit of research and some work the “new” website is up and running.

So now back to my regularly scheduled card making.  LOL.

I seem to work better with a project so when my sister requested some birthday cards it was perfect timing.  20 cards – 10 masculine/10 feminine themed cards.  To ensure the cards work throughout the year I tried to include a good mix of colors, prints and themes.  As most of the cards will be hand delivered I was also able to use multiple layers and plenty of embellishments (twine, brads, rhinestones, etc.).

The first 2 cards feature fish and farming.  I like the bright colors and mix of the fish and geometric prints on the first card.  For the farming card I paired the tractor paper with gingham and woodgrain prints.  I don’t believe any of the papers came from the same collection.  The fish is from a 12×12 sheet from Recollections and the tractor is from Recollections At the Barnyard 12×12 paper pad.
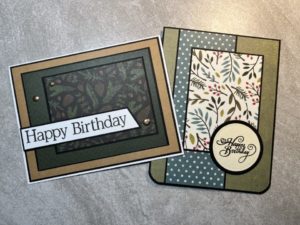
Keeping with the bright colors, I paired a green and cream stripe with a multi-colored wonky square design.  For some separation between the prints I added a pale green Love from Lizi peel off.  A few green brads around the sentiment finished the card.  The second card uses papers from the Bo Bunny Stay Awhile collection.  By using a single collection it was easy to find colors and prints that coordinated well.  I skipped adding any additional embellishments as they would be lost on the busier background and focal panel.

The next 2 cards both have a fall/winter feel.  The first card uses a patterned paper from Echo Park’s Warm & Cozy 6×6 paper pad.  Instead of more brads as embellishment, I used a few gold Nuvo drops in the upper left corner and near the sentiment.  For the second card I wanted to use the branch pattern paper from Recollections.  The background paper, a green distressed print, and the dot print were both partial pieces leftover from past projects.

The two prints on the first card are actually the front/back of a single double sided sheet.  I have no idea who made it as it’s been in my craft room for a while.  I wasn’t sure what to use for the sentiment strip but I think the orange brings out more of the orange in the focal panel.  For embellishment I added blue, green and orange brads.  The patterned papers for the shell themed card all came from the Craft Smart Coastal Cove 12×12 paper pad.  It’s a simple layout, but using a bit of bakers twine added some texture and dimension.

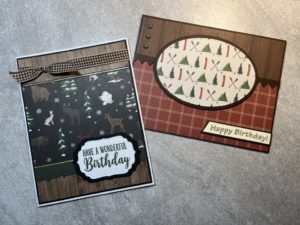
One of my favorite cards features the winter animal print (Echo Park Warm & Cozy) with the black/brown gingham ribbon.  Ribbon isn’t my go-to embellishment on masculine cards but I think doing a simple knot vs. a bow kept it on the masculine side.  The second card uses more woodgrain print along with an outdoor/camping themed paper.  All of these papers were from Carta Bella’s Summer Camp 6×6 paper pad.

I swapped back and forth between masculine and feminine cards, working on whichever papers appealed at the moment.  I’ve saved the feminine cards for another post.

Getting Motivated

Getting Motivated

Do you ever get in a crafting slump?  You know, where you have all these “great” ideas, save pictures, pin items, make a to-do list…  but when it comes down to actually starting a project  you just can’t get motivated?  This was me.  After the Christmas rush to get cards completed for my little antique booth at Touch of Country Mall and a few special orders, I haven’t been feeling crafty.  To keep up with the season, I did make a few Valentine cards for my booth but a crocheted afghan I started in November is still sitting incomplete on my coffee table.  LOL.

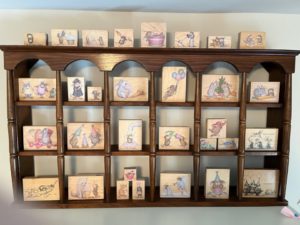
What usually gets me out of a slump is a new craft purchase – a new paper pad, some stamps, a few skeins of yarn, etc.  But this time it wasn’t a crafting tool or supplies.  While shopping for things for my antique booth, I came across a vintage Hortonville Rustics teacup/collectible display shelf.  It’s perfect for my collection of House Mouse stamps.  I rarely use the stamps but the images on the front of the stamps are too cute not to display.  So after a little cleaning and rearranging in my craft room, the shelf was ready to go.

I think it’s perfect as craft room decor.  And, it got me motivated to do some crafting.  I pulled out a Spellbinder’s card kit I purchased last year during one of their big sales.  It’s an older kit but the theme, Feeling Hoppy, is perfect for Easter cards.  And now I’m on my way with a few projects – Easter cards, some Easter themed beaded garland and although too late for this year some crochet hearts that I can make into a garland for next year.

Now to finish up a few more Easter cards and then on to another project.