Browsed by
Category: General

New Address Cards

New Address Cards

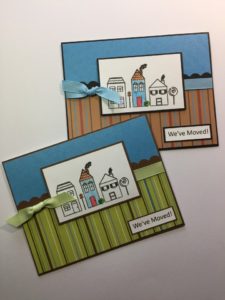
A long time customer contacted me about making some change of address cards.  She had recently moved and wanted to send out cards to family and friends with her new address.  I definitely wanted to include a house image or shape in the design.  As I would be making many cards, hand cutting the card base into a house shape wasn’t feasible.  I knew I had a house image stamp and thought I’d try that.  The stamp is part of an old stamp set and included a street scene with 3 houses.

I choose a layout with clean lines which would work well with an assembly line process – stamp, color, cut all the individual pieces and then assemble.  I colored one house with colored pencil, using colors that coordinated with the printed papers I was planning to use.  Once my customer approved the mock-up, I got to work.

First I cut all of the individual pieces – white cardstock for the stamped image, printed paper for the bottom panel on the card, blue cardstock for the top panel on the card, cardstock strips for across the card and then the matting for everything.

I then stamped the image on each of the white cardstock pieces, allowing time for the ink to fully dry before beginning the coloring.  I colored batches of about 10 images and then matted them before coloring the next batch.

I die cut all of the cardstock strips to have a scalloped border and then assembled the top and bottom panels and the scalloped border for all of the cards.

For an embellishment, I tied a coordinating ribbon around the middle of the panel.  Using foam tape, I attached the house image to the center of the panel.  The completed panel was then matted and attached to the card base.

As a sentiment I printed “We’ve Moved” which I cut, matted and attached to the lower right corner of the card.

For the inside of the card, I printed the new address on white cardstock and then die cut and matted using the Gina Marie Venetian Label die set.
8×8 Paper Pad

8×8 Paper Pad

I was doing some clean-up in my craft room and came across an 8×8 paper pad I’ve had forever, probably about 10 years.  Yikes!  The cover has been gone for ages so I have no idea who made the paper.  I decided to challenge myself to use at least 1 sheet of each paper.  I did pretty good, using 1 of all but 2 of the papers to make 21 cards.

I didn’t have a particular plan when I started so the cards are all over the place with general sentiments, holidays, etc.  With all the bright colors, I used several colors of cardstock for matting and inks for stamping.  Embellishments included enamel dots, sequins and Love from Lizi peel-offs.

Here are a few of my favorites…


Using up more scrap paper

Using up more scrap paper

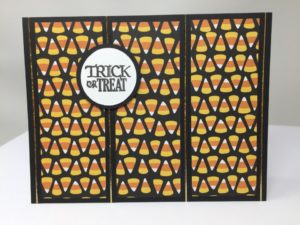
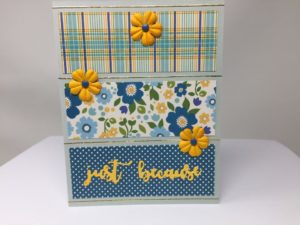
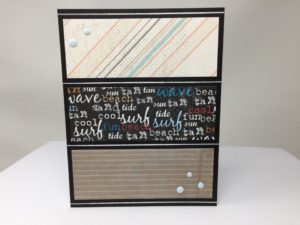
Like my last batch of cards from scraps, I picked a simple layout – #91 from Operation Write Home.  I was able to quickly cut a bunch of 1 1/2 x 4 inch strips.  Then all I had to do was match up 3 coordinating papers and pick the background cardstock.  Instead of doing 1 card to completion, I made all of the card fronts and then went back and added the sentiment.  By using an “assembly line” process, I was able to complete 20 cards over the weekend.

With such a simple layout, the cards needed something to add interest.  I used Love from Lizi Peel-offs on all of the cards to separate the paper strips.  I added enamel dots, paper flowers, Nuvo drops, rhinestones and brads on several of the cards.  I kept the sentiments simple using some stamps and Queen and Company dies.

A great thing about this layout is that it works well vertically or horizontally which made it easy to accommodate the patterns on the printed papers.  Here are a few of my favorites.

This really thinned out my paper scraps.  Now to find some older paper pads to try and use up.

Recollections Backyard Table

Recollections Backyard Table

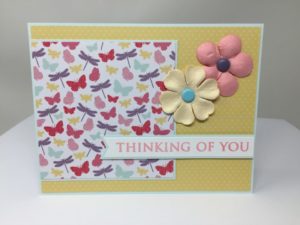
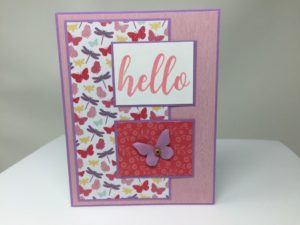
For something completely different than the last 6×6 paper pad, I pulled out Recollections Backyard Table.  It’s a very girly paper pad in pastel colors with lots of flowers and butterflies.  With all the different colors I was able to use several colors of cardstock for matting.

I only made 16 cards since I used several of the tone-on-tone papers for the backgrounds.  Here are a few of my favorites.

For the embellishments I used coordinating Recollections flowers and butterflies, Love From Lizi peel-offs, and miscellaneous brads and pearls.  I still have several 6×6 paper pads but after using 4 in a row, I think I’ll take a break.  I noticed my scrap bin was starting to get full again so maybe I’ll do a few cards to use up some scraps.

Pink Paislee Outfitters

Pink Paislee Outfitters

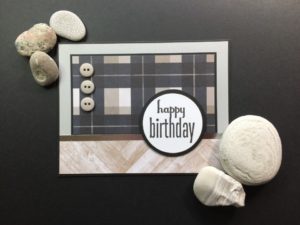
Another 6×6 paper pad…  This time it’s Outfitters by Pink Paislee.  I purchased this paper since the theme was completely different than any other paper in my collection and would be good for masculine cards.  I think it’s hard to find paper pads with a masculine theme.

I ended up making 33 cards.  I used several of the cut-aparts included in the paper pad and a few sentiments and images from Echo Park’s Happy Camper stamp set.  I really liked the images on all of the papers, but they were a bit challenging to combine.  There were no tone-on-tone papers and only a few sheets had small prints.  I ended up sticking with layouts where I only needed to use 1 print for many of the cards.
Here are a few of my favorites…

In keeping with the masculine feel, I kept the embellishments to a minimum – twine, buttons, brads and a bit of washi tape.  I also used an embossing folder with a hiking boot footprint to add some texture and interest to a plain gray background.  I still have several 6×6 paper pads but I’m thinking I may do one more and then take a break.

Craft Smith Feeling Nauti

Craft Smith Feeling Nauti

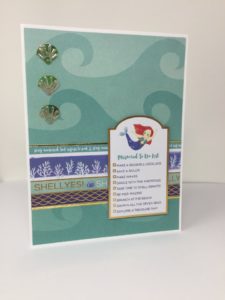
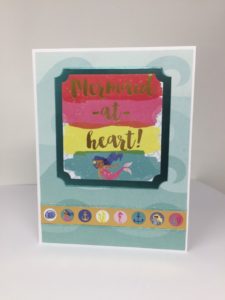
I’m still working on thinning out my 6×6 paper pad collection.  This time I used the Craft Smith Feeling Nauti paper.  Obviously it’s a nautical theme with a lot of blues and a few splashes of bright pink.  It was an interesting paper pad with the paper having an adult feel, and the cut-aparts having a juvenile feel (i.e lots of mermaids).

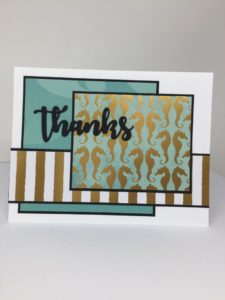
I decided to put the cut-aparts to the side and focus on using the paper.  I ended up leaving a few of the cards blank, since not everything needs a sentiment, and used stamps and dies for the rest.  I especially liked how the cards with the die cut “thanks” and “hello” sentiments turned out.  It was a bit time consuming to die cut each sentiment 3 times and then stack and glue but I think they made a nice impact on the cards.

I was able to use the mermaid cut-aparts by pairing them with some wave patterned paper from my stash.  While not my favorite cards, I liked how they turned out and they will be good to donate as kid-themed cards are very popular.

Embellishments on the cards included washi tape, charms, ribbon, sequins, Love from Lizi peel-offs and Queen and Co. pearls.  I was also excited to try out some new mirrored specialty cardstock on a couple of the cards.

Recollections Sunday Morning 6×6 Paper Pad

Recollections Sunday Morning 6×6 Paper Pad

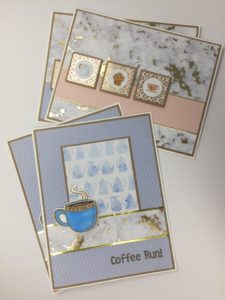
I picked up a couple of new 6×6 paper pads recently.  When I went to put them in the basket with my other paper pads, they wouldn’t fit.  So it’s time to use up a few of the paper pads that have been hanging around for awhile.  I decided to start with the Recollections Sunday Morning paper pad which is all soft blues and peaches with a bit of gold foil.

Other than 2 sheets where the image and sentiment were too large to fit on a A2 sized card, I was able to use pretty much the entire paper pad.  In keeping with the softer colors, I used kraft cardstock for all the matting.  In addition to the cut-aparts included in the paper pad, I used a few images and sentiments from a coffee themed stamp set.  The stamped images were colored with Copic markers.  For embellishments, I added some gold brads, rhinestones and Love from Lizi peel-offs.  I ended up with 21 cards.  Here are a few of my favorites.

Many of the cards have either no sentiment or fun coffee themed sentiments, I’ll probably keep a few for personal use and donate the rest.

American Crafts Travel Paper

American Crafts Travel Paper

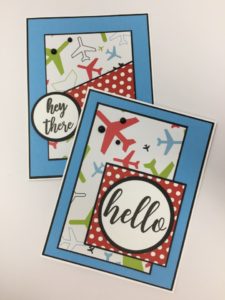
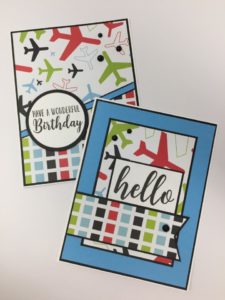
I wasn’t in the mood to make a bunch of cards so decided to just pull out a few sheets of paper from the American Crafts Travel 12×12 paper pack.  The papers are all nice and bright with only a few colors – black, red, light blue and bright green.

I settled on an airplane print, a green check and a black/red/light blue and bright green check.  With black being one of the few colors, I was able to use black cardstock for all the matting.  I found a few sheets of solid blue and green cardstock in my craft room to pair with the prints.  I also threw in some red and white polka dot paper from my scrap bin.

For some “bling”, I added Queen and Co. pearls, Love from Lizi peel-offs and Nuvo Crystal Drops.  I believe the sentiments are all from various Ms. Sparkle & Co. stamp sets and are stamped with Versafine Onyx Black ink.

I used 8 different layouts to make 10 general sentiment cards – Thank You, Birthday and Hello, which should all work well for donating.

Using up scrap paper

Using up scrap paper

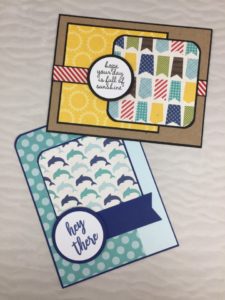
I decided to take a break from holiday cards but couldn’t decide on a new project.  I figured a clean craft room might help me get motivated so I organized my desk and work areas.  As I was putting away tools, inks, papers, embellishments… I noticed my scrap bin was getting quite full.  I decided to pull out some of the smaller scraps and make a few cards.  To keep it simple I selected 1 layout and 1 type of embellishment.  This made it easy to quickly cut the paper and assemble the cards.  For even more ease, I used the same sentiment on all but 1 of the cards.

It was quite fun to flip through the scraps and pair up papers that were not originally part of the same collection.  I’m thinking maybe I should try this once a month or so.  It didn’t use up a lot of scraps, but made a small dent in the scrap bin.

Echo Park Pirate’s Life Kit

Echo Park Pirate’s Life Kit

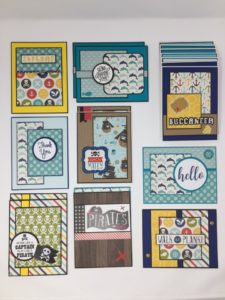
Before starting on my next batch of fall/winter holiday cards, I thought I’d take a quick detour and do a few general cards.  I pulled out the Echo Park Pirate’s Life kit that I purchased at last years Scrapbook Mega Meet.  The kit includes 12 double sided 12×12 sheets of paper, 1 sheet of element stickers and 1 sheet of alphabet stickers.  I also picked up a package of dimensional pirate stickers from the Dollar Tree.

With all the colorful paper, I was able to find several colors of cardstock to use with the paper.  After that I was ready to get started but for some reason the 12×12 sheets seemed a bit overwhelming.  So, I cut them all down to 6×6 size and found it much easier to work with.

Here are a few of my favorite cards.  In the first 2 cards I used a couple of the Dollar Tree stickers as the focal point.  I think they worked well with the Pirate’s Life papers.  I also used a couple of the element stickers – the blue flag and the “Buccaneer” sentiment.
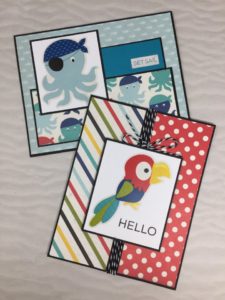
The next 2 cards used element stickers included in the Pirate’s Life kit as the focal point.  Black and white bakers twine was used to separate the striped and polka dot papers on the parrot card.

While at the mega meet, I picked up the Ahoy Mateys stamp set which coordinates with the Pirate’s Life kit.  I used a couple of the sentiments from the set on the next 2 cards.

For these cards I used some of the larger scrap pieces.  I kept the sentiments generic as none of the papers were specifically pirate themed.

I ended up making a total of 66 cards, which took me over a week.  So much for a “quick” detour.  LOL.  I used up all but a few small scraps of the paper and all of the element stickers.

Now it’s back to making holiday cards.  I’ve already started pulling out Halloween themed papers and stamps.