Browsed by
Category: Holidays

My Minds Eye Jingle All the Way

My Minds Eye Jingle All the Way

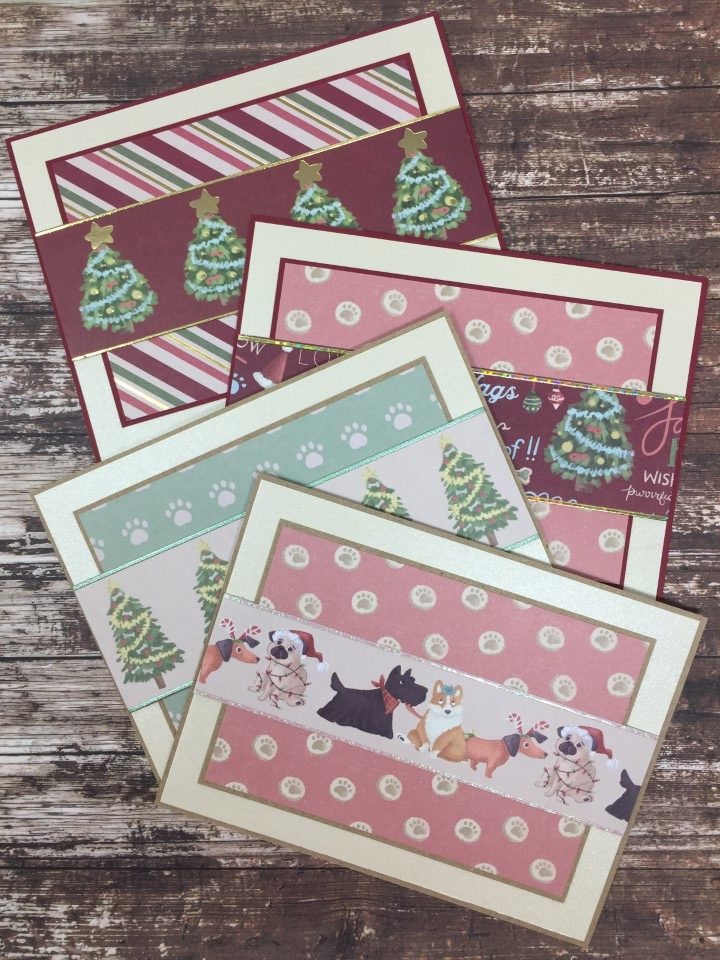
One of the paper pads I wanted to use this year was Jingle All the Way from My Minds Eye.  I had picked it up a couple years ago because I liked the colors.  Also, with some of the prints having a less serious feel, like the candy canes, and others having a more traditional feel, like the ornaments, I figured it would be easy to make a mix of Christmas cards that would appeal to many recipients.

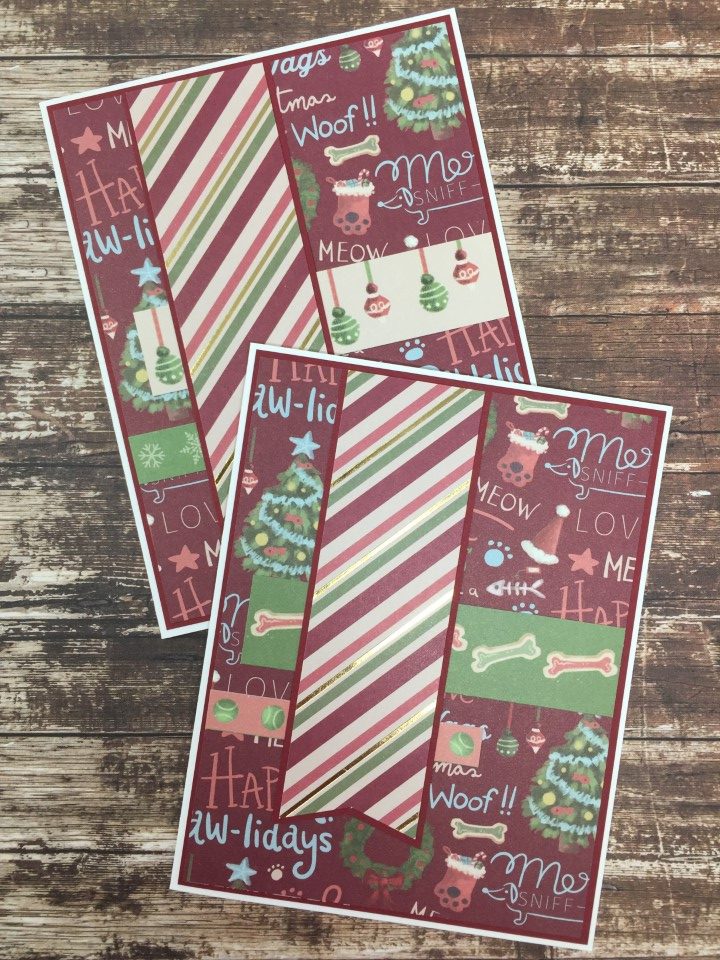
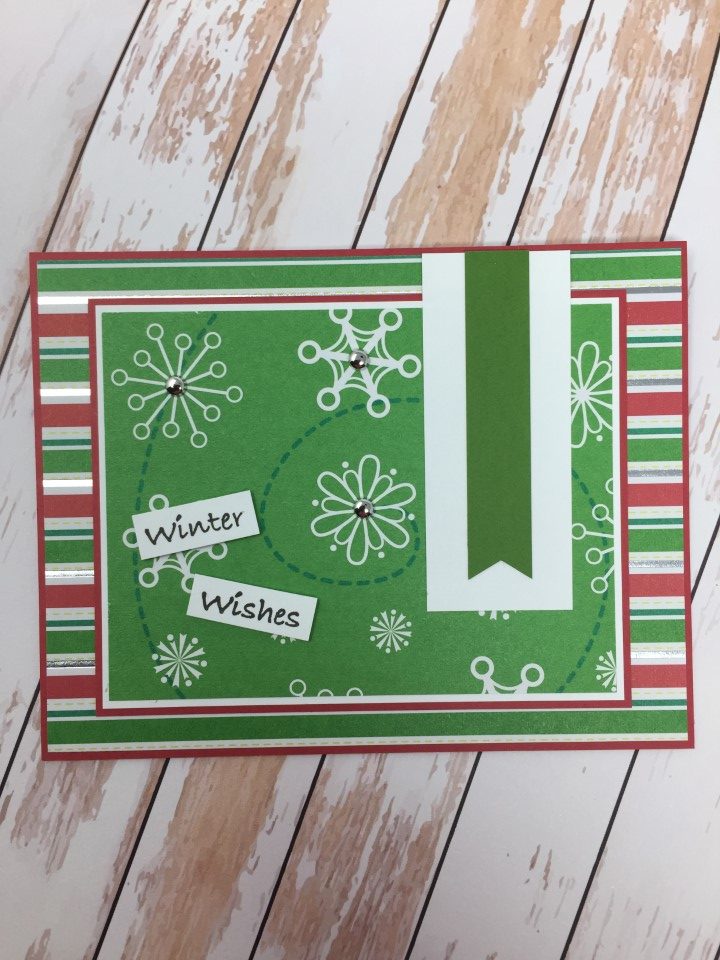
My favorite card uses a peppermint stripe for the background and the candy cane print for the focal panel.  After stamping the sentiment, the ends are fish-tailed and matted on a piece of dark teal cardstock that matches the holly leaves in the candy cane paper.  Three sizes of circles were die cut from red glitter paper and added for embellishment.

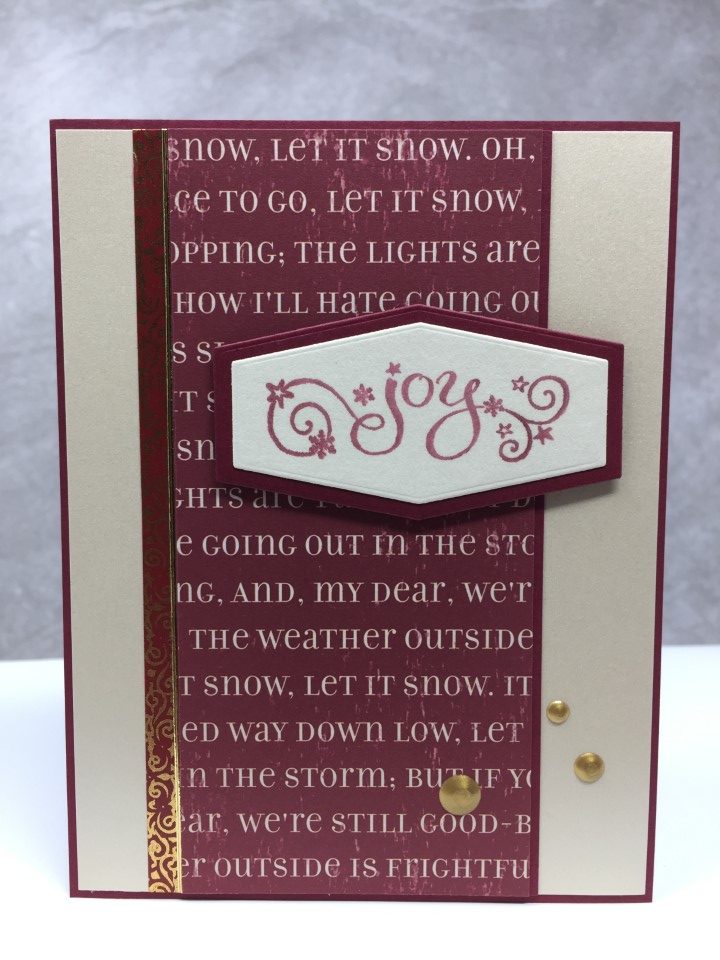
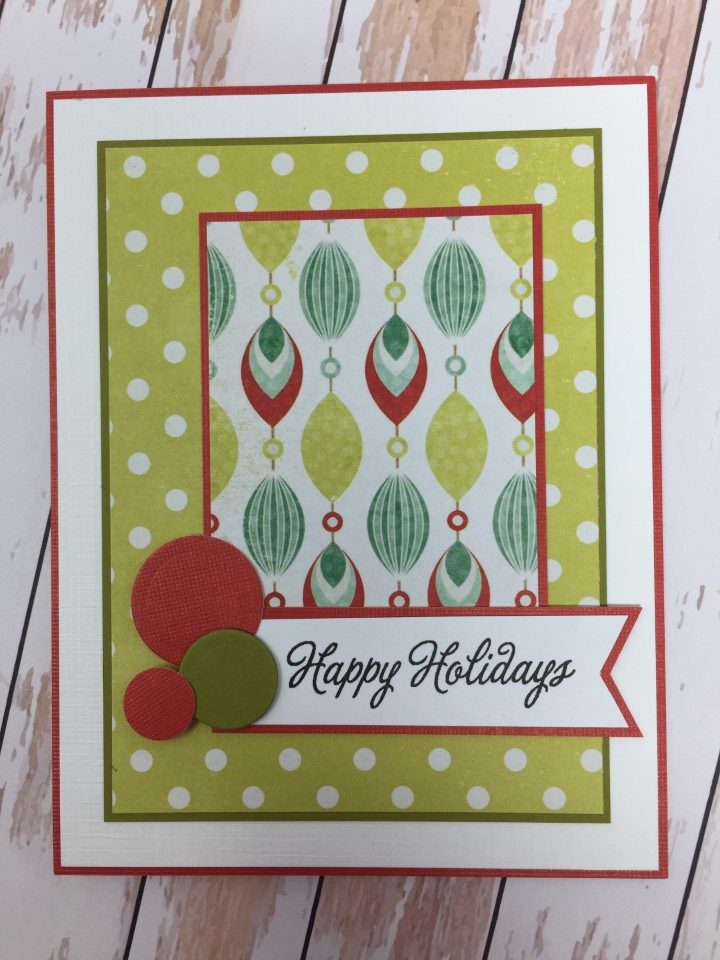
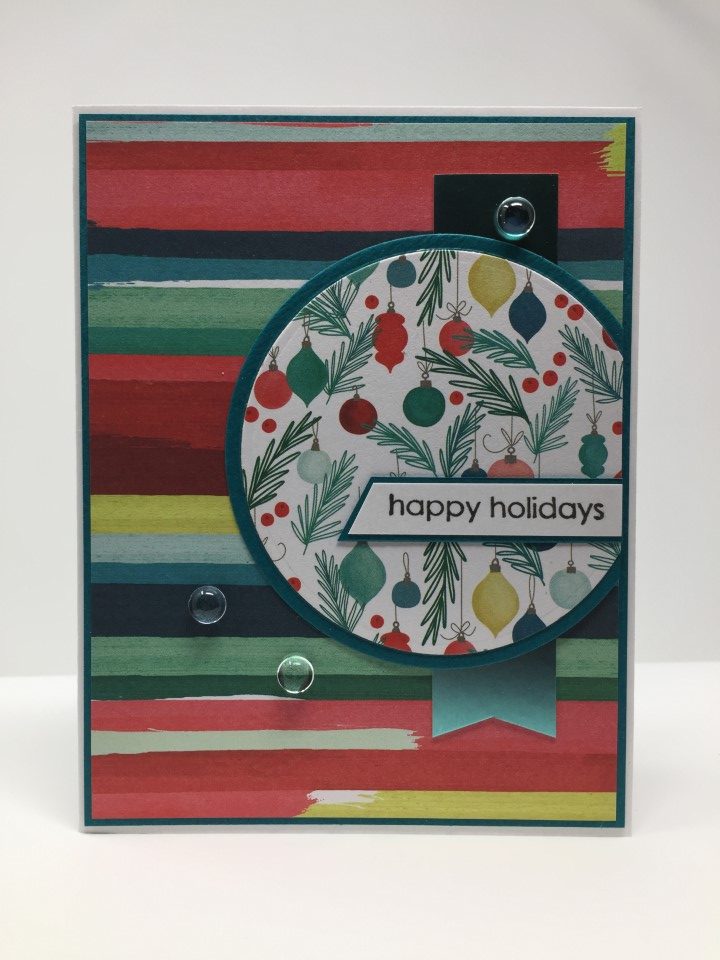
With the simple pattern and all of the colors, the watercolor stripe would work with just about any of the papers in the paper pad.  Since I found the ornament print the hardest to pair with other papers I decided to use it with the stripes.  Dark teal cardstock was used for matting, a teal satin mirror cardstock banner was added behind the ornament focal panel and a few clear crystal drops were added for a bit more shine.

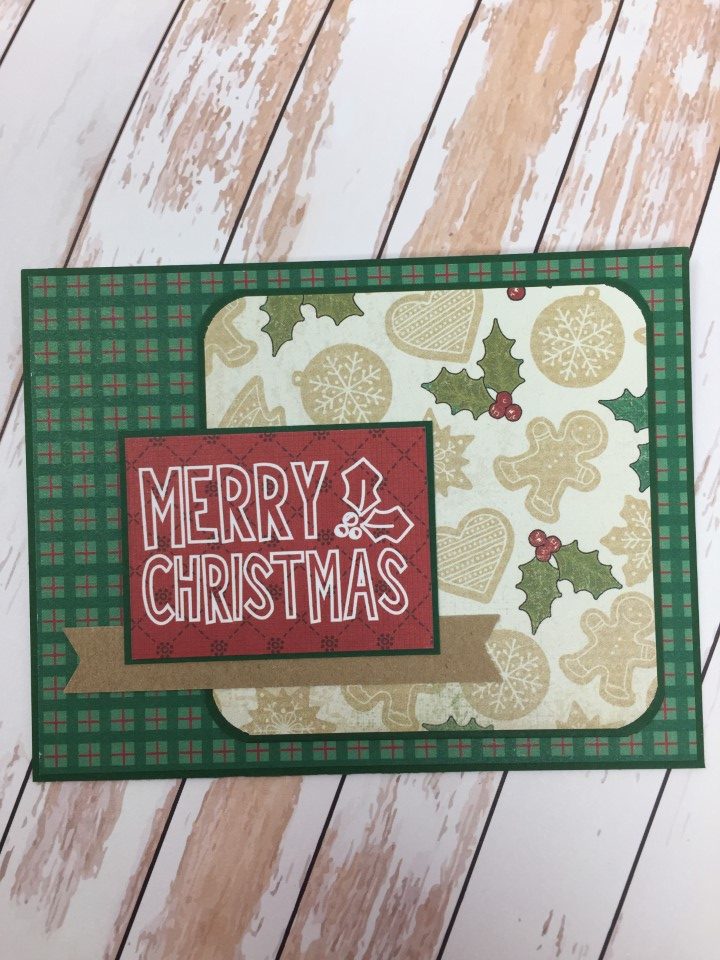
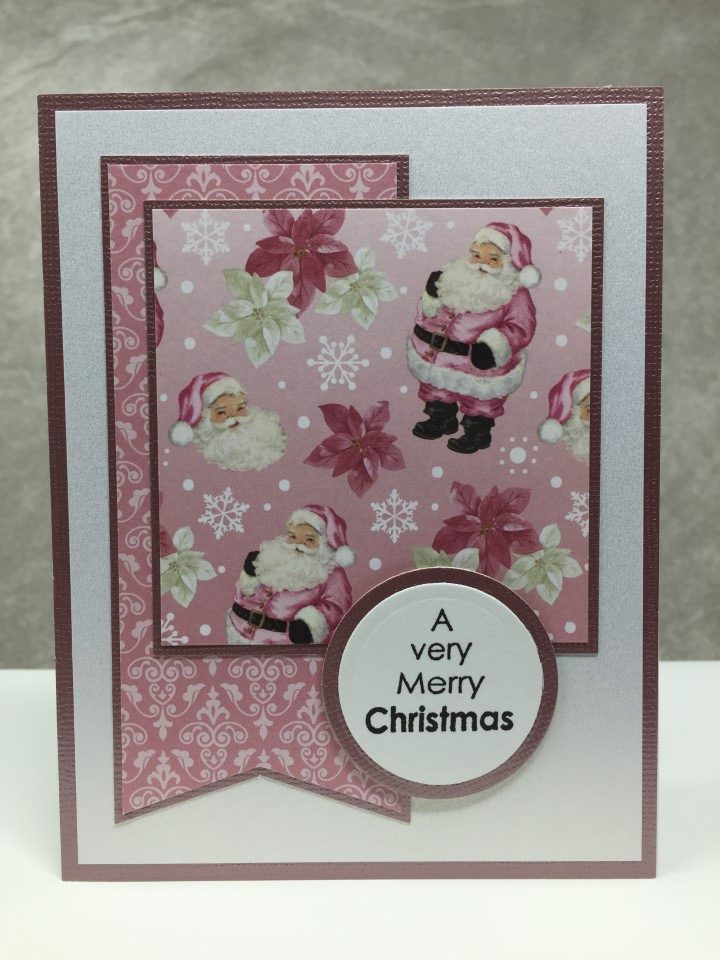
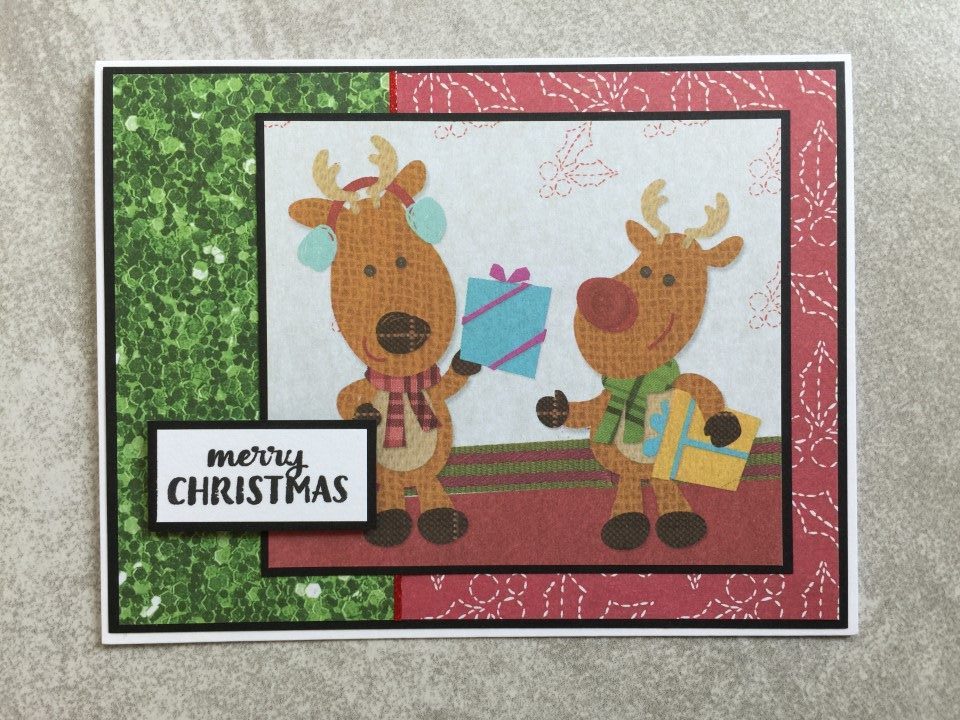
The next card used a new-to-me card sketch, #516 from MFT.  I liked the combo of the red plaid with the poinsettia print and used those for the background and focal panel.  Using the “Merry Christmas” paper worked as both the horizontal panel and the sentiment.  For some sparkle, white shimmer paper was used for the vertical banner and Wink of Stella was used to highlight the poinsettias.

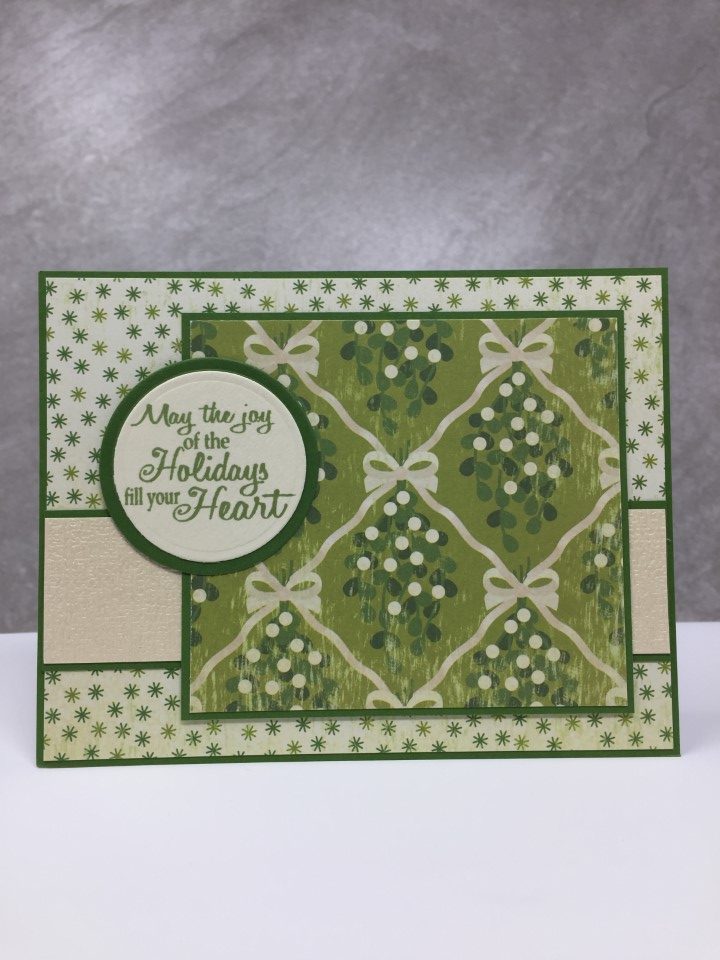
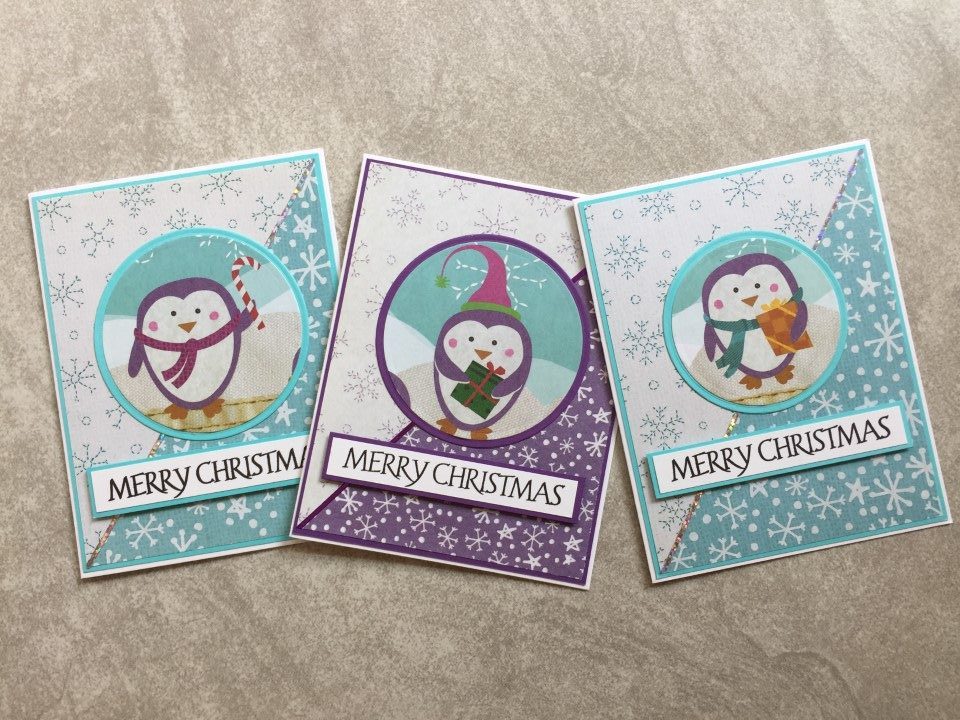
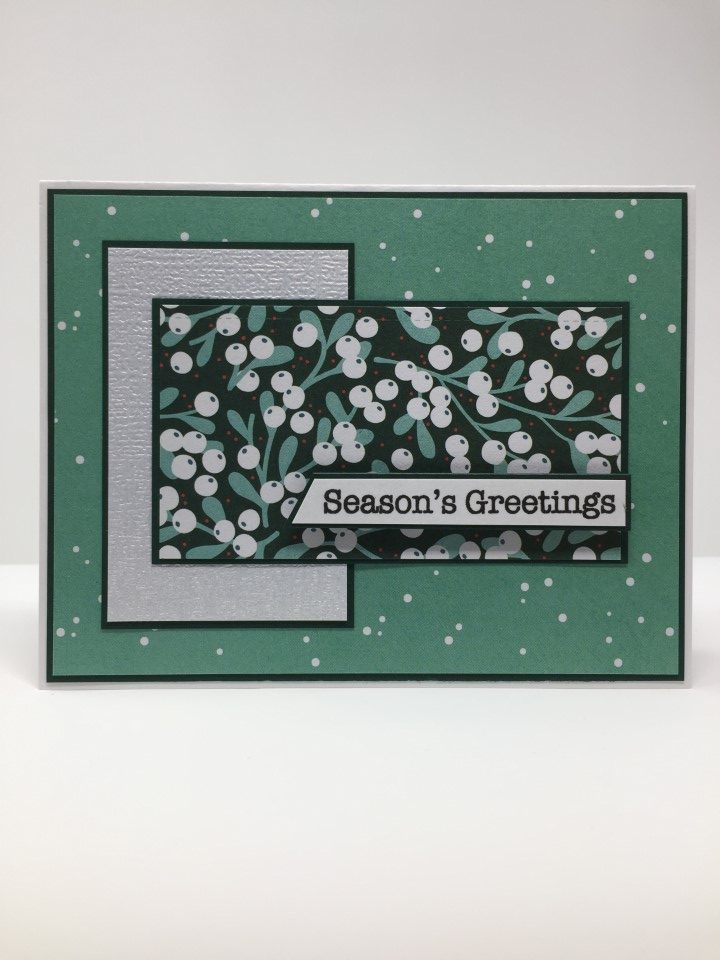
Since the holly paper only had 3 colors, white and 2 shades of teal, it was easy to decide which paper to use for the background.  To break up all the teal, a piece of white textured pearlescent paper was used for the vertical panel on the left side of the card.  To finish the card, a sentiment was stamped and popped up with foam tape.

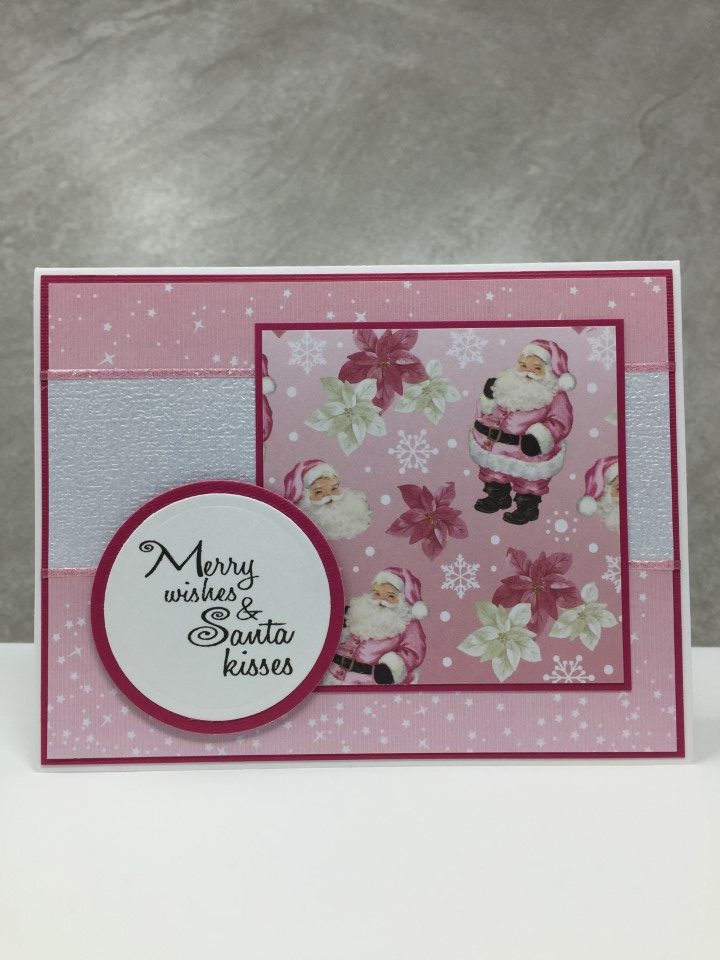
The next card used more of the poinsettia/plaid paper combo.  This time with a multi-colored plaid which picked up on more of the colors in the poinsettia paper.  A gold Love from Lizi peel-off was used to separate the 2 prints.  A white ribbon was tied around the left side of the card and the sentiment was popped up with foam tape.

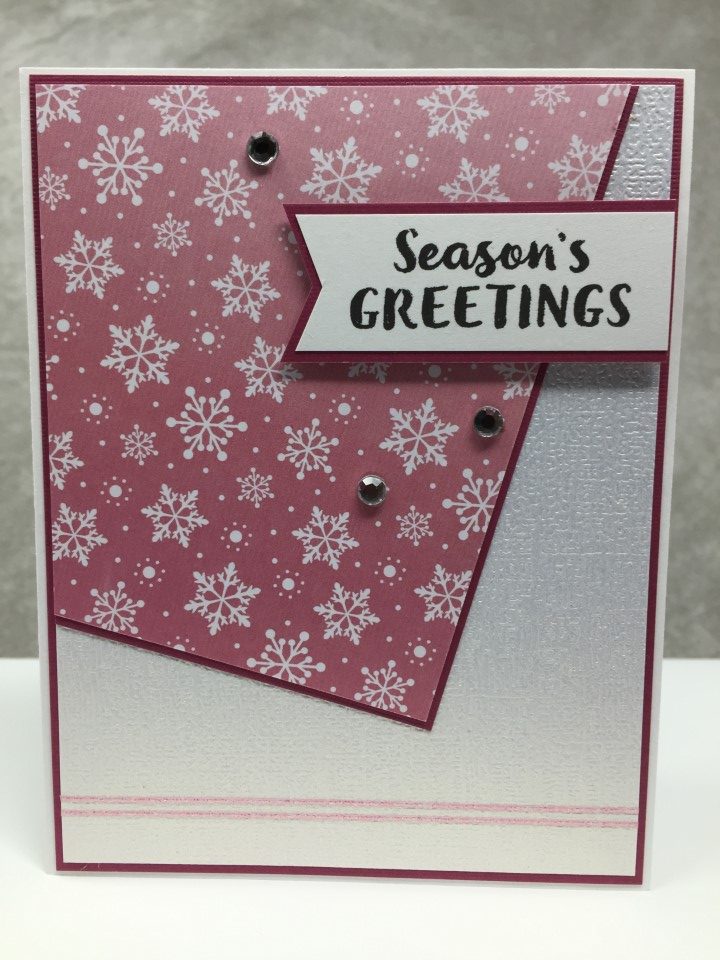
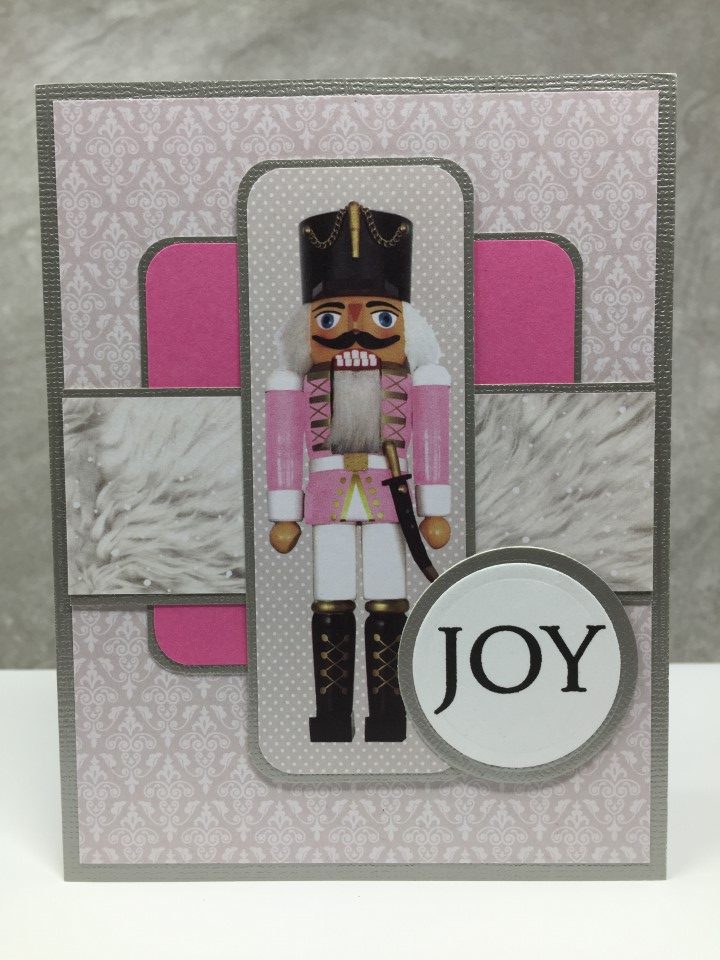
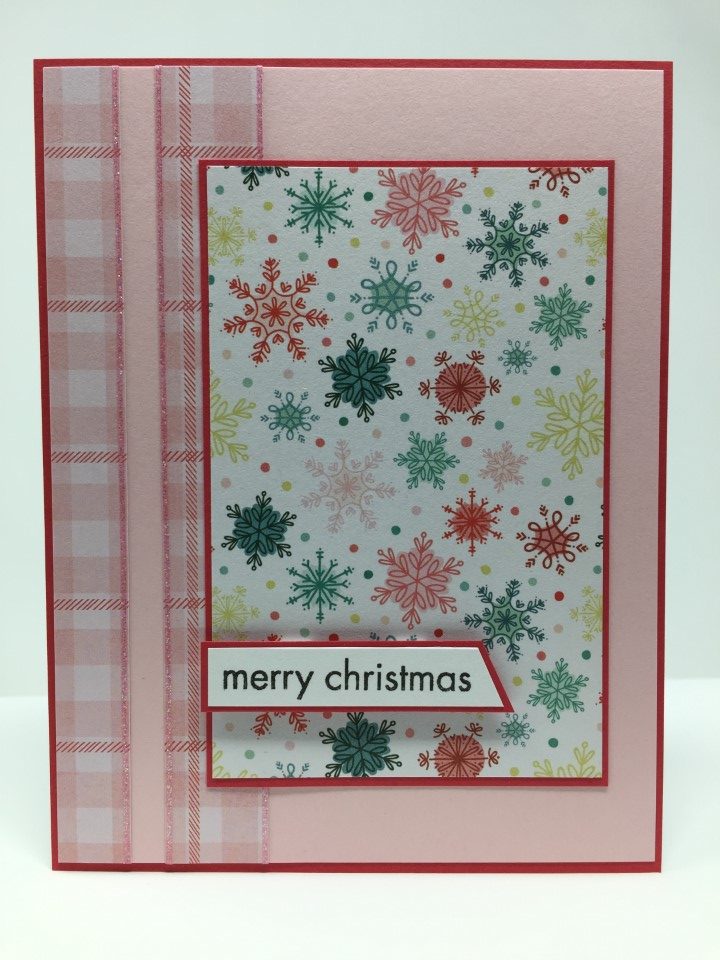
The snowflake print was one of my favorites but I wasn’t sure what to pair it with.  I thought about sticking with the traditional red and green Christmas colors but decided to go non-traditional with pink.  A pastel pink cardstock was used for the background and a pink plaid was used for the strips on the left side of the card.  I added even more pink with the pink iridescent glitter Love from Lizi peel-offs matting the plaid strips.  All of the other matting was done with a dark pink cardstock.

With all of the colors and prints, the paper pad was quite fun to use.  I did end up with more scraps that usual as not all of the papers could be paired together.  The colors in this paper pad reminded me of an Authentique paper pad I had used last year where I also had a few more scraps than normal.  Maybe I’ll have to pull out those scraps and see what I can do.

Making Memories Mistletoe 12×12 Paper Pad

Making Memories Mistletoe 12×12 Paper Pad

I’ve had the Mistletoe paper pad for years and have actually used quite a bit of it.  The papers are the traditional red and green but done in darker red and lighter green shades.  The paper also has a slightly distressed look that is most visible in the solid color papers.

To get started I pulled out the green mistletoe paper which always seems to be my go-to paper from this collection.  Probably because green is one of my favorite colors.  A larger focal panel was used to include as much of the mistletoe image as possible and a tiny green star print was used for the background.  For the strip across the card I used some textured cardstock that has been hanging out in my craft room for awhile.  Memento Bamboo Leaves ink, which was a perfect match with these papers, was used for the sentiment.  For some sparkle I used a Wink of Stella pen to highlight the “ribbon” on the mistletoe paper.

My favorite card used the cardinal paper.  I wanted to include as many cardinals as possible and based on their spacing a horizontal card worked best.  A scallop die was used to cut the bottom edge of the cardinal paper and the matting.  A piece of the red paper, from the same paper pad, was used for the bottom panel on the card.  The sentiment panel was popped up in different places on the cards so that none of the cardinals were hidden.  Once the cards were complete, the bottom panel looked a bit plain so a few gold mirror Love from Lizi peel-offs in different widths were added.

I know the paper pad only included 2 sheets of the green mistletoe paper but I think it multiplies.  I have used this paper numerous times and there always seems to be more.  I had used all of the tiny green print paper, so instead used some more of the textured cardstock for the background.  A few pearls, which worked great with the pearlescent finish of the background, finished the card.

I typically use paper with text horizontally so that more of the phrases are visible, but I was determined to use the few tall thin leftover strips.  I think there is enough of all the phrases to still be recognized as Christmas/winter themed paper.  A cream colored shimmer paper, which matches the color of the text, was  used for the background.  With just those 2 papers and some cardstock matting, the card was a bit boring.  To add some interest, burgundy/gold foil washi tape and a gold Love from Lizi peel-off were added as “matting” to the left side of the focal panel and a few gold Nuvo drops were added to the lower right corner.

The most time consuming card was the last card I made.  The paper pad included a sheet with trees in all shapes, sizes and patterns.  I found the images too large to use for a focal panel and too busy to use as a background.  So while watching TV one evening, I fussy cut all of the trees.  There’s another sheet of the tree paper but I don’t think I’ll have the patience to fussy cut all the trees again anytime soon.  The card itself is quite simple.  The “ground” was cut from paper with a large polka dot print using a Creative Memories Decorative Trimmer, trees were popped up with 2 sizes of foam tape and the sentiment was stamped directly on the “sky”.

There are still a few sheets of paper left in the paper pad but my goal wasn’t to use up all of the paper, just to use up a few sheets.  So, goal complete.

I wanted to make at least 100 Christmas cards to donate and with 120 cards complete I could be done, but I still have one or two 6×6 paper pads that I wanted to use this year.  After all, I need to make room for paper that I pick up at after Christmas sales.  LOL.

Recollections Christmas Pets 12×12 Paper Pad

Recollections Christmas Pets 12×12 Paper Pad

Still catching up on posts…

I purchased this paper pad a few years ago to make Christmas cards for pet people.  The paper wasn’t available as a 6×6 so I purchased the larger 12×12 paper pad.  None of the local Michael’s stores had the paper in-stock so I ordered it online.  The pictures on the website showed a nice mix of traditional red and green, plus some blue and burgundy.  When the paper arrived it had all of the cute dog and cat images but in a more muted color palette than what I expected so I needed to re-think my cardstock selections.

The paper pad included papers which were cat only, dog only and both cats and dogs.  I tried to use some of each and although I am a dog person I started with a cat-only print.  The cat with the snowflake is too cute and I tried to ensure it was visible on several cards.  I added a couple silver brads for embellishment and used Gerda Steiner Designs Deck the Halls stamp set for the sentiment.

The next group of cards used a dog-only print.  I thought about using the same layout that I used for the “cat” cards but the dog images seemed to be spread out a bit more and worked better for a horizontal card.  A dark green cardstock was used for all of the matting and to brighten up the muted colors a cream colored shimmer paper was used for the background.  A small banner using the same green cardstock and a couple gold Nuvo drops finished the cards.

These cards used a paper with both cats and dogs.  To keep the card pet neutral, a simple gray/white polka dot was used for the thin panel on the left side of the card.  To separate the different prints a strip of charcoal gray glitter washi tape was added along the seam.  Burgundy cardstock was used for the small fish-tailed banner and to mat the sentiment panel.

The paper pad included a sheet of border strips which were perfect to use with this layout.  When trimming the strips to fit the card, I tried to cut them so that only full images, like with the Christmas trees, were included.  For the larger panels, coordinating paw print and striped paper were used.  A cream colored shimmer paper was used for the background.  To add some additional sparkle, Love from Lizi peel-offs were added to the edges of the border strips.

The next few cards used some more of the border strips paired with the rest of the dog and cat papers.  One of the border strips had a nice gold foil scalloped border.  For the other strip, a metallic silver washi tape was used to add some shine.  The sentiment panels were popped up with foam tape to add dimension.

At this point there was only one full 12×12 sheet and miscellaneous scraps left.  While the full sheet had lots of cute images, it was also extremely busy.  I decided to try it as a background.  By adding a few border strips and a diagonal striped banner, they toned down some of the busyness of the background paper.  I thought about adding a sentiment, but thought there were enough cute sayings still visible on the background paper.

I’ll be donating most of these cards and thought something besides the traditional Santa, snowmen and Christmas trees would be fun.  Maybe one of the cute dog or cat images looks like someone’s pet and would be the perfect Christmas card.

More Christmas Cards

More Christmas Cards

When I pulled out all of my Christmas supplies I noticed that I had several random sheets of Christmas themed paper.  Some were papers that I picked up on clearance, some came from a local scrapbook store’s “garage sale” and mystery packs (1-2 sheets of various low stock or discontinued papers) and a few were left-overs from 12×12 paper pads.  Before starting on a new paper pad I decided to try and use up a few of the random sheets.

I started with a couple partial sheets that came from the same collection.  There wasn’t enough of either paper to use them for the background so I went with a basic white cardstock.  I originally planned to use red cardstock for all the matting, but after trying it with the green polka dot paper decided I didn’t like the look and went with green cardstock instead.  For some dimension a couple of the die cut circles were popped up using 2 sizes of foam tape.

On these cards the ornament print was used for the large focal panel.  There was only enough green polka dot paper for one card so I used a scrap of red polka dot paper for the other.  This led to matting one card with green cardstock and the other with red cardstock.  I always think it’s interesting how a small change, like the the color of the diagonal strip or the matting, can totally change the look/feel of a card.

For the next set of cards I used 1 full 12×12 sheet of cookie print paper and a partial sheet of green plaid paper.  The papers were different brands but the red and green in both papers were a good match.  Also, the “country” feel of the papers worked well together.  Cookies, fussy cut from the 12×12 paper, were popped up for an embellishment.

By using the plaid paper as the background and smaller pieces of the cookie paper for the focal panel and I was able to make a couple more cards.  For the sentiment panel I used left-over cut-aparts from an older 12×12 paper pad.

The paper for the next card has been sitting in my craft room for at least 10 years.  I’ve used bits and pieces of them but never quite finished up either sheet.  I like the traditional Christmas colors and the silver foil stripe but…  Because it’s a lighter weight paper I find it more difficult to actually work with.  But after 10 years this had got to go.  I made 4 different cards but this was my favorite layout.

The last few cards used paper from an older 12×12 paper pad.  Leftover red and green papers were used for the backgrounds and a candy print paper, with a fun spot gloss finish, was used for the focal panel.  And since I was using up random supplies…  A few coordinating rhinestones that have been hanging around my craft room for awhile were added as embellishments.

Some of the cards used papers from a single collection while others were a combination of papers from different collections and brands.  It was quite fun to mix the papers and the “combo” cards ended up being some of my favorites.  I made 22 cards and used up 4 full sheets and 4 partial sheets of paper.  Not too bad.  There are still several random sheets left that I’ll save for another day.

Recollections Sugar & Sparkle 6×6 Paper Pad

Recollections Sugar & Sparkle 6×6 Paper Pad

I needed to get serious about making Christmas cards but I wasn’t quite in the red and green Christmas mood.  So I decided to use a non-traditional Christmas color – PINK!  Other than a couple sheets of pale gray prints, everything in the paper pad is pink.  There were some really cute Santa and snowflake prints along with stripes, damask and even a pink nighttime sky.  With the many different shades of pink I figured it might be difficult to find cardstock for matting and originally planned to use black cardstock.  After trying it with the first card I didn’t like the look and searched through my craft room to find a few sheets of pink, gray and metallic cardstocks that would work.

Since my favorite paper was the Santa print I decided to start with that.  I kept it simple using the pink sky as a background and the Santa print as the focal panel.  Using the soft white shimmer paper for the strip across the card and edging it with some pink iridescent Love from Lizi peel-offs added a bit of shine.  The “Merry wishes & Santa kisses” sentiment was a perfect match for the paper.

For the next few cards I decided to use one of the snowflake prints.  I started by cutting the paper to 4 x 5 1/4 inches and then cutting it roughly in half on the diagonal.  This gave me 2 pieces to use for the top portion of the cards.  Pink iridescent washi tape separates the snowflake print and the white shimmer paper on the bottom portion of the card.  The embellishment, a snowflake embossed on a circle panel, mimics the images on the printed paper.

The next card used another snowflake print with a textured pearlescent cardstock.  Dark pink cardstock was used for matting to ensure there was enough contrast with the varying shades of pink in the snowflake papers hombre background.  A few rhinestones and Love from Lizi peel-offs added a bit of sparkle and completed the card.

Since it was my favorite, I made sure to use up all of the Santa print paper.  Pink metallic cardstock was used for the matting and more white shimmer paper was used for the background.  Leftover pieces of a damask and stripe print were used for the other panels on the cards.  The horizontal card looked a bit bare, so a few pink Queen and Company goosebumps were added to fill in some of the empty space.

One of the last cards I made used the cute nutcracker cut-apart and the last full sheet of 6×6 paper.  Pink cardstock from my craft room was added for some color and a leftover piece of fur print paper was used for the strip across the card.  Everything was matted with a matte silver metallic cardstock.  To add a hint of sparkle I used a Wink of Stella pen to highlight the gold on the nutcracker’s hat, boots and uniform.

This paper pad had so many fun prints.  The only downside was that the paper is double-sided, making it hard to decide which side/print to use.  But, I’ll have plenty of opportunities to try each print since I got this paper on a super sale and picked up a couple extra paper pads.

Out of Season Motivation

Out of Season Motivation

I am way behind on my blog posts.  I like to post pictures of the cards within a week or two of making them so that I can get them ready for donation – which includes stamping the charity information on the back of the cards and sealing each card/envelope in a cellophane bag.  This can be quite time consuming so I try and stay caught up.

I typically post in the order that I make the cards and have several drafts just waiting to be posted.  To get caught up I’ll need to do a couple posts a week and will start with the post I had intended before I got completely side-tracked with Christmas cards.

After watching a Valentine card making video, I was inspired to make a couple Valentine cards.  I don’t usually make cards “out of season” and I didn’t want to make all of the Valentine cards I plan to donate, just take a short break and work on something different.

To get started I pulled out a paper pad I’ve been working on for the past few years.  It’s a 48 sheet 12×12 paper pad so there’s a lot of paper.  I’ve used up several of the patterned papers but there are still a few sheets with cute puppies and ice cream prints.  There are also several sheets of tiny prints and tone-on-tone papers that worked well for backgrounds.

To keep it simple I pulled out a favorite go-to card sketch.  It’s a great sketch for featuring a cute print as the focal panel.  Also, since there’s only 3 pieces besides any matting, it’s quick and easy to cut out and assemble multiple cards.  Keeping with the simple theme I used coordinating stickers (a nice surprise from a Michaels’s mystery box) for the sentiments and embellishments.

By making just a few cards I didn’t get tired of the paper or the theme and managed to use up a couple more sheets of paper.  I’ve still got several sheets left but I’ll eventually get through most of the paper pad.  It’s hard to use up an entire 12×12 paper pad.  LOL.

First Batch of Christmas Cards

First Batch of Christmas Cards

I wasn’t ready to go into full Christmas mode but wanted to get a bit of a start, so I pulled out the Recollections Christmas paper pad.  It’s a huge paper pad, 180 12×12 sheets, with lots of patterns and colors which makes it easy to pull out a couple sheets and make a few cards.  Since they are 12×12 sheets, I was able to make several of each card.

To get started I used some of my favorite papers in the paper pad – snowmen and snowflakes.  With bright magenta backgrounds, it’s not the typical winter color scheme which I think makes it even more fun.  To keep the cards nice and bright I used magenta cardstock for the matting and Recollections White Gold shimmer cardstock for the background.  I used some thin foam tape to pop up the sentiment and added a few matching sequins.

Several of the papers in the paper pad have larger images/scenes, which would be great for scrapbooking.  Since the images are really cute I wanted to find a way to use them on cards.  I found a simple sketch which had a large focal panel.  With some strategic cutting I was able to trim the larger images down to card-size.  To create the backgrounds I used 2 different patterned papers from the same paper pad – red and green for the reindeer image and blue and white for the snowmen image.  A coordinating Love from Lizi peel-off was added to separate the papers.  As the cards will be sent overseas glitter cannot be used.  So for some sparkle, the reindeer noses and snowmen hats were highlighted with a shimmer pen.

One of my favorite images included the cute penguins.  Because of how they were spaced on the paper, they didn’t work with the previous sketch, but I think this sketch worked even better.  Various sized circle dies were used to cut out each of the penguins.  Snowflake prints, cut on the diagonal, were used for the backgrounds and paired with coordinating blue and purple cardstock for the matting.  Love from Lizi peel-offs were added along the diagonal and sentiments were popped up with thin foam tape.

The cards will all be donated to the Cards for Soldiers program where blank greeting cards are provided for service members to send back home to friends and family.  With the fun colors and cute images I think these cards will be great for children.

Autumn Cards

Autumn Cards

I’m starting to get in the autumn holiday mood but didn’t want to pull out all of the Thanksgiving stamps and paper pads.  Instead I decided to use a layout/technique that I’ve used in the past for many different occasions – birthday, baby, spring, etc.  I only needed a couple ink pads, a few stamps and some printed paper in fall colors.

As all the cards used the same layout and sizes of paper I followed an assembly line process to create the cards.  To get started I cut several sheets of white cardstock into 2 7/8 x 4 1/8 inch pieces.  I then picked an ink pad (red, yellow or orange) and stamped a circle on the left side of the white cardstock.

After stamping a circle on 6-10 pieces of white cardstock, I switched to another colored ink and stamped the 2nd circle slightly overlapping the 1st.  I followed the same steps for the next 3 circles.

I then switched to brown ink and stamped a leaf in the center of each circle.  I think changing the direction of the leaf gives the feeling of motion, like leaves falling from the trees.

The final step for the white cardstock panel was to add the sentiment.  As the circles were all randomly stamped, the space for the sentiment was slightly different on each panel.  Again using brown ink, I stamped an appropriately sized autumn sentiment on each panel.

While the ink was drying I cut the rest of the papers – background paper to 4 x 5 1/4, coordinating matting to 4 1/8 x 5 3/8 and matting for the stamped pieces to 3 x 4 1/4.  By then the ink was dry and I was able to assemble the first batch of cards.

The first few batches of cards used 12×12 paper from an older Recollections paper pad for the backgrounds.  I was able to make 6 cards from each 12×12 sheet.

The final few batches used partial 12×12 sheets and a few 6×6 sheets for the backgrounds.  The batches were smaller, but it was interesting to see how using the different backgrounds changed the look of the cards.

I can’t decide if my favorite uses the wood panel paper or the brown checked paper as the background.

All of the stamping was a bit time-consuming but with an assembly line process and small batches it was easy to complete about 50 cards in just a few days.  And, while the layout and supplies used are all the same, each card is slightly different as everything was hand-stamped.

Pebbles Trick or Treat 6×6 Paper Pad

Pebbles Trick or Treat 6×6 Paper Pad

Since I still had all of my Halloween stamps and embellishments out, I decided to do one more Halloween paper pad.

The paper pad had 2 sheets of 1 1/2 x 2 inch sentiment cut-aparts.  The cut-aparts were all very cute so I decided to challenge myself to use as many of them as possible.

One of my favorite cut-aparts was the “Got Candy?” sentiment.  The paper pad included a candy print paper so that was easy.

The spiderweb print paper was a bit busy so I kept it the only printed paper on the card.  The cut-apart had a cute sentiment and a small spider image.  For some color I used orange cardstock and some orange rhinestones on the spider die cuts.

I also liked the “31” sentiment which had a spider hanging from the “3”.  I added a few die cut spiders, orange and purple rhinestones and silver and black Love from Lizi peel-offs.

There were still several cut-aparts left.  I found a sketch that would work with the cut-aparts and the remaining 6×6 paper.

I still had several sheets of 6×6 paper but they seemed more like backgrounds than focal points.  I pulled out a larger Halloween stamp, a haunted house, and used it as the focal point with a smaller sentiment.  I didn’t want to add any color, so used a silver holographic Love from Lizi peel-off to separate the printed papers.

With the cards from this paper pad I now have over 100 Halloween cards complete.  I think this is enough to donate and I’m ready to move on to something new.

Halloween Paper

Halloween Paper

When I was pulling out supplies for my last batch of cards I came across several 4 1/2 by 6 pieces of Halloween paper.  I believe it is from Recollections but the paper pad cover is long gone.  Since I was already making Halloween cards I decided to use up these few sheets of paper.

The papers were all Halloween themed but not easily combined.  I ended up using several non-Halloween papers for many of the backgrounds.

I really liked the new-to-me card sketch I used with the previous paper pad and decided to use it again.  I combined the Halloween print with a black and purple background paper and bright green cardstock.

The orange spider print paper was very busy.  I decided to keep it simple using a tone-on-tone black/gray print paper for the background.  For an embellishment I used the spider die to add a spider on the sentiment panel.

My favorite card was actually the last card I made.  I was able to use up several of the smaller pieces of scrap paper and some black and white bakers twine.

I kept the embellishments to a minimum using scalloped paper borders, die cuts and bakers twine.