Craft Smart Happy Pawlidays 6×6 Paper Pad
I can’t believe it’s only a little over a week before Christmas and I haven’t posted any Christmas cards. I have been busy making them. I took the first batch to my little antique booth in early November and have made several more small batches to keep up with purchases.
I started making Christmas cards in late October/early November and found it hard to get into the holiday mood. Since I work better with a project, I challenged myself to use up some of the partial 6×6 paper pads in my Christmas paper stash. One of the first paper pads I pulled out was Happy Pawlidays by Craft Smart which features several fun cat and dog images.
Since there were still several full 6×6 sheets, I focused on layouts that included larger panels. For the first card I used a tone-on-tone plaid for the background and a dog print for the focal panel. As part of my “challenge” I had also pulled out some older supplies for embellishments which for this card was baker’s twine. The tan and white matched the color of several of the dogs in the pattern paper and fit the feel of the card. The sentiment is stamped with Versafine Vintage Sepia ink and popped up with foam tape to sit nicely over the baker’s twine.

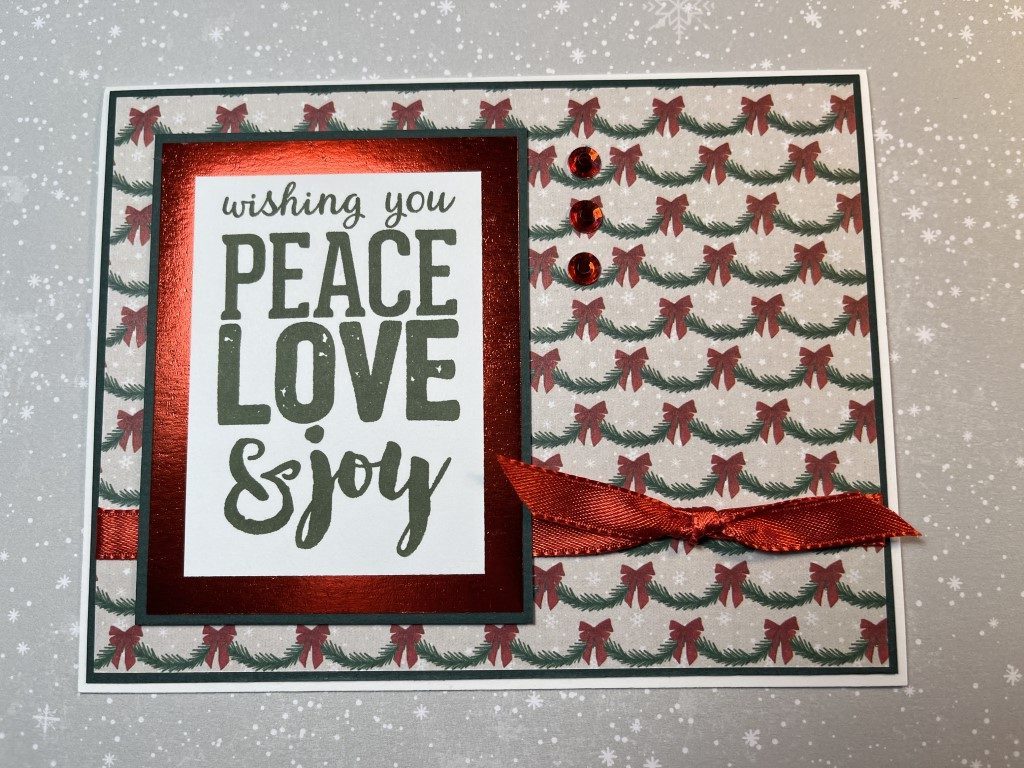
One of the things I liked about this paper pad is that it included several papers that weren’t pet specific which made them easy to use by themselves or paired with non-pet prints. For this card, the pine garland print was used as the background. The large sentiment, stamped in Versafine Olympia Green ink, was made even larger by double matting it on red metallic paper and then again on dark green cardstock. Embellishments on this card include some red satin ribbon and a few red rhinestones.
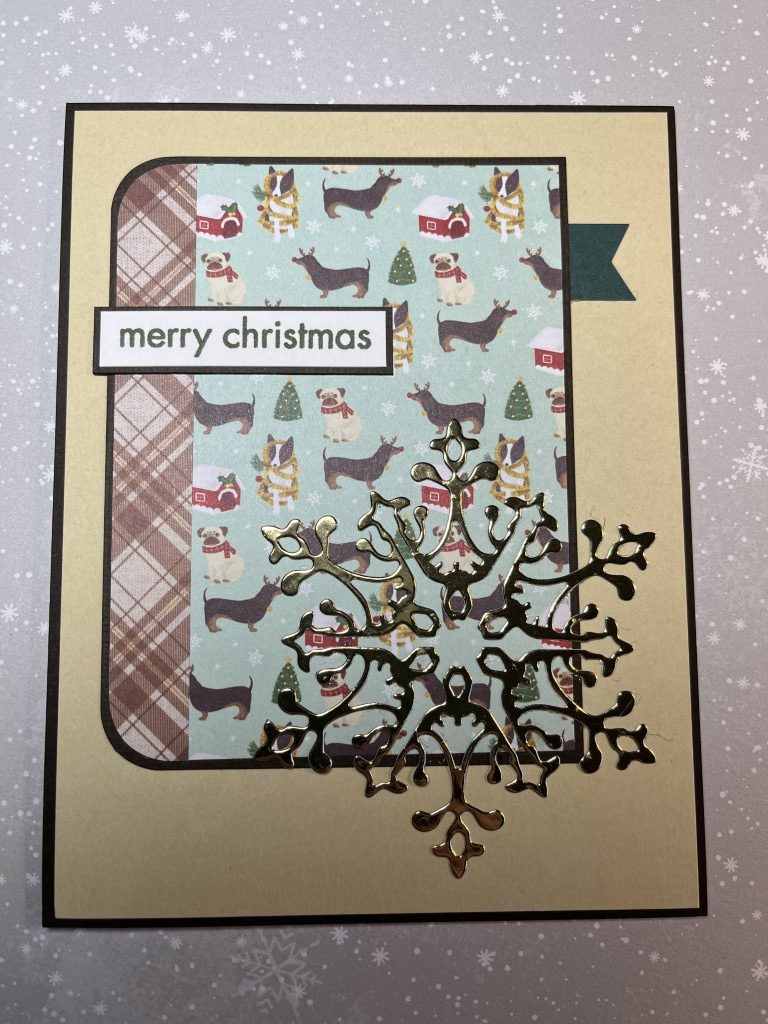
I wasn’t sure about this card. There wasn’t a large enough paper from the paper pad to use for the background. I tried some red and green cardstock from my stash but couldn’t find one I liked. I also tried a white shimmer paper but it washed out the green pattern paper. I ended up using a tan sandy color that coordinated with the brown plaid. The card sketch featured a large embellishment in the lower right corner of the card. I used my go-to Christmas embellishment – a die cut snowflake. The gold metallic paper added some much needed shine to the card.
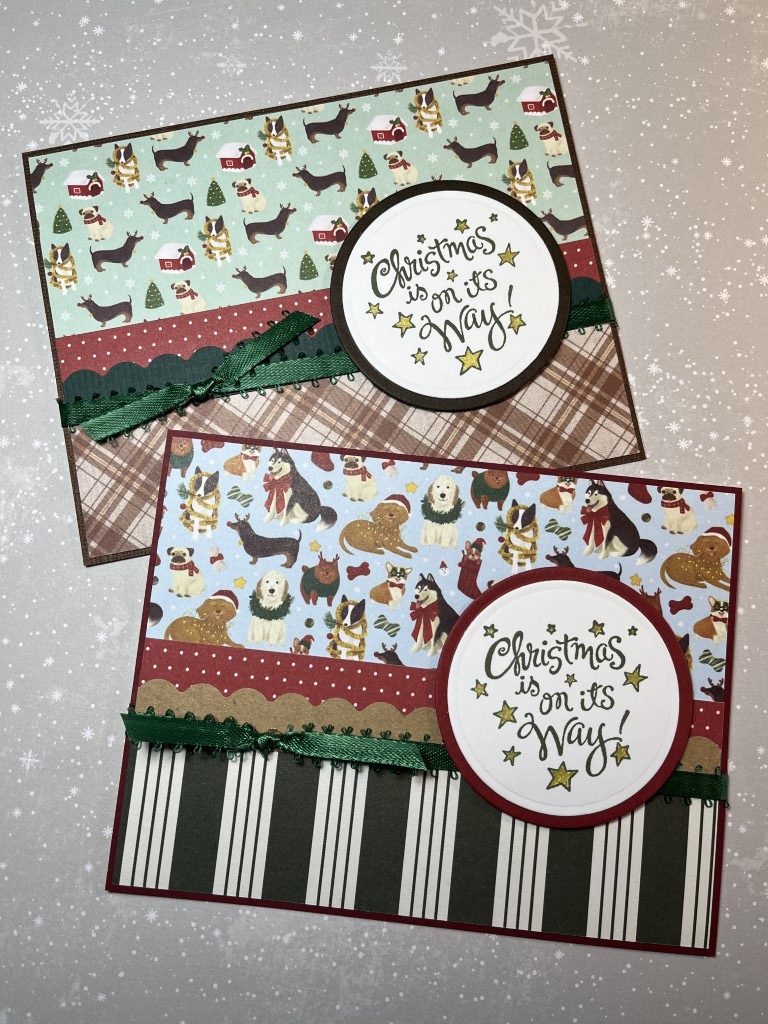
I didn’t realize it until I was working on this post but this is the only card that featured a cat print. I’m not sure if I had already used up most of the cat paper or if it just happened to be the flip side of the tone-on-tone papers that I used. A kraft parentheses border separates the cat print and the tiny polka dot print. In an effort to use some older embellishments, I also added a couple strips of washi tape that I’ve had in my craft room for years. To keep the sentiment strip from just “floating” on the card, I tucked it behind a die cut pine tree.

I was now down to small pieces and longer strips. After much rearranging, I was able to pair up several of the longer pieces to use for this simple design. Along with the red polka dot print, a scalloped border and green satin ribbon separated the 2 busier prints. To brighten up the sentiment panel, I colored the stars on the panel using a gold metallic pen.
At this point I’m calling the paper pad done. There are a few smaller pieces that I’ll toss in my scrap box. I may try and use them for some Christmas scrap cards but will more likely use the flip sides which are non-pet and non-Christmas prints like the polka dot and plaid for some general cards.