Recollections Wrapped With Care 12×12 Paper Pad

Recollections Wrapped With Care 12×12 Paper Pad

Recollections Wrapped with Care was another paper pad I had used a few sheets from last year.  Like the Bright Night paper pad I struggled with this paper.  I like the pine trees, presents and wreath prints but for some reason I struggled to make them work for me.  With the red/green colors and wreath and pine tree prints it is a more traditional color palette and theme and will provide some variety when displayed in my booth.

Since I enjoyed using the strips/borders in the previous paper pad I decided to look at those first.  I thought the “Peace and Cheer” strip would work great as a sentiment panel and it already included a nice gold border.  To bring out the small red berries on the wreaths I added a few red metallic brads.  For the second card I used some more kraft cardstock as the background.  I think it gives the card a rustic/country feel.  I added a scalloped border on one side of the vertical strip and a couple gold die cut snowflakes for a little shine.

If I had to pick a favorite paper, I think it might be the present print.  It was a bit difficult to work with since the presents were spaced out quite a bit but with some strategic trimming I was able to get a focal panel I was happy with.  I paired this with the green/white ribbon stripe.  To brighten everything up I added a Christmas red strip across the card and a few red textured rhinestones.

I liked the layout on the next 2 cards but I’m not sure I choose the best prints to feature.  I like the bright red stripes on the card on the right but I think the card on the left was more successful.  I used a scalloped border on both cards to separate the papers – red on one, gold metallic on the other.  For a bit of texture I sprinkled on a few brads, again red on one card and gold on the other.

I only ended up making 10 cards – 2 of each.  I really can’t figure out how to use the paper, so instead of struggling on I’m going to move to something different. It is pretty paper but might just be better suited to scrapbooking than cardmaking.  It is a nice heavy weight paper so it might end up for sale in my booth.


Recollections Bright Night – Part 2

Recollections Bright Night – Part 2

I’m still going with the Recollections Bright Night paper pad.  There was a lot of paper I wanted to use, especially more of the strips/borders.

The next 2 cards, my favorites, both used a border along the bottom of the card.  The layout is the same for both but I modified the size of the striped panels to accommodate the width of the borders.  I used a narrower sentiment panel on the gray/white stripe card so as not to cover up too much of the ornament border.  I was able to use a larger sentiment panel with the snowflake border.  For embellishment I added a gold Love from Lizi peel-off to separate the borders from the striped papers and a coordinating die cut – a gold ornament that I offset on a black ornament and a gold snowflake.

I used the same layout on the next 2 cards.  I paired the black/white snowflake paper with the last of the knit print paper.  As the papers were all black, white and gray I thought it needed something to brighten it up.  I added a metallic silver strip behind the focal panel and 2 die cut silver snowflakes.  The knit print made me think of sweaters, scarves and staying warm, so I used the “Warmest Wishes” sentiment.  Since I had only used the bow paper once there was still almost 1 full sheet.  I tried it with other papers but only liked it paired with the gray/white stripe.  So instead of making something I didn’t like I used that combo again.  A black strip behind the focal panel and a die cut silver metallic bow completed the card.

For the next few cards I had looked for a layout where I could use 2 inch strips of paper.  I’m used to having 2 inch strips when using 6×6 paper but I’m not sure why I ended up with so many when using 12×12 paper?  The backgrounds are all papers from the Bright Night paper pad.  The backgrounds were actually portions of 12×12 sheets which featured large images along the top or bottom edges of the paper.  I added a couple Love from Lizi peel-offs across the card and although you only see a small portion of them, they do add a bit of interest and shine.

The last few cards I made used quite a bit of the sentiment paper – as a background on 1 card and the focal panel on another.  I was also able to use 1 more border, the poinsettias, along the top of the striped card.  With the sentiment paper as the focal panel, I skipped adding another sentiment and just added a few snowflakes die cut from gold metallic paper.  The sentiment paper also worked well as a background for the poinsettia paper (my favorite).  I added another die cut gold metallic snowflake and some gold Love from Lizi peel-offs.  For this card I did add a small sentiment in the lower corner of the focal panel.

For all of the cards, I made a least 2 using each layout and paper combination.  This gives me one card to use/sell and another that I’ll save and donate to the Cards for Soldiers program.  The cards I plan to sell will be displayed on the card display board in my booth.  I don’t want the cards to all look the same and I want to offer a nice variety.  I know that these papers won’t be to everyone’s taste.  So even though there is still paper left, I am moving on to another paper pad which will bring in some more color and patterns.

Recollections Bright Night 12 x 12 Paper Pad

Recollections Bright Night 12 x 12 Paper Pad

Do you ever get bored with your hobbies?  I’ve had a hard time getting interested in card making lately.  Other than a few Halloween and Thanksgiving cards to put in my antique booth I haven’t made any new cards.

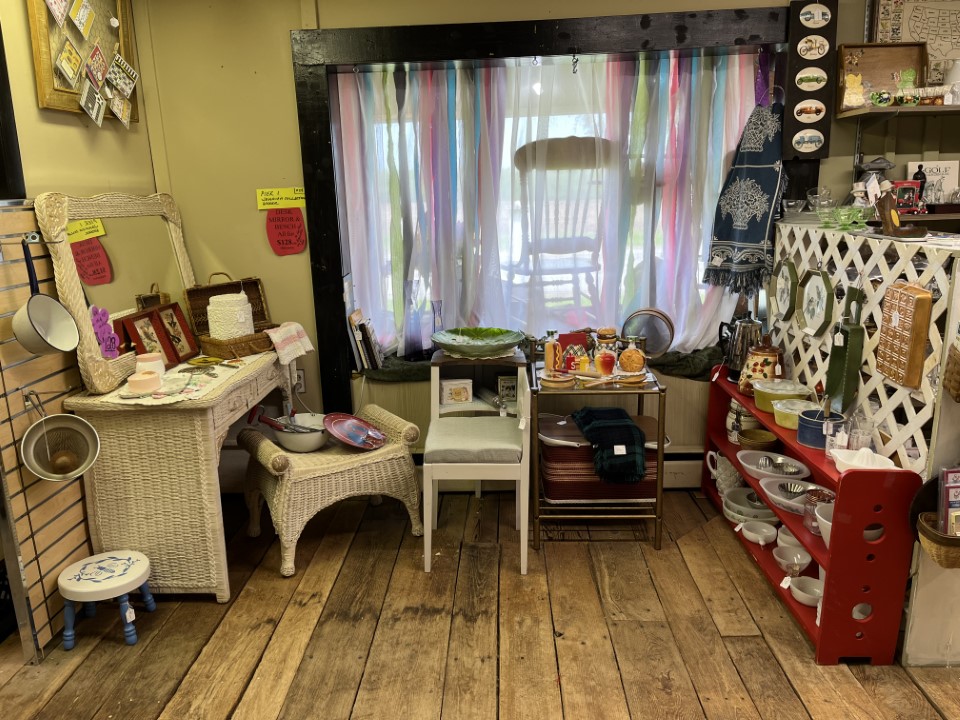
For the last few weeks I have been busy getting Christmas items ready for the booth – pricing and tagging everything from ornaments to books, kitchenware to collectibles.  I’m amazed at how much Christmas “stuff” I’ve accumulated.  Although this has been time consuming and sometimes tedious, it did get me motivated to make Christmas cards.  I don’t want to have my booth all done up for Christmas and not have any Christmas cards.

So, I pulled out a couple older Recollections 12×12 paper pads.  I used a few sheets out of each pad last year but with 48 12×12 sheets it takes me forever to use up 1 paper pad.  I decided to start with Recollections Bright Night.  I thought it may be a bit of a challenge since I had a hard time with this paper last year, but surprisingly I found it much easier to work with this time around.

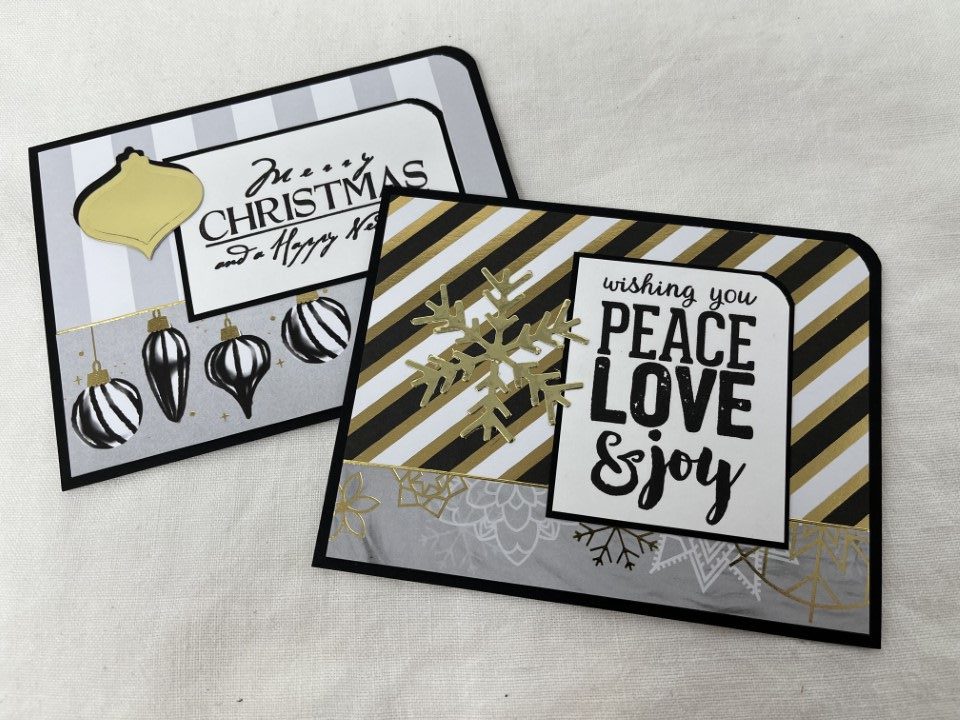
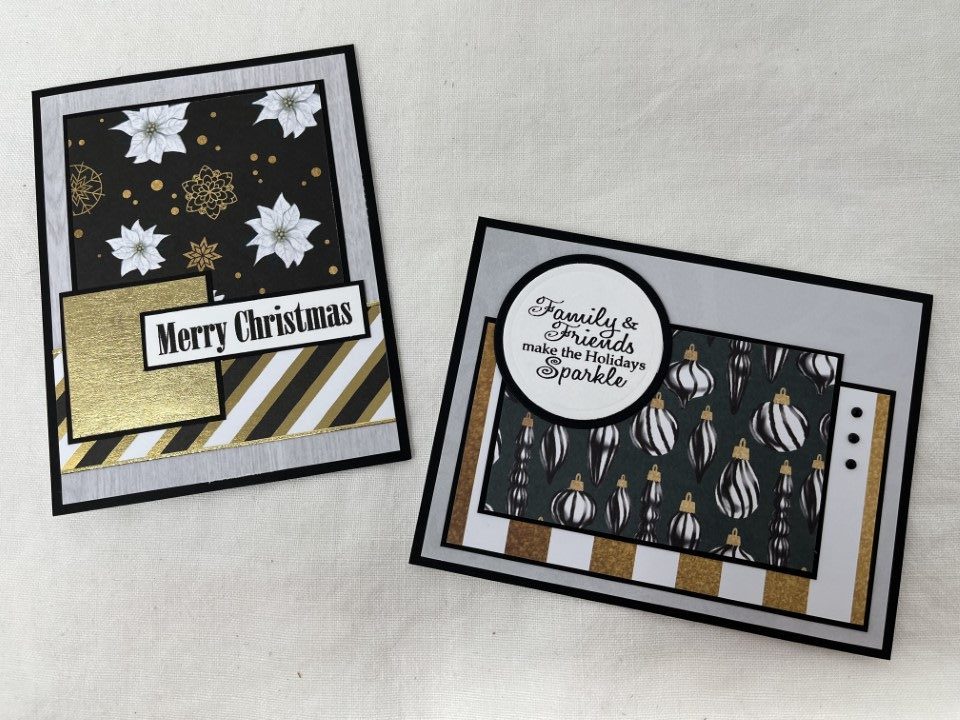
One of my favorite papers in the paper pad is the white poinsettias on the black background.  With the gold snowflakes and the sharp contrast it is a beautiful paper.  I paired it with the black, white and metallic gold diagonal stripe paper and added a small square of gold metallic paper from my stash to anchor the sentiment.  For the background I used a gray woodgrain print also from the Bright Night paper pad.  With all the metallic gold, the only embellishment I added were some Love from Lizi peel-offs along the striped paper.

For the second card I used nothing shiny.  I think the gold and white stripe paper is meant to look like glitter but there’s actually no glitter on it.  The focal panel features a black/white/gold ornament print.  The bit of gold on the ornament caps coordinates nicely with the gold stripe.  The background is some more gray paper from the Bright Night paper pad.  For embellishment I added a few black mini brads.

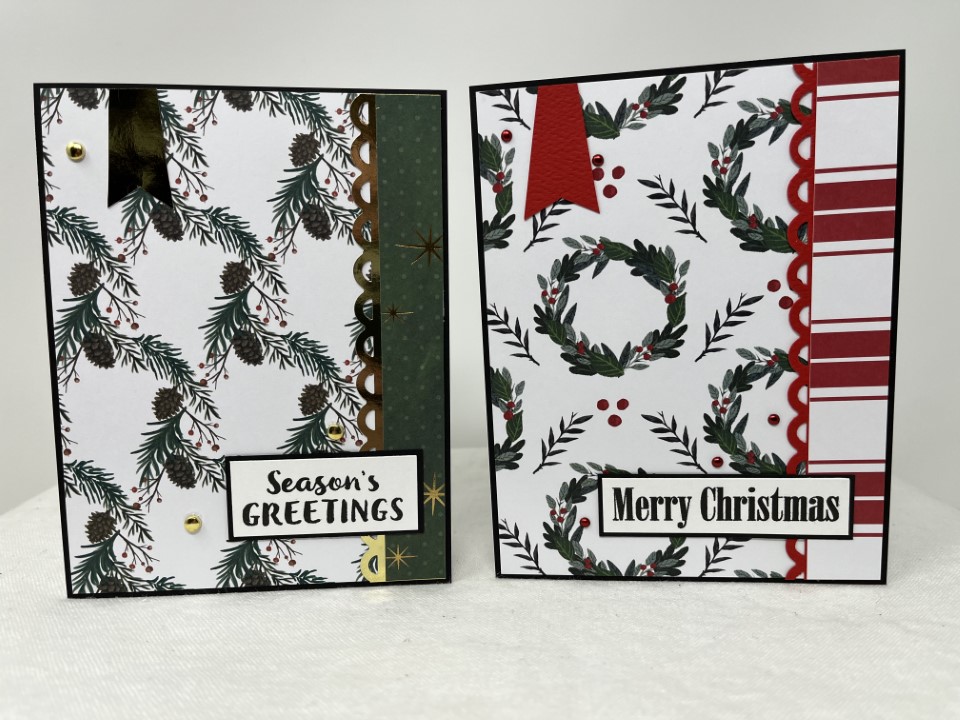
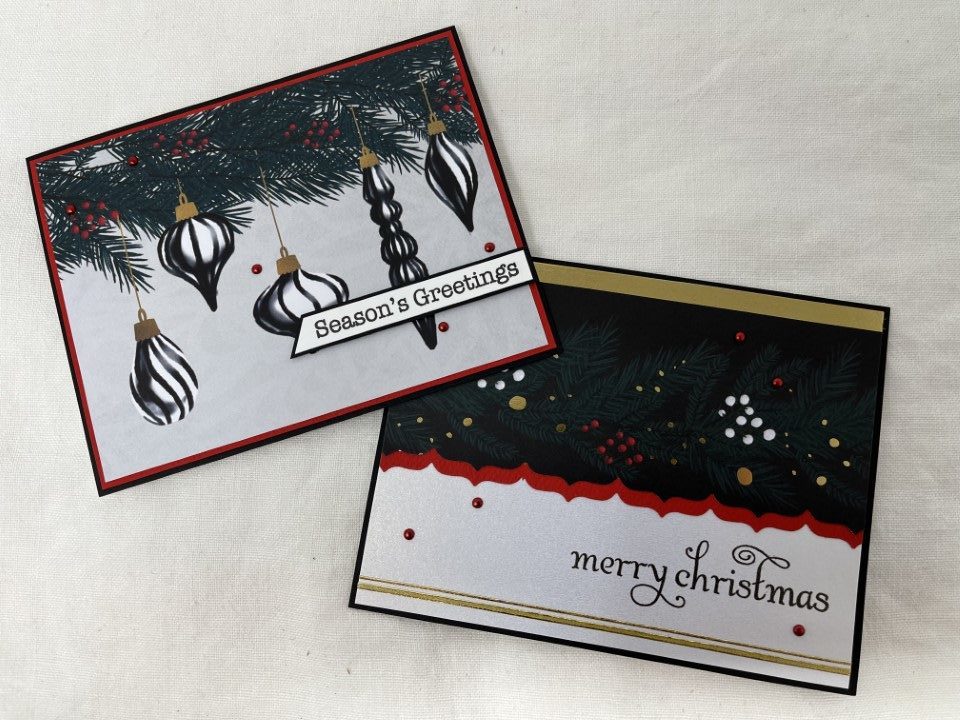
The next 2 cards allows the paper to do all the work.  For the first card the entire print is the top portion of a 12×12 sheet of paper.  I simply trimmed the top 4 inches off the paper, centered the ornaments and trimmed to 5 1/4 inches.  To highlight the small red berries in the greenery, I added a double matting of bright red and black cardstock.  A few metallic red mini brads, a sentiment and this card was complete.

The paper pad included a 12×12 sheet with several strips/borders.  For the second card I used one of the wider borders for the top portion of the card.  The border already included the metallic gold stripe and I added a few gold Love from Lizi peel-offs to the bottom of the card to bring in some more gold.  I used a parentheses border punch and red cardstock to add some interest against the white paper.  The sentiment is stamped directly on the white shimmer paper and heat embossed to ensure it doesn’t smear.  I added a few more metallic red mini brads to finish the card.

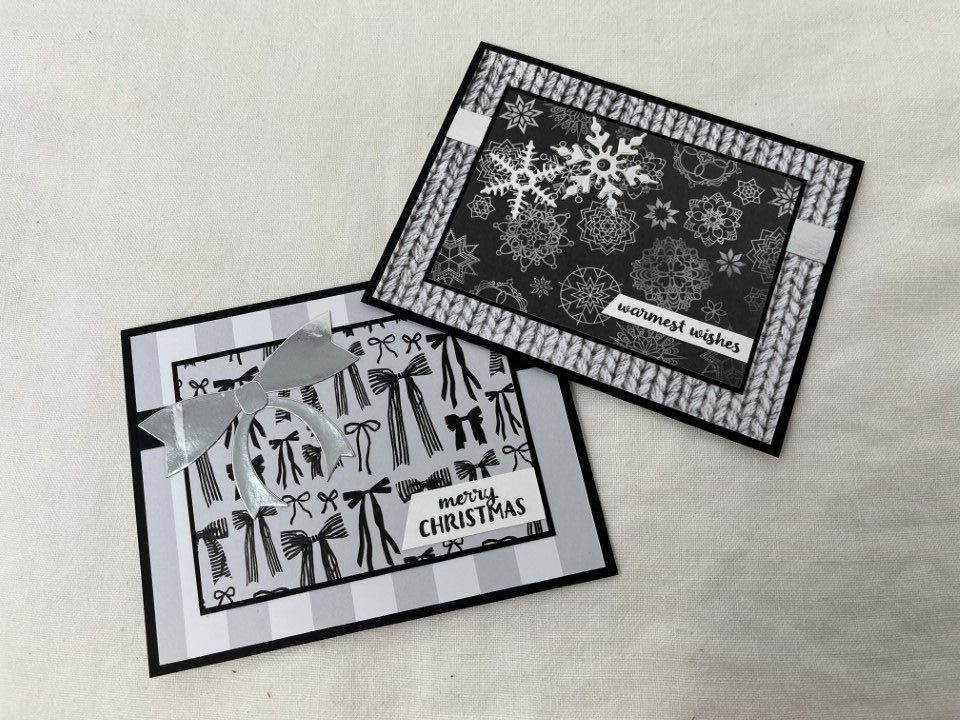
The next two cards are a bit muted with all of the gray, but I think they have an elegant look to them.  The first card uses some more of the ornament paper.  I contemplated using the sentiment paper as the background but thought it might be too much.  Instead I trimmed a strip and used it behind the ornament focal panel.  A separate sentiment wasn’t necessary but stamping in on white paper with no matting breaks up some of the busyness of the ornament paper.

The second card used a simple layout and gave me a chance to feature the bow print paper.  I matted the bow paper with black cardstock and added a scalloped border down one side of the panel.  A thin black/silver ribbon tied around the panel added a bit of dimension.  A few clear rhinestones added some sparkle and a crisp Merry Christmas sentiment completed the card.

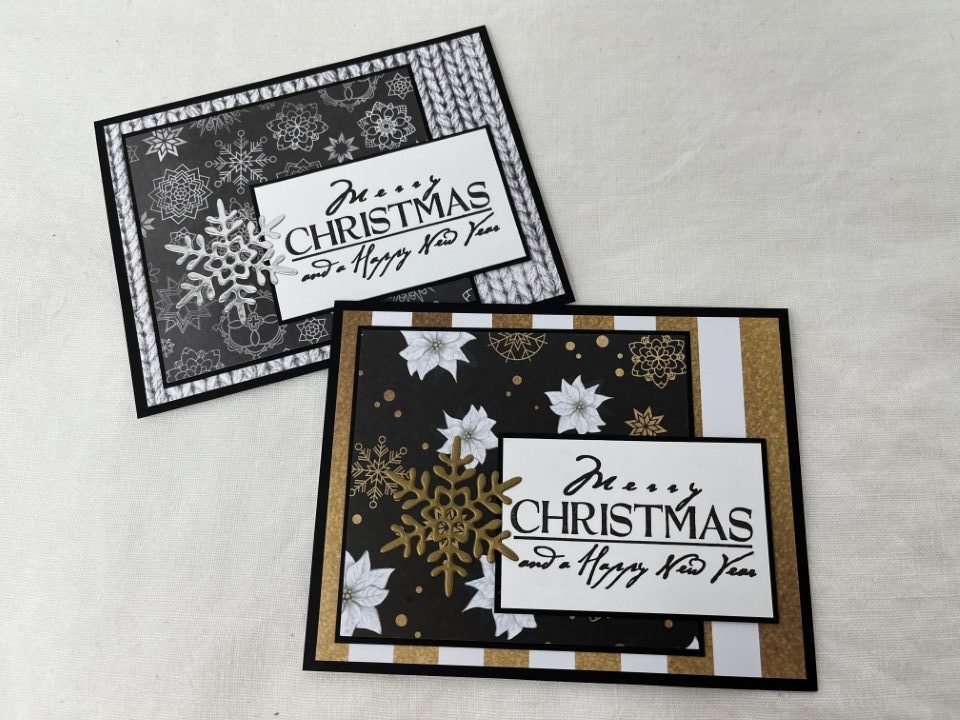
The next two cards use the same layout and snowflake die cut but have a very different feel just by switching up the paper.  The first card is completely monochromatic using only black, white and gray papers.  To keep it from being too boring a very shiny silver metallic paper is used for the die cut snowflake.  The second card also only includes 3 colors but the black, white and gold is much brighter.  The snowflake die cut on this card is cut from a matte gold metallic paper.

To get me started with this paper pad I had pulled out 1 sheet (or partial sheet) of each of the different papers.  I didn’t plan on using all of the paper but wanted to see what was available.  Even after making over 16 cards I still had quite a bit of paper left that I wanted to use and paper combinations I wanted to try.  Since I was still having fun I decided to continue on.  I’ll post the rest of the cards I made using the Bright Night paper soon.

Echo Park Back to School 6×6 Paper Pad

Echo Park Back to School 6×6 Paper Pad

It’s been months since I last posted some cards.  I’ve been making them, just not posting them.  So, I figured I would try and get back on track.

With all the back to school ads on TV, I thought I’d pull out Echo Park’s Back to School 6×6 paper pad.  I used a few sheets and cut-aparts last year and since it’s a double-stack, 48 sheets instead of the usual 24, I had plenty left.

Instead of trying to use up the entire paper pad I decided to pull out a few sheets and just make a couple of cards.  For inspiration I pulled out an old Archiver’s card sketch book.

For the first card I decided to try a sketch I’ve never used before.  All of my card bases have the fold on the longest side and for this card I needed to cut a new card base with the fold on the shortest side.  I think this as referred to as a hotdog fold vs. a hamburger fold.  Once I had the card base, I trimmed off the bottom 1 inch of the front flap and assembled the front of the card to match the sketch.  I added Love from Lizi black glitter peel-offs between the star and alphabet print papers, a few a, b, c plastic letters (that I’ve had in my craft room for ages) and popped up the School Days cut-apart with foam tape.  Once the card was done, I thought the white card base showing behind the front panel was too stark with the papers I had used so I added a small strip of black cardstock to the inside bottom of the card.  Overall, I liked the card sketch but think it might work best if using colored cardstock for the card base.

The next couple of cards used the same layout, but different papers.  The bottom strip on both cards are more cut-aparts from the paper pad.  I popped up an “apple for the teacher” die cut, made using scraps from this paper pad, on both cards.  For a sentiment I stamped Back to School and then using gel pens colored in the letters to coordinate with the paper.

For the next 2 cards I wanted to use the backpack paper, one of my favorites from the paper pad.  Since the top panel on the sketch was 3 x 4 inches, I was able to get 2 panels from a single sheet of paper.  For the bottom panels I used some of the partial sheets left over from other cards.  Before adding the red strip to cover the seam between the 2 panels, I added a small flag cut from scraps of pattern paper.  To finish the card I wrapped some black and white twine around the card and tied a small bow to the left of the flag.

I plan to add the cards to my booth soon for any back to school “well-wishers” — either kids heading back to school or maybe a parent who’s ready for their kid to head back to school.  LOL.

Antique Booth News

Antique Booth News

No new cards in the last couple weeks.  I have been busy getting stuff ready to move into my bigger antique booth.  I’ll still have my “old” booth which has my card display but now I’ll have room for some smaller furniture pieces.  In addition to the booth, we created a website (Rustandsuch.com) to showcase items that are currently available in the booth or that will be coming soon.

While I was the featured vendor at Touch of Country Mall last month I had space in an extra booth where I was able to display a beautiful wicker set – vanity/desk, bench and mirror.  I was disappointed it hadn’t sold but it fits perfectly in my new booth and has been great to use for staging.  I’m still hoping it will sell (soon) as I’ve already found a few more furniture pieces – a vintage 60’s kitchen table with Formica top and chrome legs, a piano bench I’d like to refinish and a few small end tables.

I knew I’d need some additional display space and was lucky enough to find some cute red shelves at an estate sale.  They are the perfect size and the red is just the right pop of color in the booth.  I’m still working on getting everything just the way I want it.  I need to hang a few more things on the wall and add a couple rugs on the floor for some more color but I think it’s looking pretty good so far.

And now for pictures…  I can hang some items in front of the window.  I have found a vintage crib and plan to hang the side rails vertically to display vintage linens.  I have quite the collection of doilies and dresser scarves.  When I think of all the time that went in to crocheting and sewing them I can’t resist when I see them at estate sales.

Here’s a look at the wicker set.  I decided to stage it as a vanity and used a floral bone china tray to hold a vintage milk glass cold cream jar and powder box.  I added a few framed bird lithographs, a couple of hand mirrors, a suitcase style basket and a large floral canister.  And of course I couldn’t resist adding a few linen items – dresser scarf , doily and cute child sized crocheted apron.

For the other end of the booth, I added the red shelves.  I love how the vintage kitchen items really pop against the red color.  There was also room to add a small end table.  It’s not old but the muted gold color works and the glass top keeps everything nice and light.  There’s not a lot of wall space in the booth and the white lattice adds another option for hanging smaller items.  Here I added another pair of bird prints, a hand painted wooden scoop and a copper color alphabet baking pan.

After I find a few more items to fill-up the booth I can get back to making cards.  I dropped off several hundred cards to Cards for Soldiers over the weekend and need to get started filling up another box.

Personalized Note Cards

Personalized Note Cards

As I was finishing up the birthday cards, I found a new sketch that looked interesting.  I figured a couple note cards for my sister and niece would be a good opportunity to try it out.

Well…  Once I got started mixing and matching different colors and prints I was having so much fun I ended up with another 20 cards.  Most of the cards are light and bright with some fun summer themes (popsicles, bikinis, etc.) but there are a couple more serious colors and prints as well.

I used the same sketch for all the cards and it was easiest to cut all of the pieces before starting assembly.  Since they are note cards and could be used for any occasion, I didn’t want them to be “over done”.  I popped up the sentiment circles but otherwise kept embellishments to a minimum, only added a few Love from Lizi peel-offs on a couple of cards.

I really liked some of the paper combinations I had used for the birthday cards and decided to use them again.  I paired the yellow chartreuse background print with more of the butterfly paper.  Both are from the Echo Park I am Mom collection.  The second card uses more of the gingham and donut (by Recollections) prints.  For the initials, I used a more traditional font for my sister and a fun swirly font for my niece.

The card for my sister pairs a watercolor stripe with multi colored popsicles.  Both papers are from the Echo Park Summer Dreams collection.  To keep it nice and bright I used orange ink to stamp the “A”.  The card for my niece uses more of the brown/green branch paper, this time paired with a tiny floral print in green and white.

The card for my niece uses paper from the Craft Smith Palm Springs 12×12 paper pad.  I added a few Love from Lizi peel-offs across the bottom of the card.  The background is a busy palm frond print but for some reason seemed to “need” something.  The card for my sister uses paper from the Craft Smart Llama Love 12×12 paper pad.  No llamas on the card, just a fun tone-on-tone blue background and a small floral print with a few gold foil accents.

The card for my niece is a bit busy, but I really love the bright colors.  Both papers are from the Echo Park Summer Dreams collection.  To match the background, I used the variegated orange to pink ink pad from Recollections Backyard Table collection to stamp the “R”.  For my sister I used more of the Craft Smith Palm Springs paper, pairing a fun cactus print with a green and black retro starburst background.

Since I had the paper pad out, I used some more of the Craft Smart Llama Love paper on the card for my niece.  Again, no llamas just a nice boho feeling note card.  On the card for my sister I paired a brown/cream/blue stripe with a distressed brown/blue print.  I like the look of the tailored stripes with the more casual feel of the patchwork pattern.

For the last note card, I thought I’d skip the initial and do something funny.  I had 2 puffy monkey stickers left from another project and thought they would be cute.  I used the same layout, with a larger “sentiment” circle, swapping the initial for the monkey.  The background is a large scale print, but I think pairing it with the bananas kept it from being too overwhelming.  The papers are all from the DCWV Bahama Mama 12×12 paper pad.

Here’s a look at all of the note cards for my sister…

and for my niece.

Now to find a new project to work on.

Birthday Cards Part 2

Birthday Cards Part 2

And now for the feminine themed birthday cards…

Again I tried to use a good mix of colors, prints and themes to ensure the cards work throughout the year.  I tried to limit the amount of pink and flower papers but a few did sneak in.

One of my favorites is the blue and green card.  They are my favorite colors and I used one of my favorite card sketches.  For some shine, I added Love from Lizi peel-offs along the edge of the blue scallop print paper.  The second card has some pink and flowers but I think the black background keeps it toned down.  The polka dot paper might be from SEI and the floral print is from Recollections At the Barnyard.  For both cards I added a few bubble embellishments from Queen and Co.

The first card uses paper from 3 different companies.  I always have fun pairing up different colors and patterns.  The green polka dot background paper is fairly new, but the stripe and scribble circle paper have been in my craft room forever.  A few bubbles for embellishment and the card is done.  The second card pairs a pink-ish gingham with a fun doughnut print by Recollections.  Bubbles didn’t seem like the right embellishment and after some searching I found some enamel dots that were the perfect pink-ish color.

I was trying to stay away from pink and flowers but I really liked the stripe and floral papers on the first card.  Both papers are from American Crafts Metropolitan collection.  I added a few yellow/gold sequins as embellishment.  I think one super girly pink card is OK.  The second card uses paper from the Bo Bunny Stay Awhile collection.  To soften all the straight lines I rounded the upper right corner of the background and focal panel.  Hard to see in the picture, but I used a strip of gold toned washi tape to separate the 2 background papers.

Yes, another pink floral card but I think the colors and prints give it more of a boho feel.  The background woodgrain print done in pink and orange is a bit unexpected.  The second card uses another not so common color combination – lime green and orange.  I tried a few different embellishments, but decided to keep it simple with orange/white bakers twine.

The last 2 cards both feature a floral print but have very different feels to them.  With the yellow distressed background, the first card has a more country feel.  Adding several brown brads around the sentiment picks up on the brown in the flowers.  I think the second card, which uses more paper from the Stay Awhile collection, has a more tailored feel with the subtle polka dot and stripe prints.  Adding a few off-white enamel dots finished the card.

So, 20 birthday cards complete.  Now to find a new project to work on.

Birthday Cards Part 1

Birthday Cards Part 1

After my last post I was all set to get going on some spring themed cards, but…

An opportunity to help out at the store where my antique booth is located came up.  They were looking for someone to take over the website.  It sounded like fun and would provide another creative outlet.  After a bit of research and some work the “new” website is up and running.

So now back to my regularly scheduled card making.  LOL.

I seem to work better with a project so when my sister requested some birthday cards it was perfect timing.  20 cards – 10 masculine/10 feminine themed cards.  To ensure the cards work throughout the year I tried to include a good mix of colors, prints and themes.  As most of the cards will be hand delivered I was also able to use multiple layers and plenty of embellishments (twine, brads, rhinestones, etc.).

The first 2 cards feature fish and farming.  I like the bright colors and mix of the fish and geometric prints on the first card.  For the farming card I paired the tractor paper with gingham and woodgrain prints.  I don’t believe any of the papers came from the same collection.  The fish is from a 12×12 sheet from Recollections and the tractor is from Recollections At the Barnyard 12×12 paper pad.

Keeping with the bright colors, I paired a green and cream stripe with a multi-colored wonky square design.  For some separation between the prints I added a pale green Love from Lizi peel off.  A few green brads around the sentiment finished the card.  The second card uses papers from the Bo Bunny Stay Awhile collection.  By using a single collection it was easy to find colors and prints that coordinated well.  I skipped adding any additional embellishments as they would be lost on the busier background and focal panel.

The next 2 cards both have a fall/winter feel.  The first card uses a patterned paper from Echo Park’s Warm & Cozy 6×6 paper pad.  Instead of more brads as embellishment, I used a few gold Nuvo drops in the upper left corner and near the sentiment.  For the second card I wanted to use the branch pattern paper from Recollections.  The background paper, a green distressed print, and the dot print were both partial pieces leftover from past projects.

The two prints on the first card are actually the front/back of a single double sided sheet.  I have no idea who made it as it’s been in my craft room for a while.  I wasn’t sure what to use for the sentiment strip but I think the orange brings out more of the orange in the focal panel.  For embellishment I added blue, green and orange brads.  The patterned papers for the shell themed card all came from the Craft Smart Coastal Cove 12×12 paper pad.  It’s a simple layout, but using a bit of bakers twine added some texture and dimension.

One of my favorite cards features the winter animal print (Echo Park Warm & Cozy) with the black/brown gingham ribbon.  Ribbon isn’t my go-to embellishment on masculine cards but I think doing a simple knot vs. a bow kept it on the masculine side.  The second card uses more woodgrain print along with an outdoor/camping themed paper.  All of these papers were from Carta Bella’s Summer Camp 6×6 paper pad.

I swapped back and forth between masculine and feminine cards, working on whichever papers appealed at the moment.  I’ve saved the feminine cards for another post.

Getting Motivated

Getting Motivated

Do you ever get in a crafting slump?  You know, where you have all these “great” ideas, save pictures, pin items, make a to-do list…  but when it comes down to actually starting a project  you just can’t get motivated?  This was me.  After the Christmas rush to get cards completed for my little antique booth at Touch of Country Mall and a few special orders, I haven’t been feeling crafty.  To keep up with the season, I did make a few Valentine cards for my booth but a crocheted afghan I started in November is still sitting incomplete on my coffee table.  LOL.

What usually gets me out of a slump is a new craft purchase – a new paper pad, some stamps, a few skeins of yarn, etc.  But this time it wasn’t a crafting tool or supplies.  While shopping for things for my antique booth, I came across a vintage Hortonville Rustics teacup/collectible display shelf.  It’s perfect for my collection of House Mouse stamps.  I rarely use the stamps but the images on the front of the stamps are too cute not to display.  So after a little cleaning and rearranging in my craft room, the shelf was ready to go.

I think it’s perfect as craft room decor.  And, it got me motivated to do some crafting.  I pulled out a Spellbinder’s card kit I purchased last year during one of their big sales.  It’s an older kit but the theme, Feeling Hoppy, is perfect for Easter cards.  And now I’m on my way with a few projects – Easter cards, some Easter themed beaded garland and although too late for this year some crochet hearts that I can make into a garland for next year.

Now to finish up a few more Easter cards and then on to another project.

First Client Christmas Cards for 2021

First Client Christmas Cards for 2021

I completed my first client Christmas card order for the season.  I really enjoy having a specific project to work on and this project was great.  Other than a “Merry Christmas” sentiment and traditional red and green color scheme, my client was open to any design.  The one special request was a sentiment on the inside of the card.  After going through my Christmas stamps, the traditional “Merry Christmas and a Happy New Year” was selected.

I got started by pulling out all of my “Merry Christmas” sentiment stamps and Christmas paper pads and collection kits.  I used multiple different layouts, sentiments and embellishments on the 30+ cards I initially created.  Once I had a decent number of cards completed, I hung them on my “display” board (foam board with binder clips) and sent my client a few pictures of the completed cards.

A couple of her favorites were the snowflake and vintage truck cards.  When buying paper I usually only buy 1 of each pad or kit.  So… I have lots of papers to choose from, but can only make a few of the same cards.  The first card used paper from Echo Park’s A Perfect Christmas collection kit so there was only 1 sheet of each print.  Based on the layout there was plenty of the red/green snowflake paper and I was able to use 2 different red tone-on-tone papers from the kit for the background.  A gold mirror die cut snowflake, a few gold brads and some Love from Lizi gold mirror peel-offs added just the right amount of shine to the card.

The second card used paper was from the Recollections Wrapped with Care 12×12 paper pad.  With 2 sheets of each print, there was plenty of the cute vintage truck with Christmas tree paper and gold mirror star paper to make several more of these cards.  To match the “clean” layout, I kept the embellishments to a minimum adding just a few gold Nuvo drops sprinkled around the card.

I placed some of the extra cards in my little antique booth and have already started on my next order.