Browsed by
Category: General

American Crafts Paper Pad

American Crafts Paper Pad

I’ve been making a lot of cards to donate recently which I enjoy, but I haven’t made much for me to send or use as gifts.

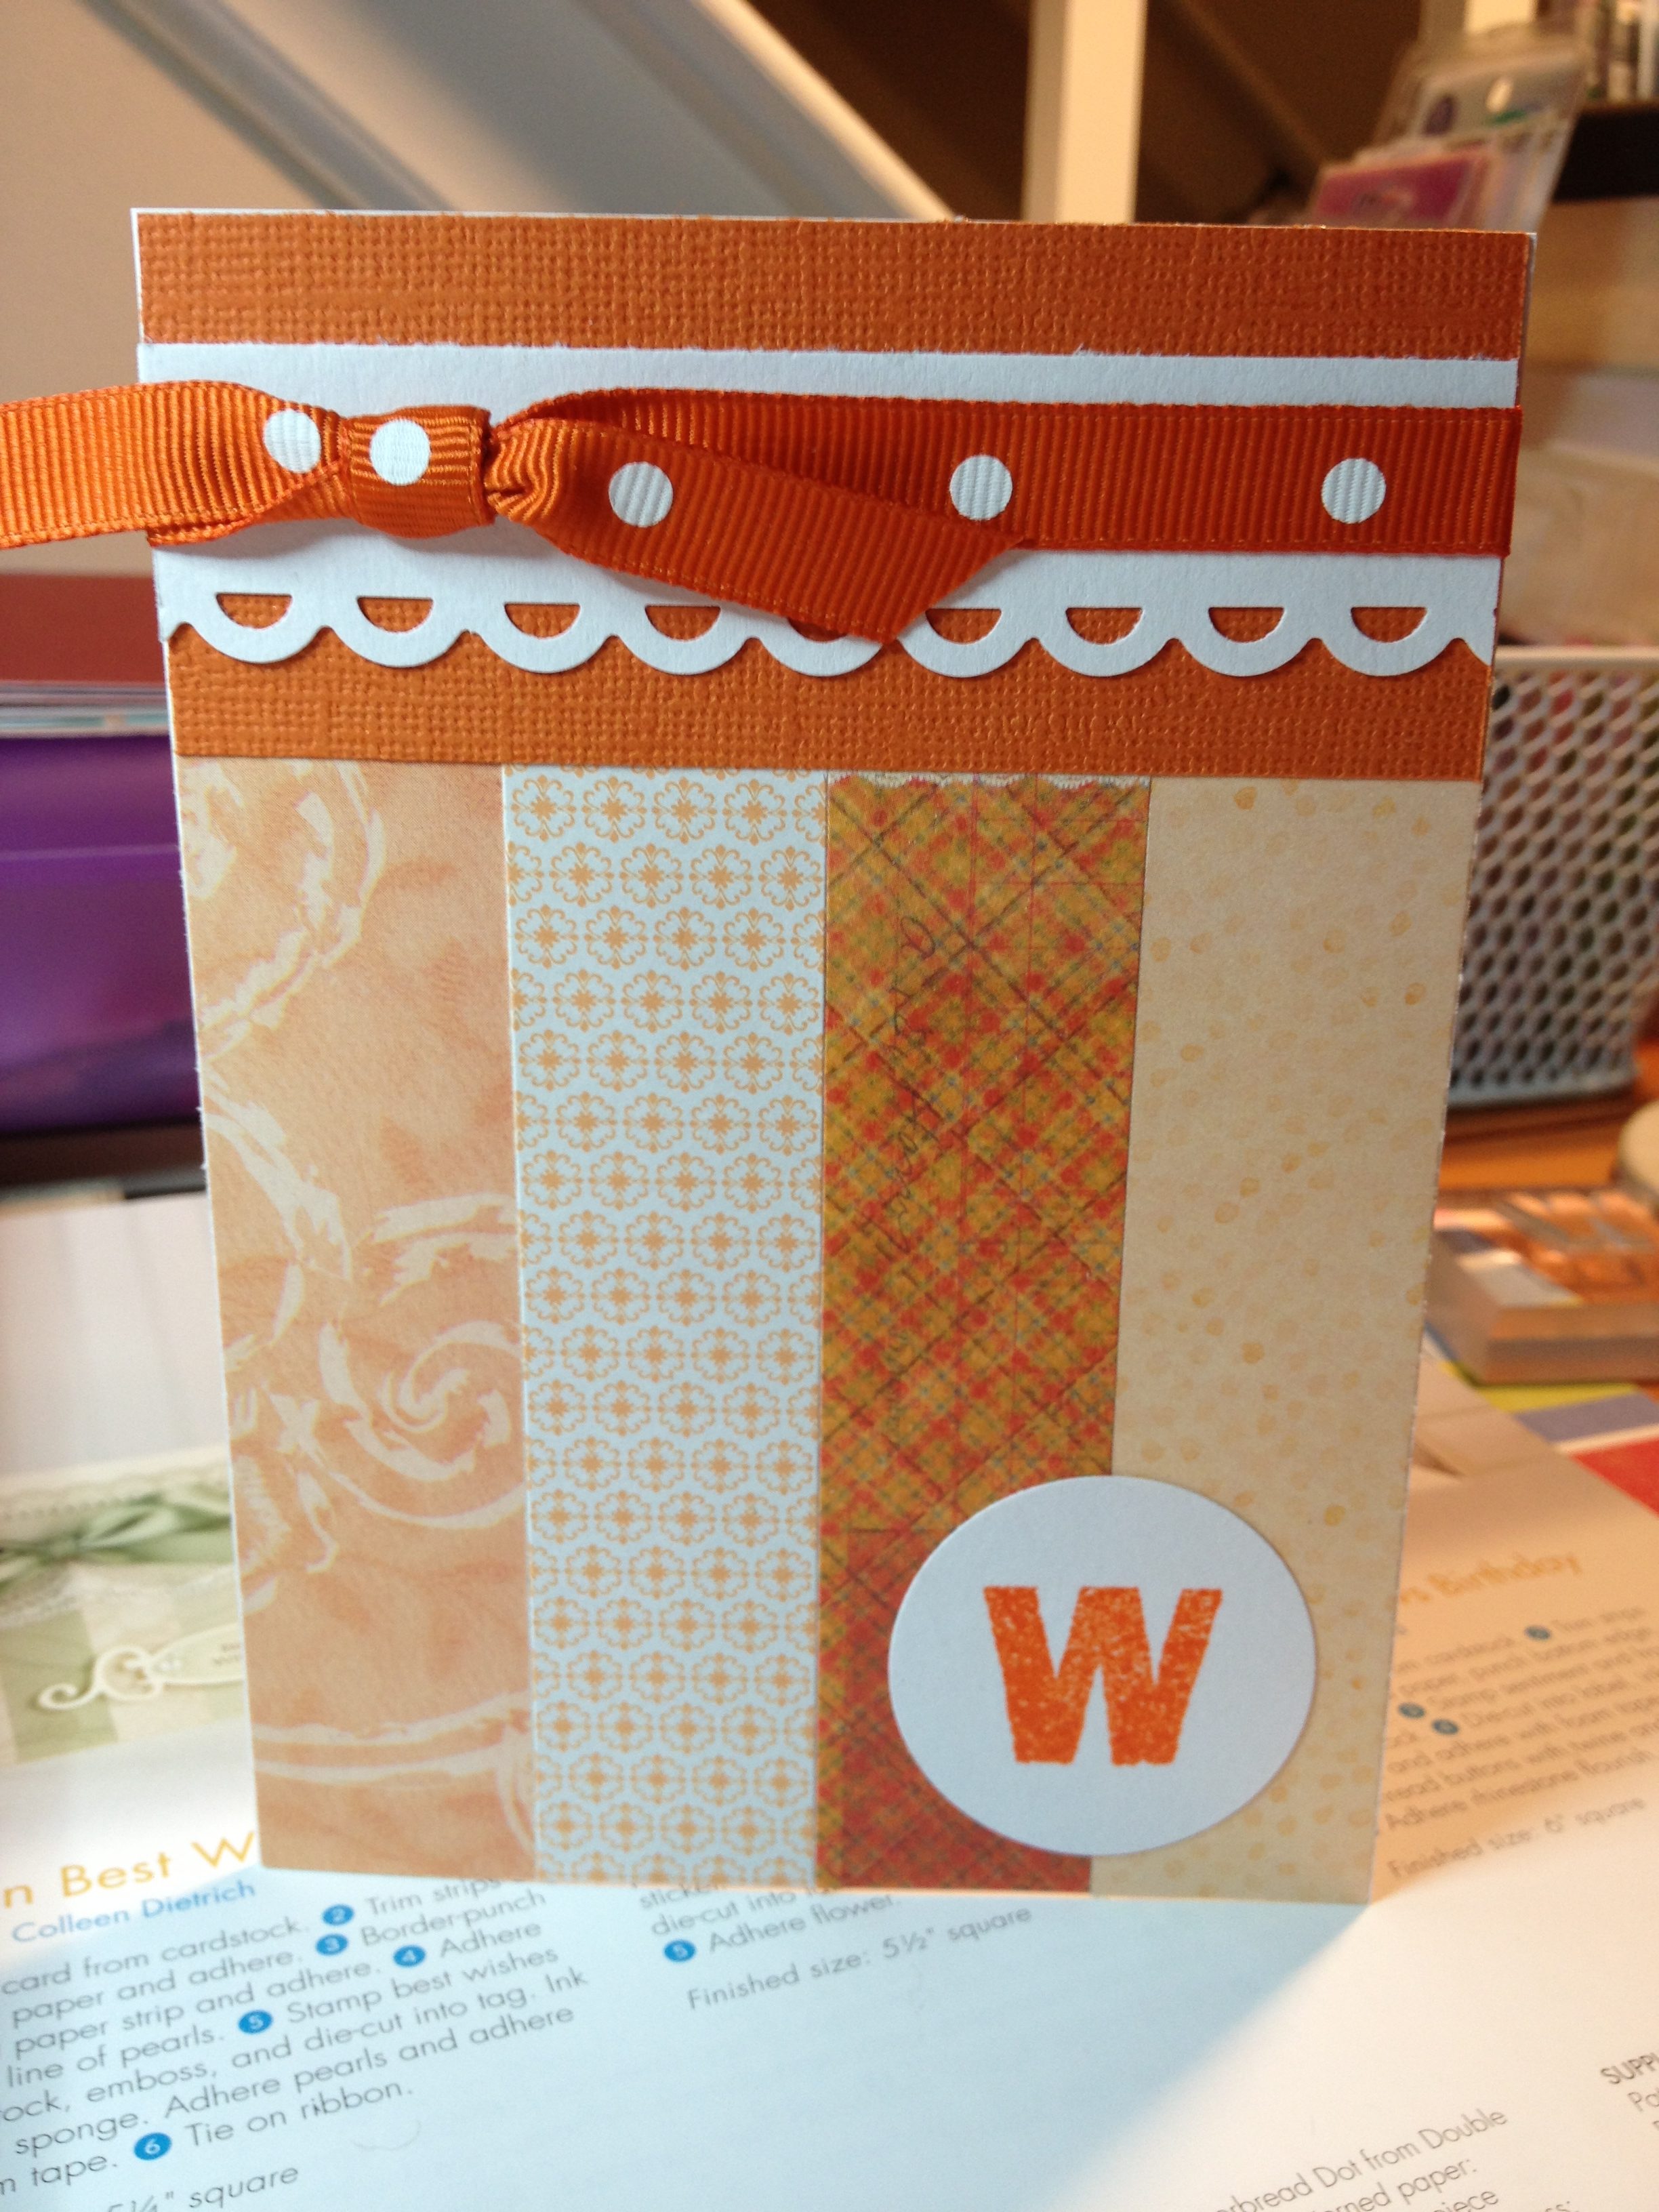
I’m still sticking with my New Years resolution to alternate between using new paper and older paper so I pulled out an American Crafts 12×12 paper pad, which I’ve had for several years.  I really like the paper but many of the sheets have larger images which I’m not sure will work well for cards.  I decided to challenge myself to try using some of the larger prints.

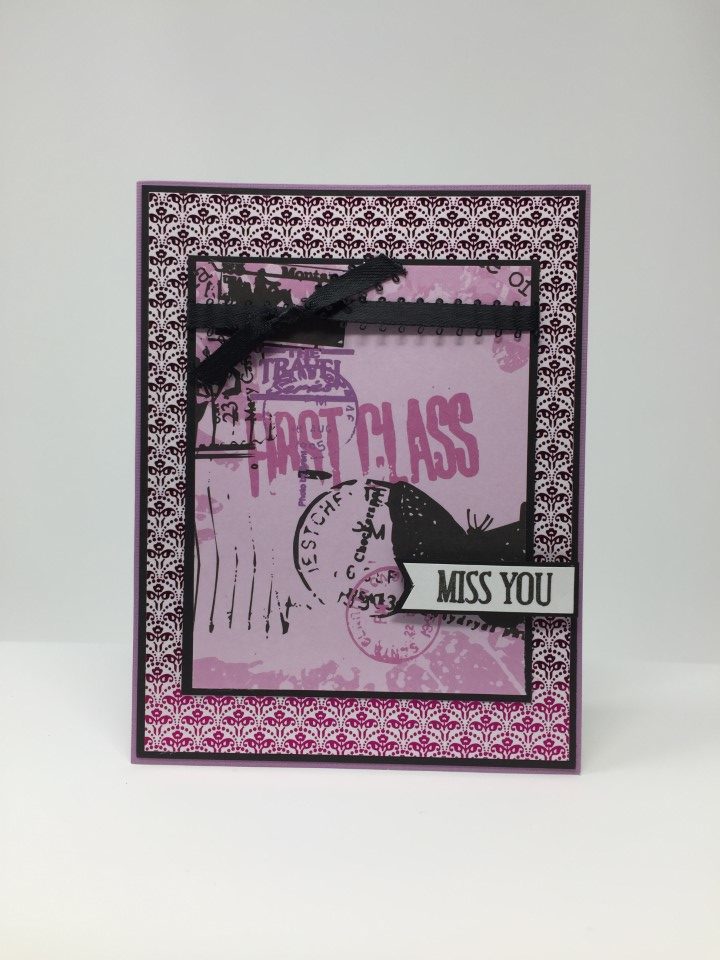
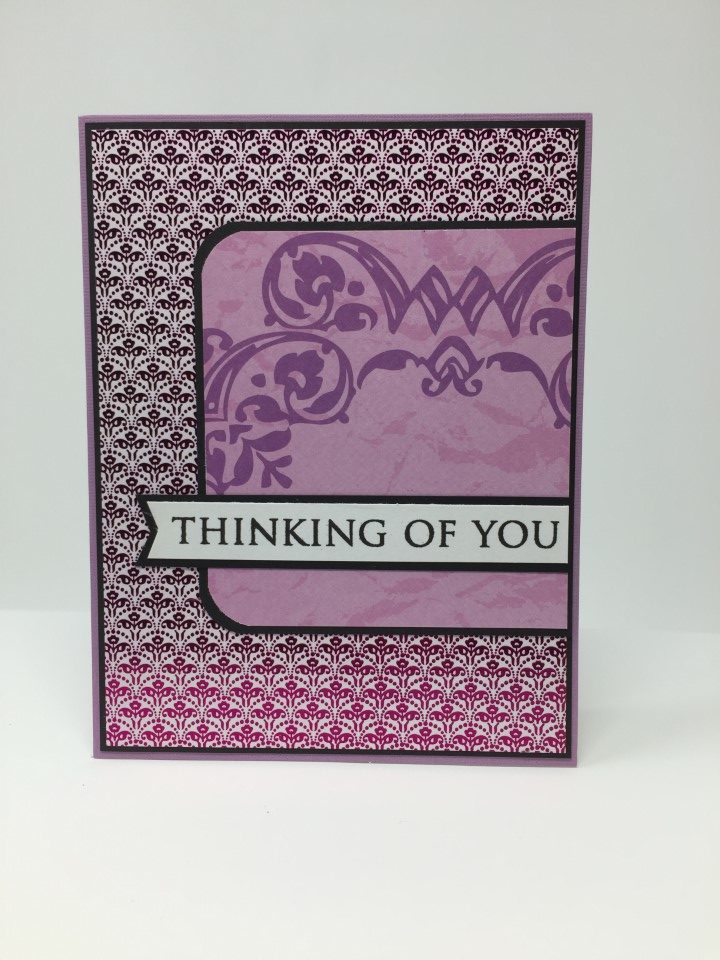
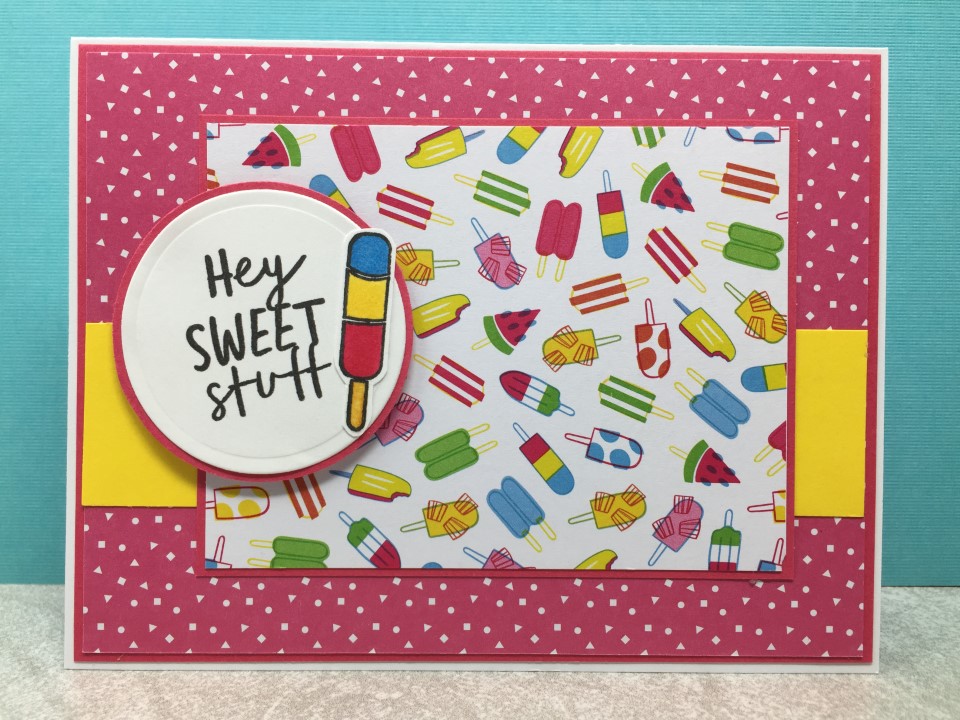
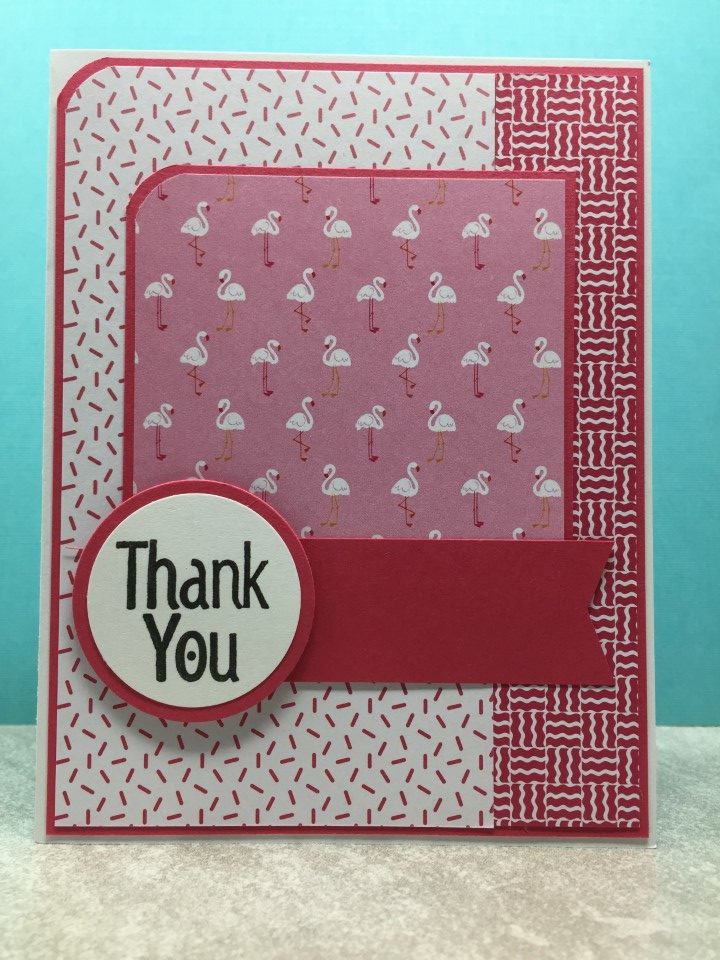
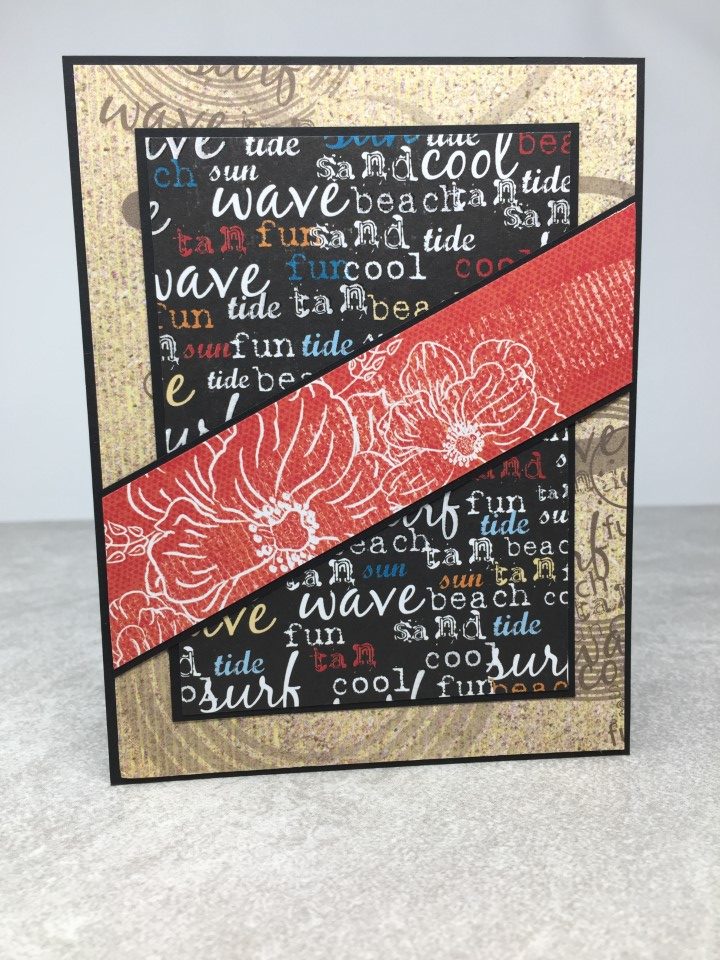
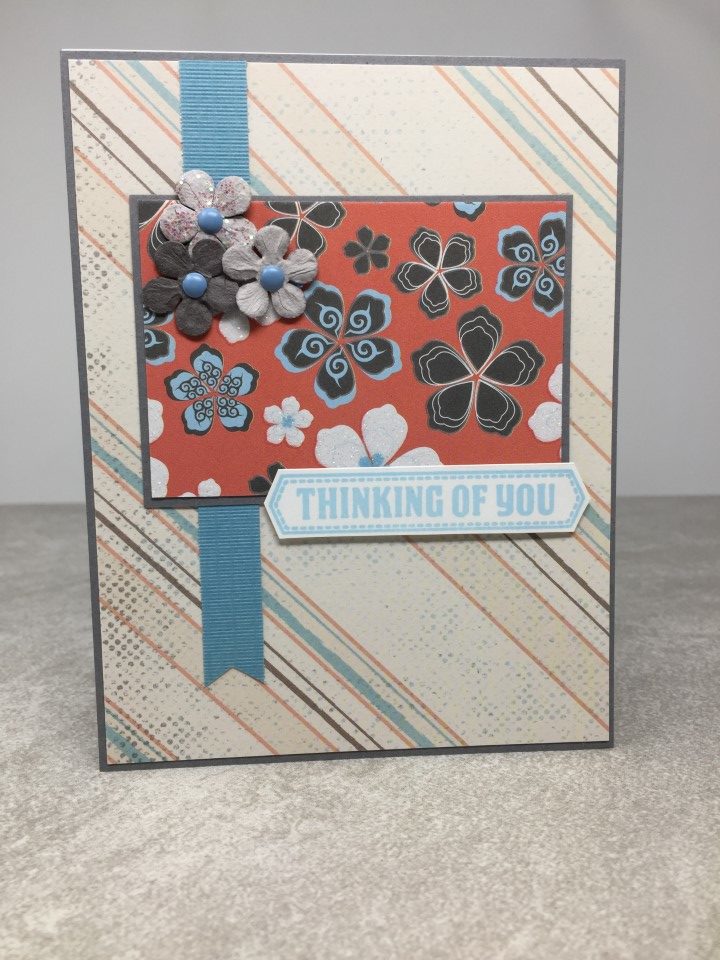
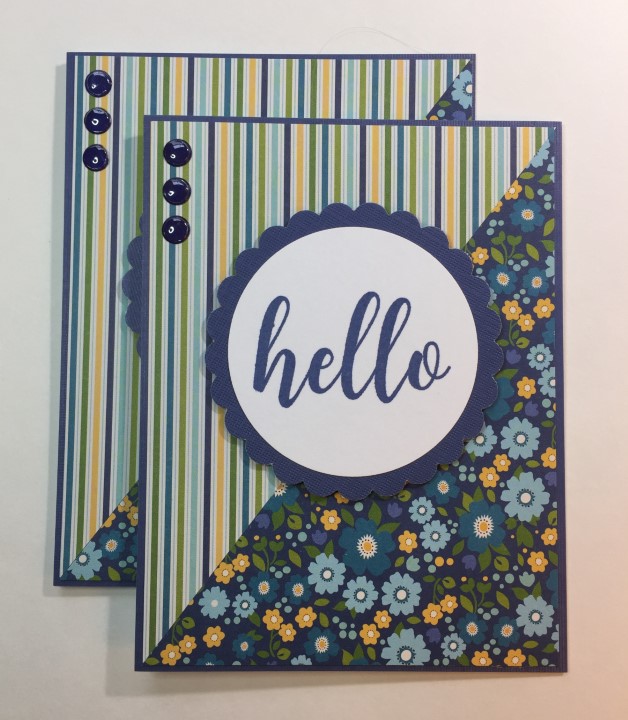
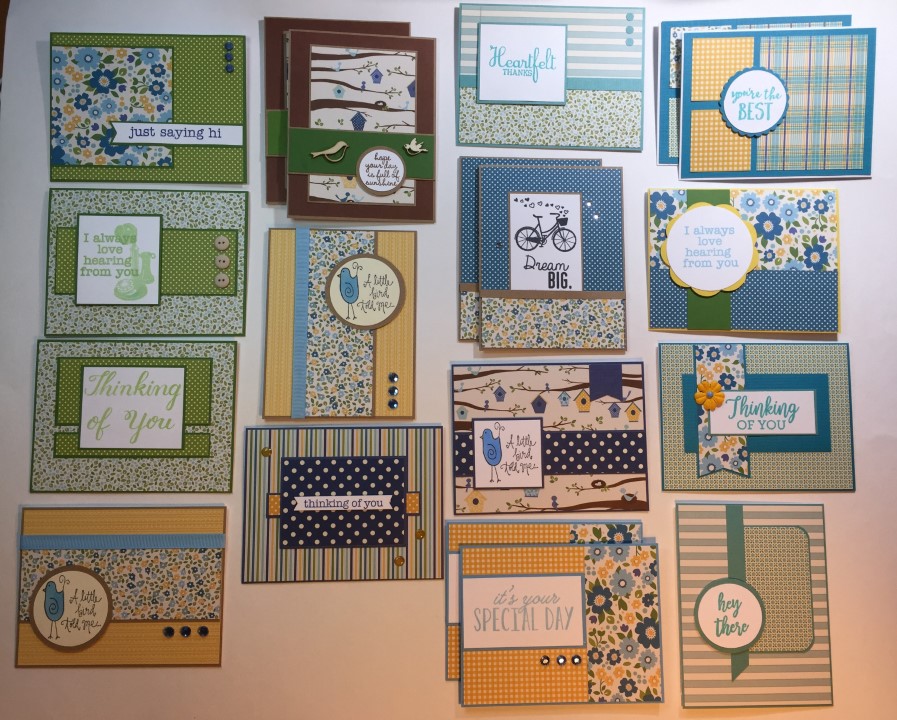
So this weekend, I made 6 cards – 2 each of 3 layouts.  The first card used 2 papers – a pink/white stripe and a floral.  Scale-wise, I thought the pink/white stripe would be fine on a card.  I wasn’t so sure about the floral paper.  I used the stripe for the background and cut out a panel from the floral paper.  The panel had just one of the large flowers, a pink flower to coordinate with the stripes. I matted everything with black cardstock and added a few pink rhinestones for some sparkle.  I thought the right sided looked a little bare, so added a small black flag to the upper right corner.

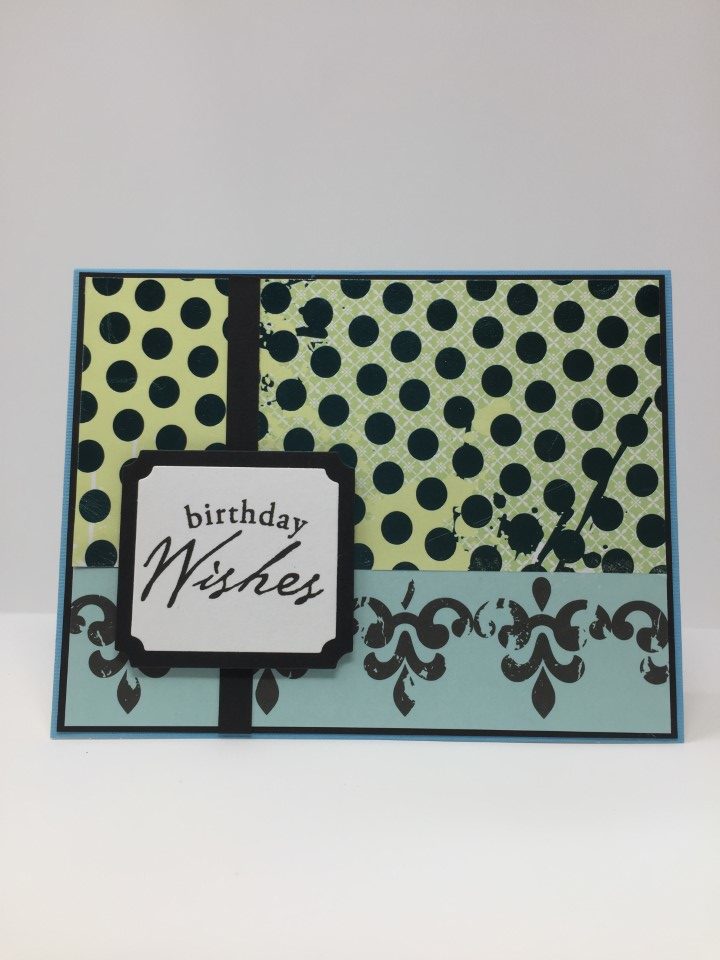
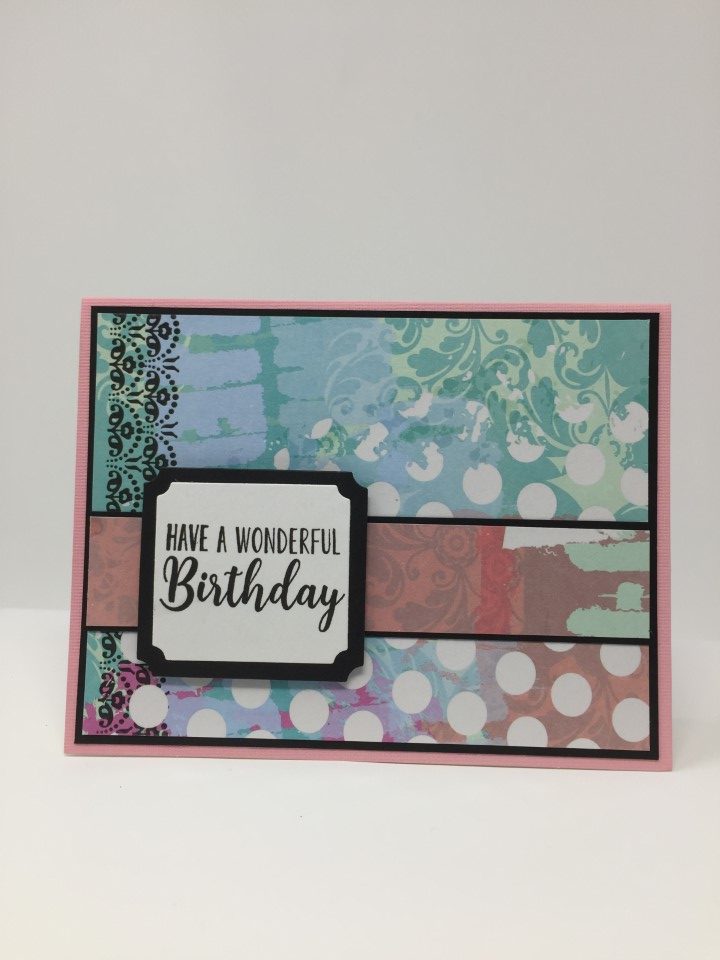
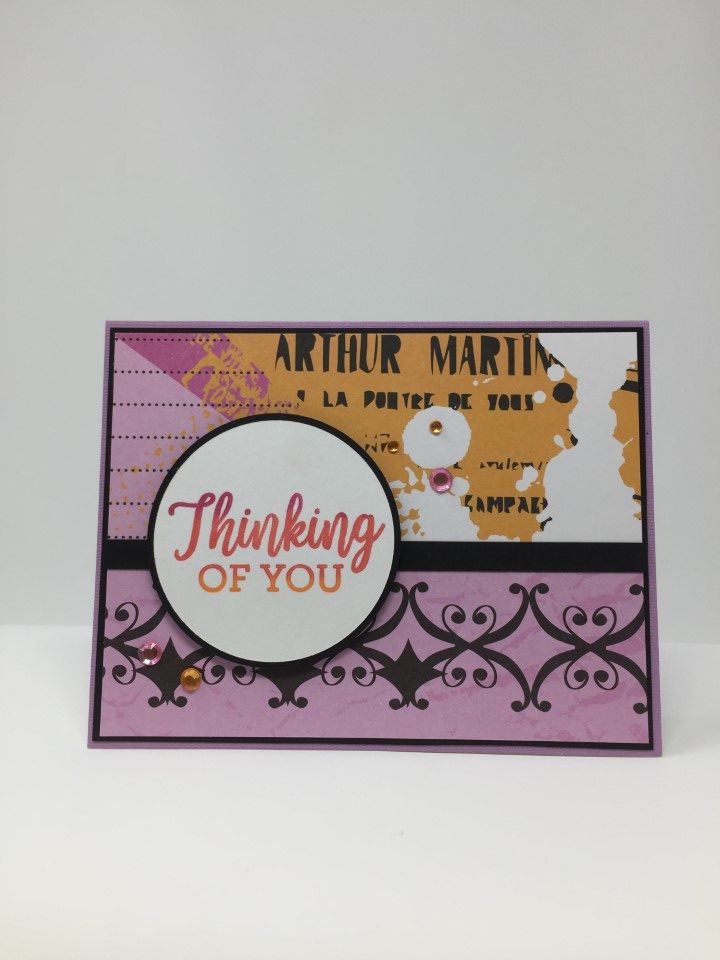
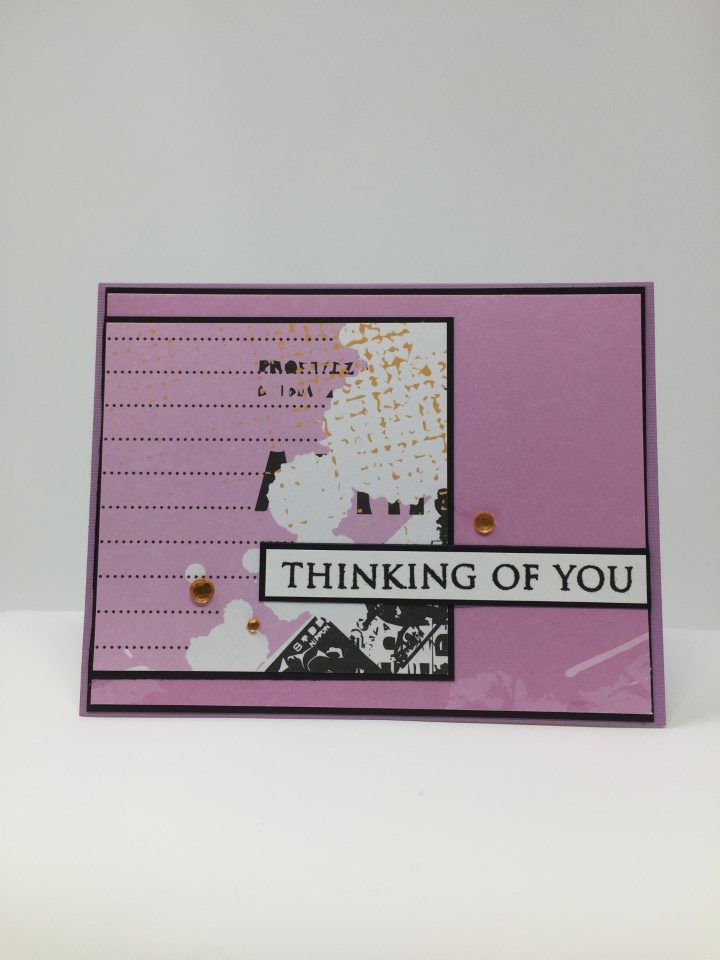
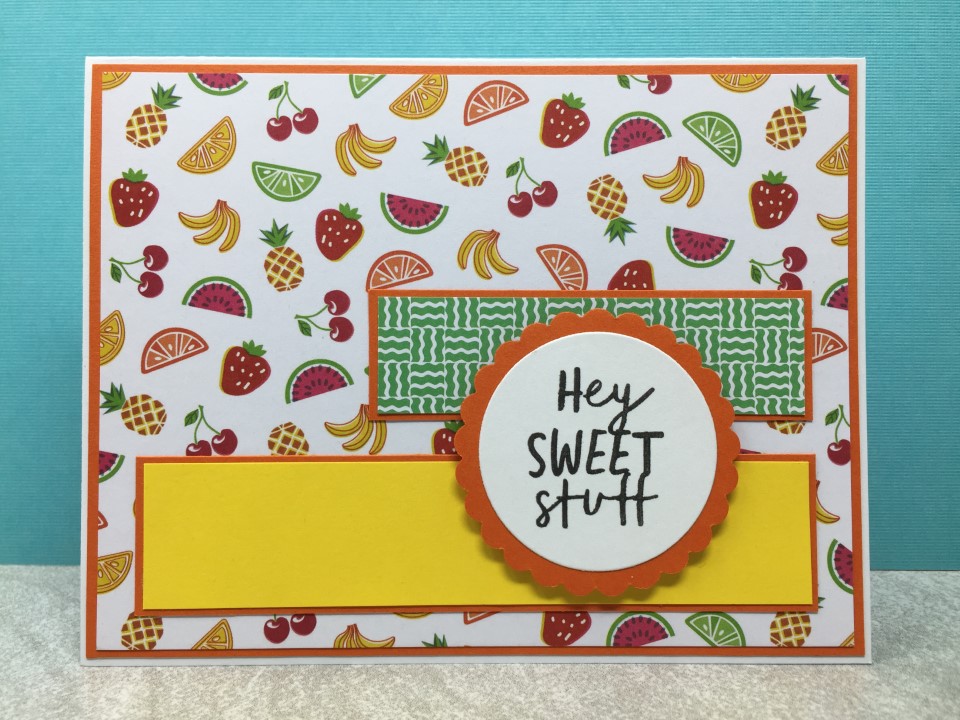
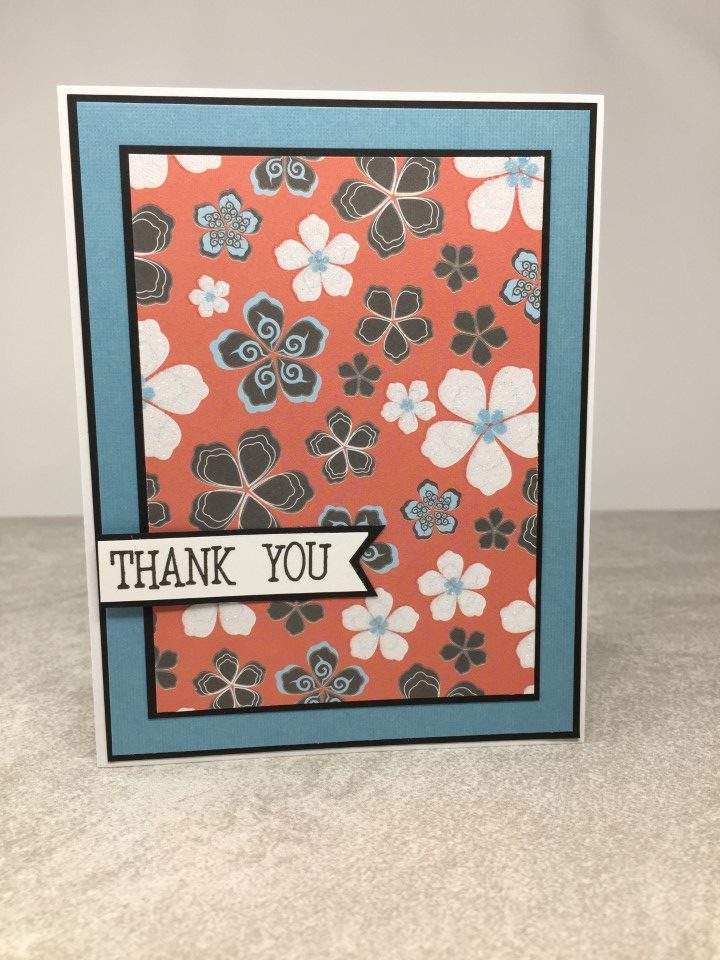
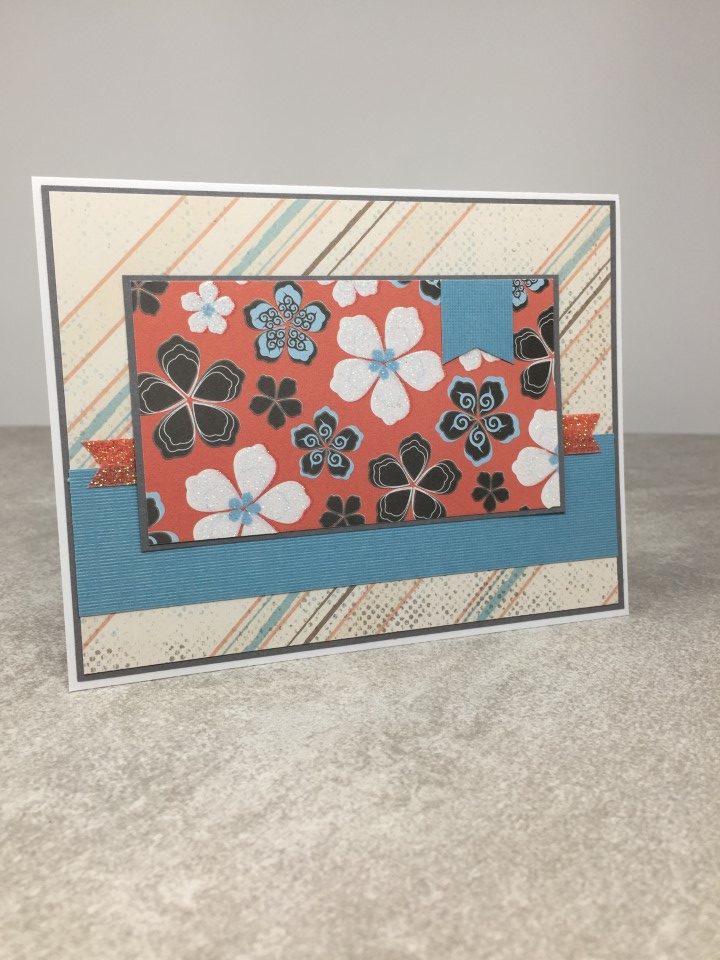
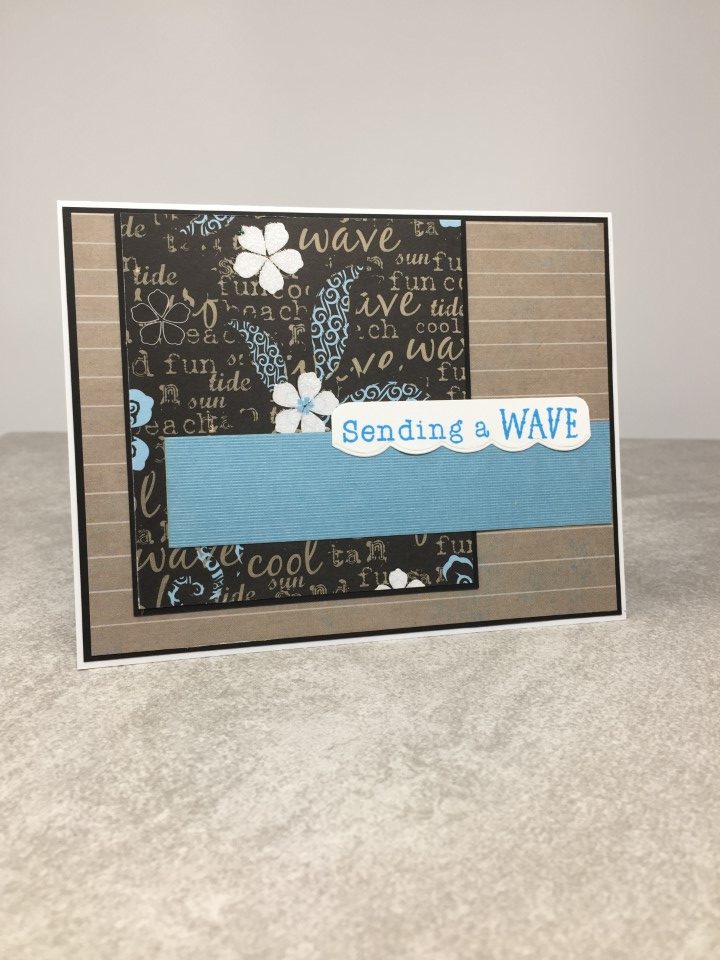
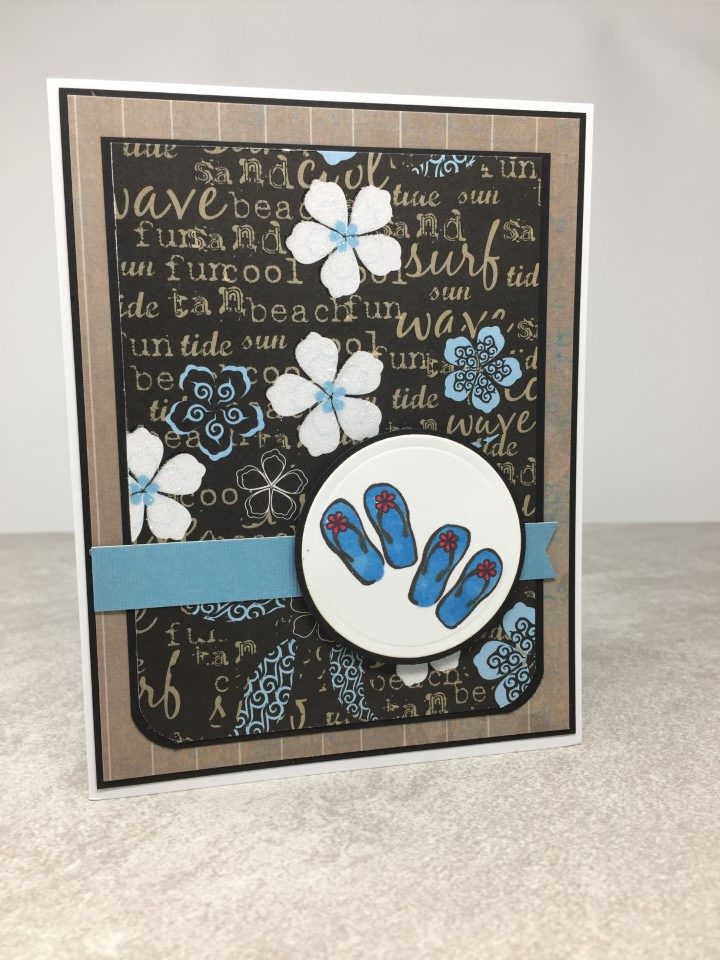
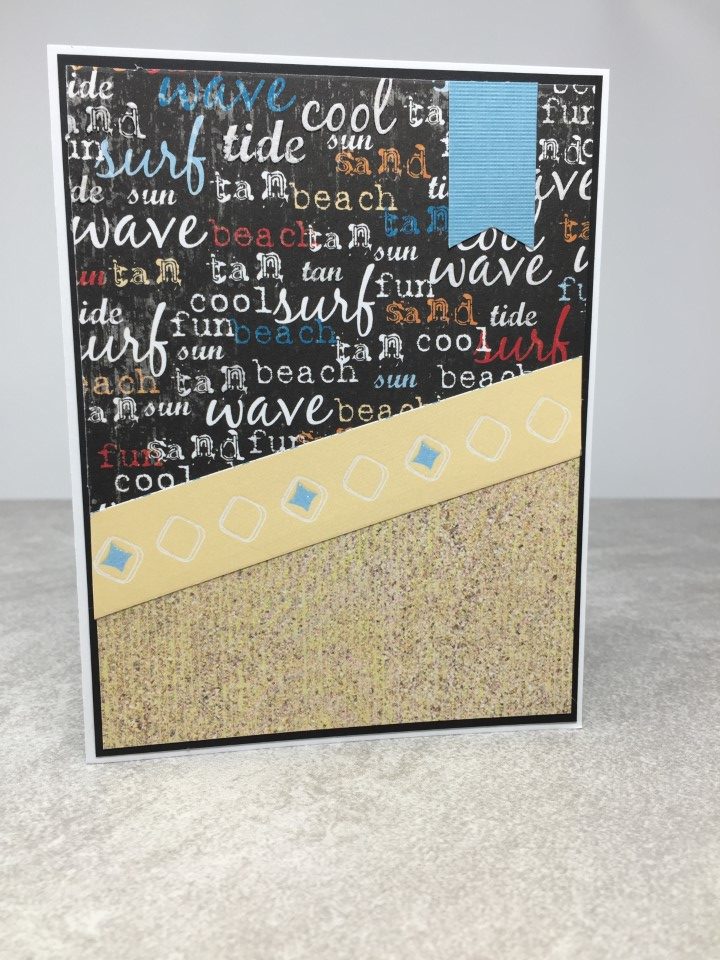
For the next card I used some more of the stripe and floral papers.  I kept the layout very simple since I was using a larger piece of the floral paper.  I knew I would be adding a sentiment which would cover some of the floral paper and hopefully keep it from being “too much”.  I added a strip of the pink/white stripe paper to the top of the card and used a yellow ribbon to cover the seam between the papers.  To bring some of the pink from the stripe paper down onto the lower panel, I added a few pink rhinestones.

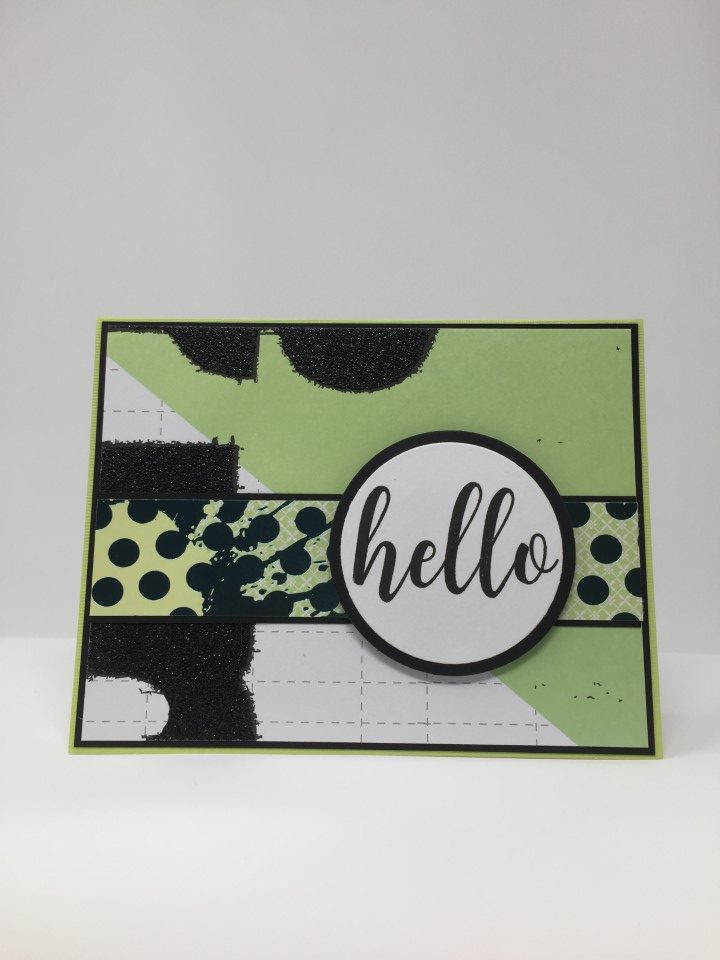
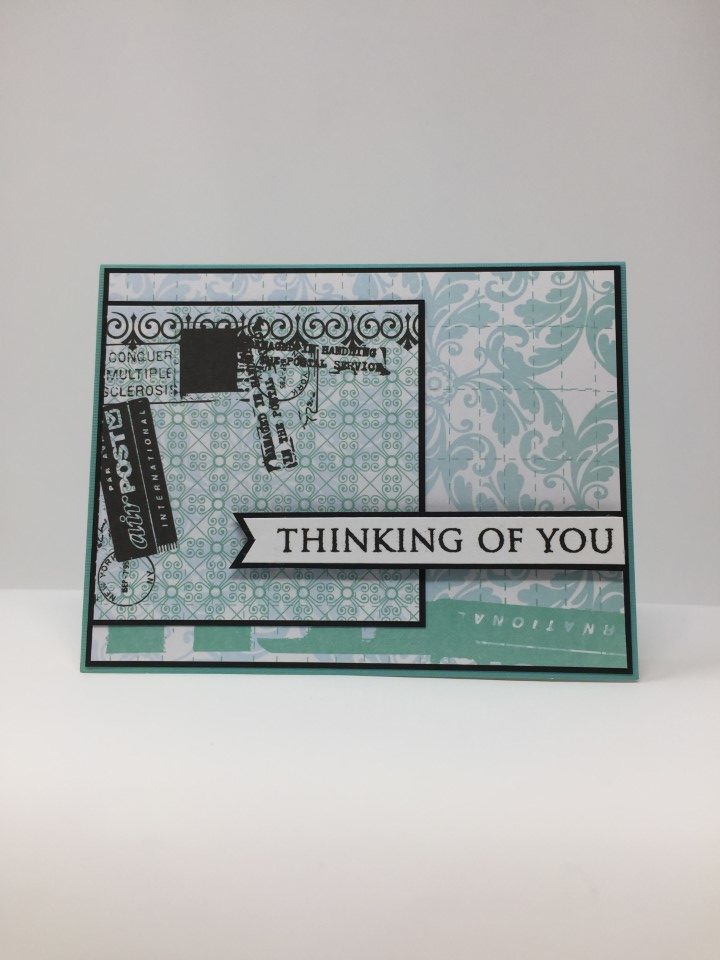
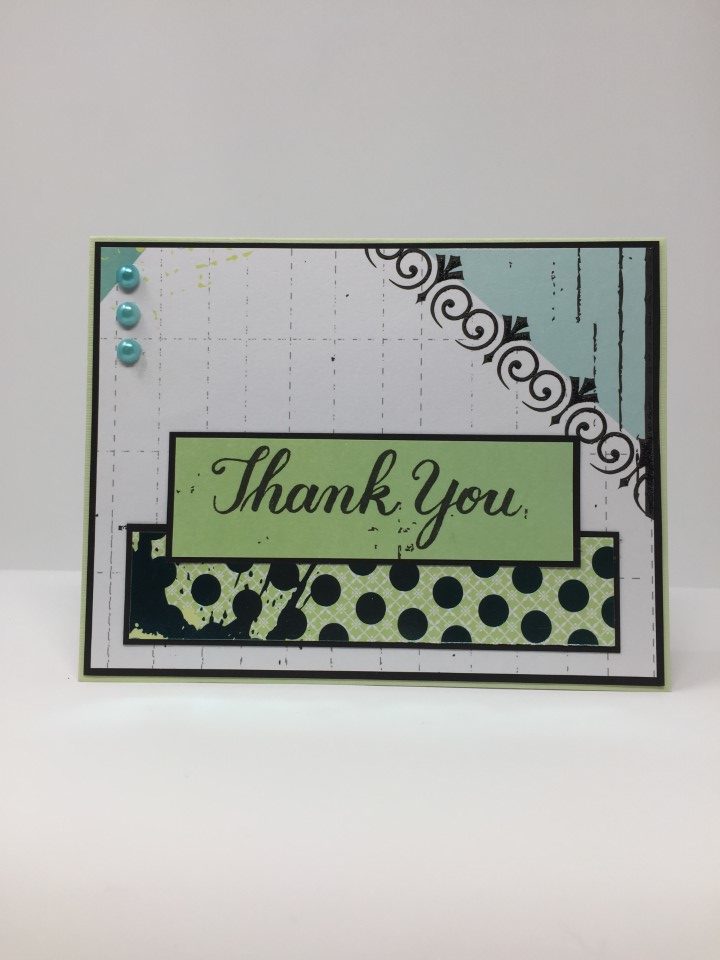
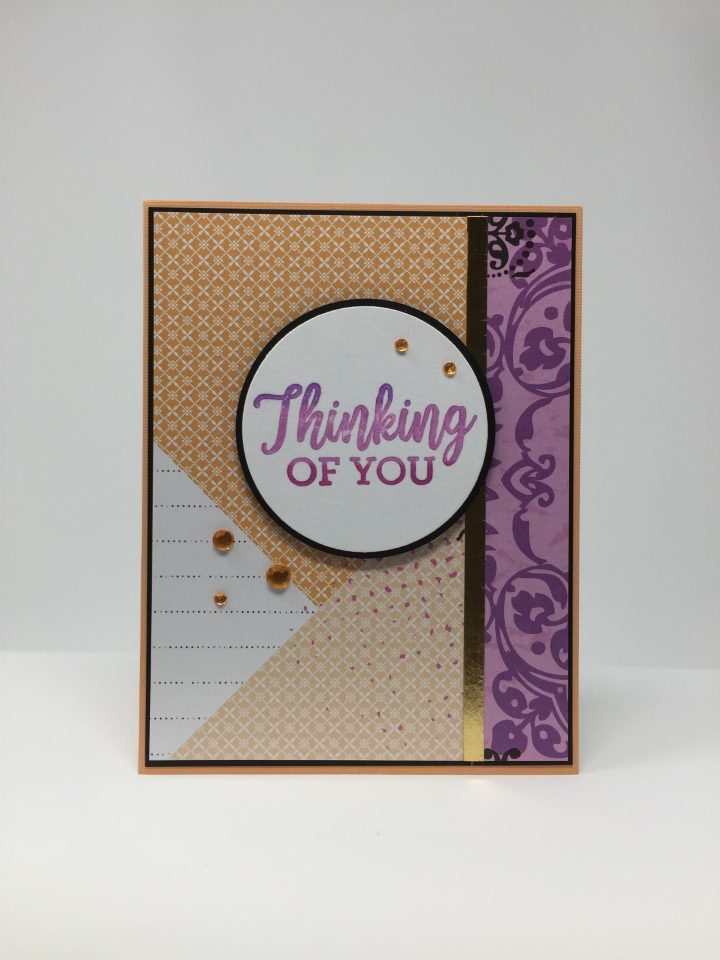
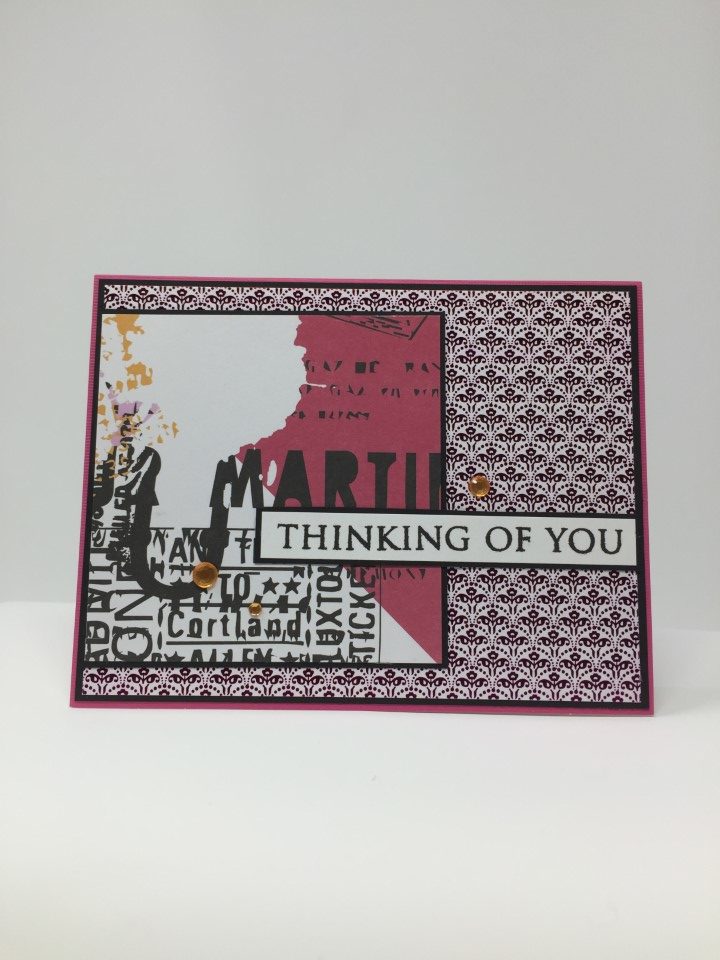
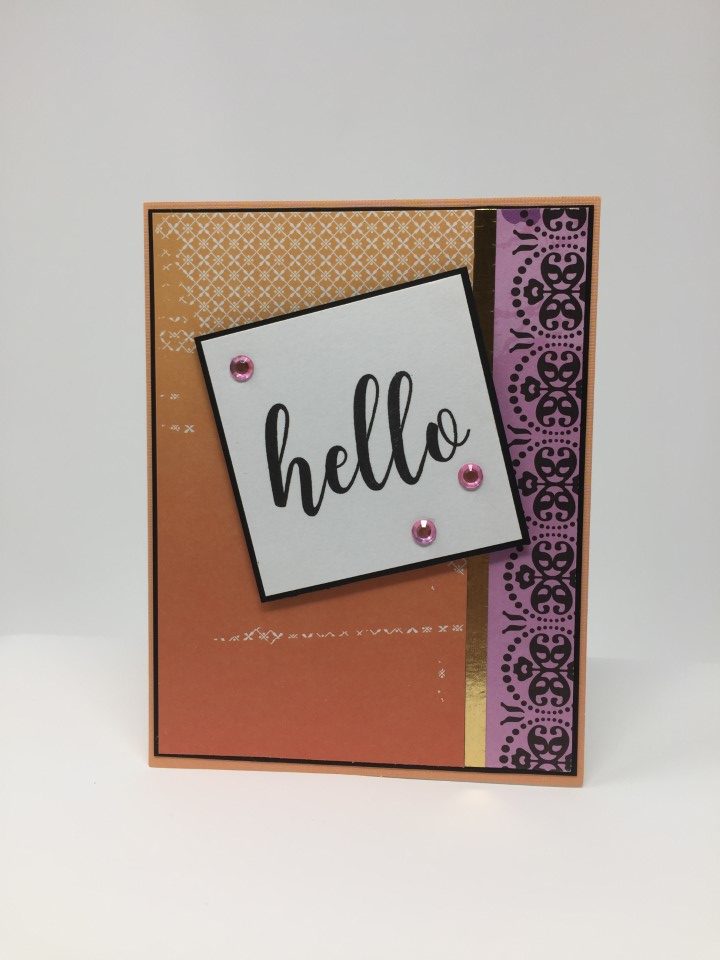
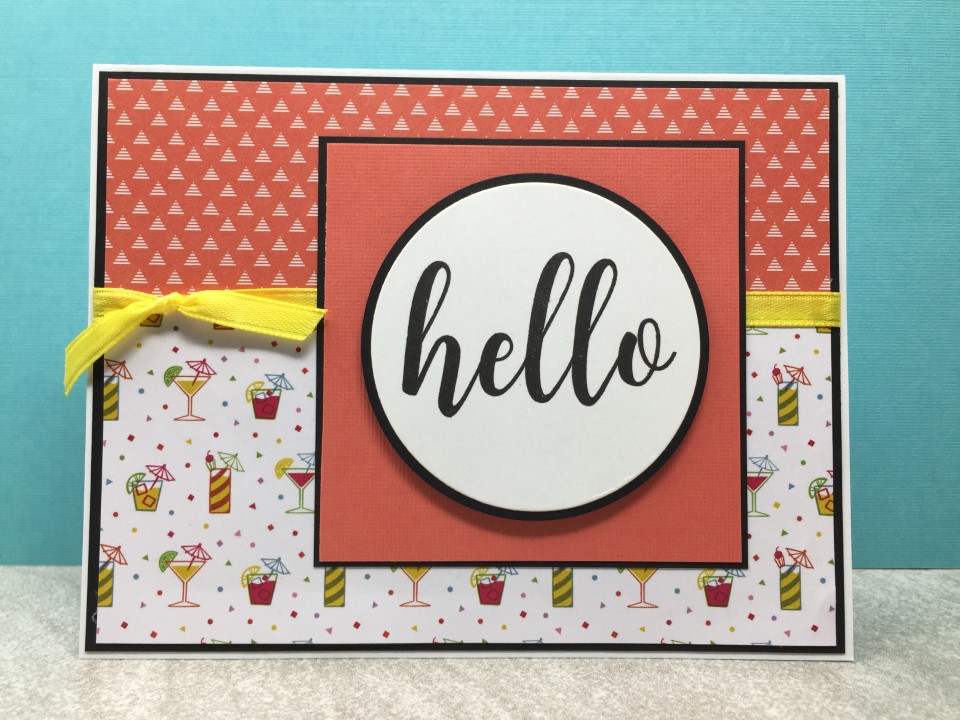
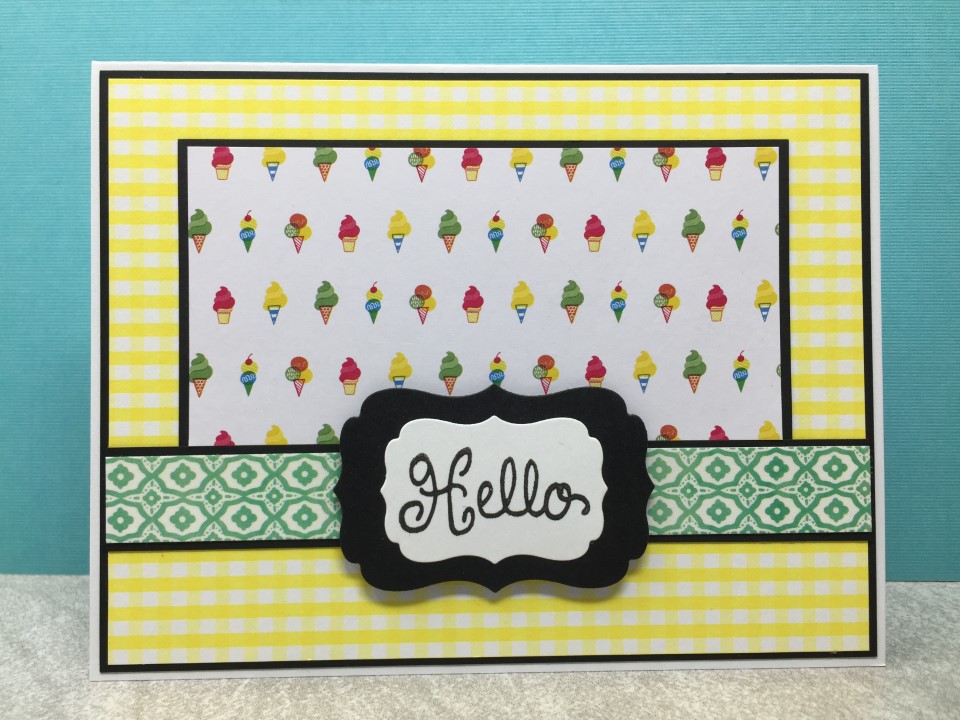
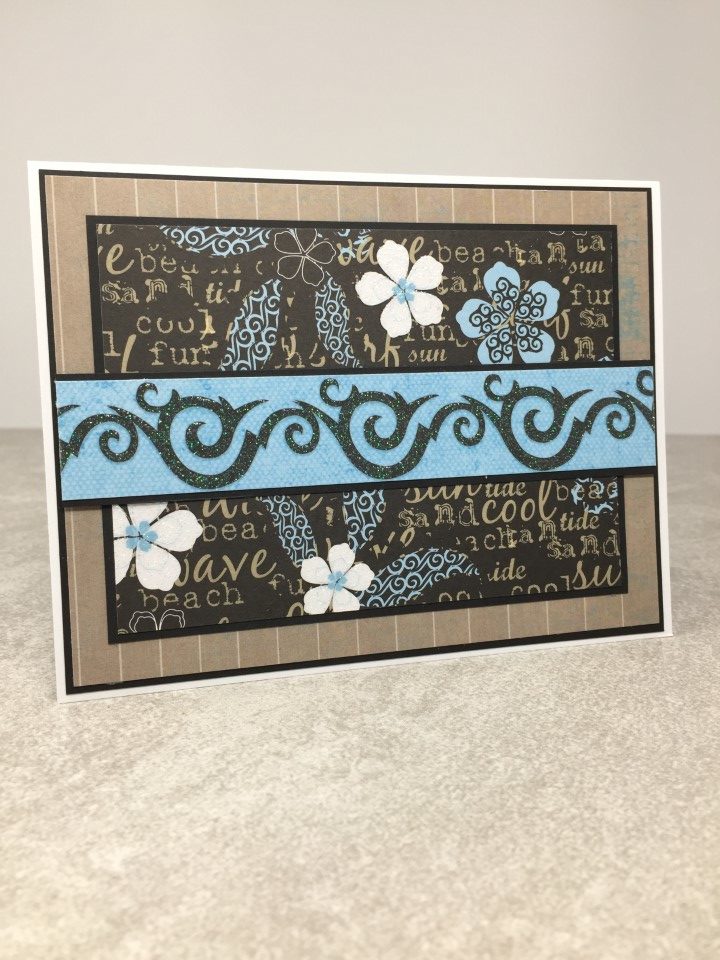
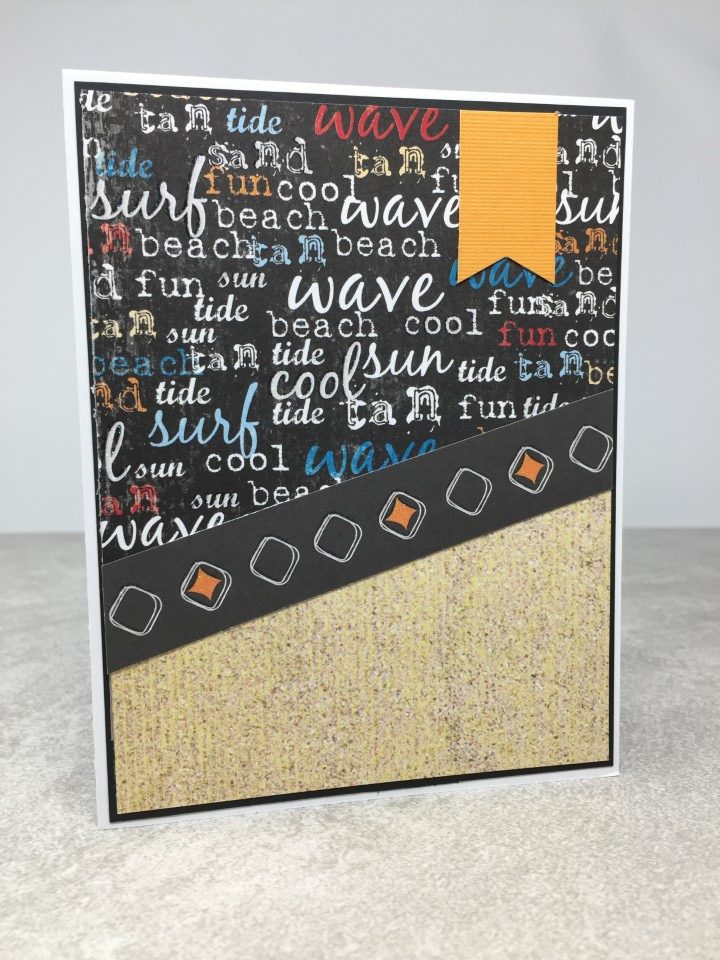
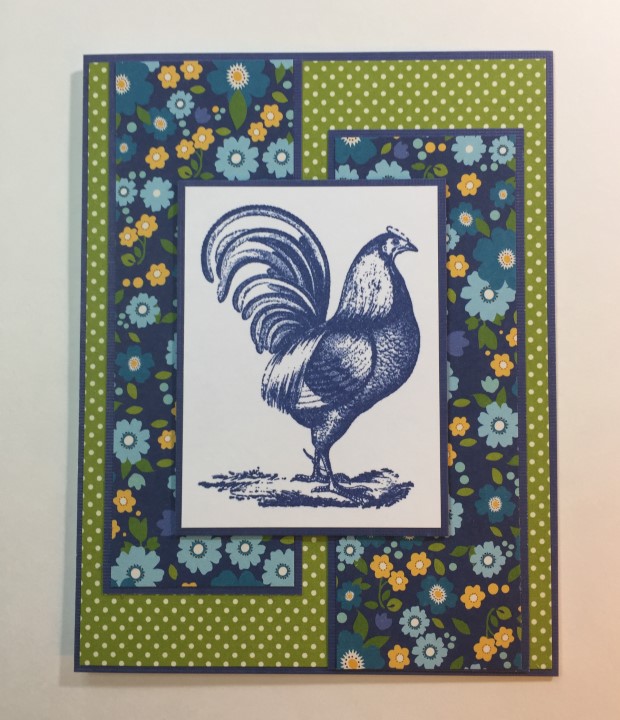
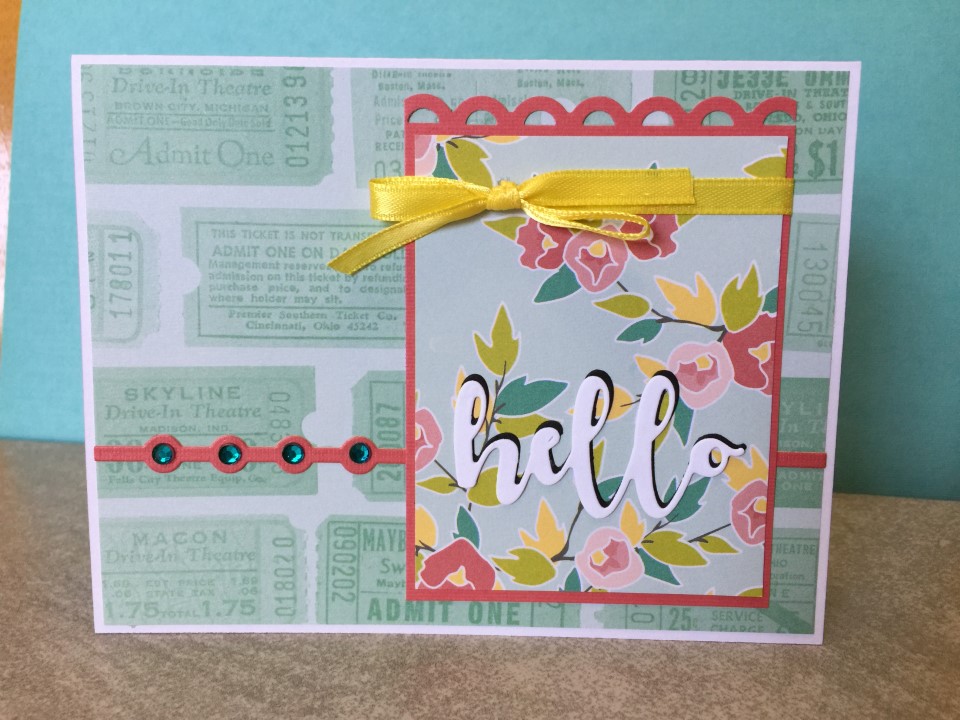
For the 3rd card I switched to some different papers.  I like the ticket paper and since it’s a tone on tone, I think it will work as a background even with the larger scale.  I paired the ticket paper with a floral that has a similar color background.  To brighten the card I added a pink matting to the floral paper.  I used a punch to add a lace border to the top of the matting and a die to create the strip across the card.  To pick up some of the other colors in the floral paper, I used yellow ribbon for the bow.  I die cut the “hello” sentiment twice, once from white cardstock and once from black cardstock.  I glued the die cuts together slightly offset to create a shadow effect.  To finish the card I added a few rhinestones.

Using the larger prints required a little more thought and planning, but I like how the cards have turned out.

MAMBI Airmail 12×12 paper pad – Part 2

MAMBI Airmail 12×12 paper pad – Part 2

I’m still using the Me and My Big Ideas Airmail 12×12 paper pad.  I have several sheets of paper left and haven’t gotten bored with it yet.

I continued with the simple layouts and minimal embellishments.

For the first card I used the green paper which has some of the glitter treatment.  I added some green foil paper for the strip across the card and a simple “Hello” sentiment.

For this card, I let the paper do the work.  The paper had a big paint splash print on it and some of the glitter treatment.  All I had to do was add a simple sentiment and pop it up with foam tape.

One of the 12×12 sheets had a mix of colors and prints and several different treatments.  I didn’t want to lose any of the fun prints so picked a layout with 1 large panel.  I border punched a strip of pink paper and added it to the top of the panel and added a small sentiment.

I liked the fleur de lis print on the blue paper and thought it would make a good border panel.  I paired it with some of the foil paper and added a thin black strip down the left side of the card.  The sentiment is centered over the black strip and the seam of the 2 papers.

One of the 12×12 sheets was a mix of several blue-green prints.  I used some of the plainer print for the background and some of the postage print for the square panel.

There was quite a bit of the foil paper left so I used some for the bottom panel.  The top panel is more of the blue-green print paper.  I used some washi tape to separate the papers and added a few sequins to the top panel.

Some of the paper was a peachy pink color which paired well with the different blues and greens.  For this card I used some more of the fleur de lis print for the bottom panel and added the peachy pink paper for the top.  I used some dies to cut the sentiment panel and matting and added a few pearls to bring the blue-green color up onto the pink paper.

There was a big area on one of the 12×12 sheets that was a solid blue-green color with no print or treatments.  I used this for the background and added a busy printed paper for the strip down the middle of the card.  I added a few pearls on the right side of the strip to finish the card.

I still had some more of the blue-green paper so used a large piece for the background.  I added a smaller piece for the square panel and some of the foil paper for the strip across the card.

This is some more of the 12×12 paper with all the colors and prints.  I used another big piece of the paper for the background.  The strip across the card is a scrap of the salmon pink paper.  As there was a lot going on with the card, I skipped adding any embellishments.

The green paper had several larger prints on each 12×12 sheet.  I used a larger piece for the bottom panel and some of the blue-green printed paper for the upper panel.  I separated the prints with a strip of black cardstock.  For some sparkle, I added a couple sequins.

This piece of paper had a lot of white space.  There was a small corner with some blue and black print.  I added a strip of green foil paper and used a small scrap of green paper for the sentiment.

For this card I used some more of the pink foil paper for the background.  I kept the piece of pink paper with the fun postage prints as large as possible and just added a simple black ribbon at the top of the panel.

This was my last piece of the pink and orange paper.  I added a few rhinestones and used the ombre ink pad for the sentiment.

This was the last piece of the pink foil paper.  I rounded the corners of a pink and purple colored square and matted it with some black paper.  As the foil paper is a very busy print, I kept the card very clean and skipped any embellishments.

I made another 33 cards, 2-4 of each of the layouts above.  There are still several sheets left, but I’m ready for a change.  I didn’t finish off the entire paper pad, but I made a good dent in it.  I’ll put the remaining paper back in my stash and pull it out another time.

Supplies include:

  • Me and My Big Ideas (MAMBI) Airmail 12×12 paper pad
  • Recollections cardstock
  • Craft Smith Solid Texture Cards
  • Tsukineko VersaFine Onyx Black ink
  • Recollections Backyard Table Ombre Pink to Orange ink pad
  • Rhinestones
  • Sequins
  • Offray black ribbon
  • Spellbinders Nestabilities Large and Small Circle dies
  • Firefly Nested Banner dies
  • Firefly Nested Square dies
  • Double sided foam tape
  • ATG tape
MAMBI Airmail 12×12 paper pad – Part 1

MAMBI Airmail 12×12 paper pad – Part 1

I’m back to using some older paper.  This time it’s the Me and My Big Ideas Airmail 12×12 paper pad.  The paper wasn’t my usual style but I really liked the colors.

As there were several different patterns on each 12×12 sheet, I did some creative cutting so I didn’t lose the really cool postage and travel themed prints.  I kept the layouts clean and simple and used larger pieces of paper for each of the elements.  Most of the papers had some type of treatment (foiled, glittered or embossed) so I kept the embellishments to a few rhinestones or sequins.  For several of the sentiments, I used a couple ombre ink pads that I had picked up at the end of season last year.  I also pulled out some pre-made cards that coordinated great with this paper.

The black print on this paper is the embossed treatment.  It adds a little shine and texture.  I border punched a strip of orange cardstock and added it towards the top of the card.  The sentiment is popped up with foam squares and I added a few rhinestones for some sparkle.

For this card, I combined a couple sheets of paper.  The pink and black paper on the bottom portion of the card is a strip that I cut from one 12×12 sheet.  I didn’t like the print as a focal point, but thought it made a nice “border”.  I used the ombre ink pad for the sentiment since it is larger and you can actually see the color changes.

For this card I used leftover paper from the first 2 cards.  I wouldn’t normally mix orange and pink, but several sheets of the paper used that color combination so…  The gold washi tape between the papers created some separation.  I used another ombre ink pad for the sentiment and added a few rhinestones.

Although you can’t tell in the picture, the pink background paper is a super shiny foil.  I don’t think I’d like it as a focal point, but it worked great as the background.

For this card I used the same layout as card #3.  I think the difference in the orange paper and changing the sentiment panel to a square give it a different look and feel.

For this card I used the same layout as card #4, but kept the background very simple.  This is one of the few cards that did not use papers with the special treatments.

I really liked the black on orange image.  As there wasn’t a good place to split the image, I used as large a piece of the orange paper as possible.  As the black image was all done in the embossed treatment, I kept the card very simple and just added a small sentiment.

There wasn’t a good breaking point in the paper pattern, so I used a single 4 x 5 1/4 inch piece for the background.  I used some leftover scraps for the strip across the card.  I used the ombre ink pad again and added a couple rhinestones.

So far I’ve made 2 of each card using the pink and orange papers.  I still have 25 full sheets and several partial sheets left.  I haven’t gotten bored with the paper and haven’t used any of the blue and green papers yet, so more cards to come.

Supplies include:

  • Me and My Big Ideas (MAMBI) Airmail 12×12 paper pad
  • Recollections cardstock
  • Craft Smith Solid Texture Cards
  • Tsukineko VersaFine Onyx Black ink
  • Recollections Backyard Table Ombre Pink to Purple ink pad
  • Recollections Backyard Table Ombre Pink to Orange ink pad
  • Rhinestones
  • Recollections washi tape
  • Spellbinders Nestabilities Large and Small Circle dies
  • Double sided foam tape
  • ATG tape
Recollections Pool-Riffic 6×6 paper pad

Recollections Pool-Riffic 6×6 paper pad

In keeping with my New Years Resolution…  Since I used an old paper pad for my last batch of cards, I used a newer paper pad for this batch of cards.  I had picked up the Recollections Pool-Riffic 6×6 paper pad at the end of the season last year.  I wasn’t sure I liked the paper but for the price figured I’d give it a try.  As it turned out I had a lot of fun using the paper pad.  The papers are all very bright and cheerful with a nice mix of prints that can be easily combined.

While checking my craft room for stamps and cardstock to use, I found several sheets of 8 1/2 x 11 pattern paper that worked great with this paper pad.  I’ve had this paper for several years and was happy to use some older paper.  And by including a few sheets of the 8 1/2 x 11 paper, I was able to “stretch” the 6×6 paper pad into 41 cards.

For the first few layouts I was able to make several cards using the same paper.  For this card, I cut the popsicle circles at 2 7/8 inches so that I could get 4 circles out of a single sheet of 6×6 paper.

Since the paper included so many colors, I was able to use up some cardstock scraps from other projects.  For this card, I used a one-off piece of orange cardstock and a scrap of yellow cardstock from a baby shower project.

When I purchased the paper pad, I also picked up a couple coordinating Craftsmart stamp and die sets.  I used the popsicle stamp and colored it using Copic markers to match the paper.  I still had another sheet of the pink dotted paper, so made another card using the same paper and layout.

I hadn’t done any Hi/Hello sentiments yet, so I pulled out my favorite “Hello” stamp.  I found a scrap piece of cardstock that matched the orange-ish pattern paper perfectly.  I added a yellow ribbon and popped up the sentiment with foam tape.  I had a few more scraps that would work with this layout so I made another card using pink papers and ribbon.

I had picked up a sheet of monkey stickers somewhere and thought it would be fun to use with the palm tree paper.  As the green dot and palm tree papers are quite busy prints, I kept the layout simple and just added a matted circle with the sticker.

I had a few 3 x 6 inch pieces of pattern paper so decided to use one of my go-to sketches, Mojo Monday #362.  By adding the 8 1/2 x 11 paper and cutting the 3 x 6 inch pieces into 3 x 3 inch pieces, I “stretched” the pattern paper into several cards.

This card was one of the last in the batch.  I didn’t have a 5 1/4 inch piece of coordinating paper left, so I used some Recollections washi tape for the green pattern strip.  For something other than a circle or square, I used the Firefly Nested Banner die set to create the sentiment.

I liked the popsicle paper and wanted to use it as a larger element.  I combined it with the gingham print and used the green dot for some contrast.  I liked how the card turned out, so made another couple cards using different papers but with the same layout.

I wasn’t a fan of the print on the reverse side of the green geometric print paper, so decided to use both sheets as a background.  I used a few cardstock scraps for the strips behind the sentiment.

For this card, I cut the pool ring circles at 3 inches.  As the right side of the circle would be cut off, I was able to easily get 4 circles from a single 6×6 sheet of paper.  I used another sheet of the 8 1/2 x 11 pattern paper for the background.

There were several papers with pink as the main color.  I decided to combine several of the papers for an all pink card.  I also used this layout for a few non-pink cards as well.

The paper pad had a sheet of banana print paper so I was able to use another of the monkey stickers.  This one with a cute monkey in a banana.

This was one of the last cards and I only had enough paper to make 1 card.  I used another Craftsmart stamp for the sentiment and a few cardstock scraps for the blue strips on the card.

I had a few square-ish pieces of pattern paper left.  By using the 8 1/2 x 11 green polka dot paper for the background, I was able to make another 4 cards.

This was the 41st card and used up the last of the bigger pieces of scrap paper.

I really liked how these cards turned out and while I will be donating most of the cards, I did pull a few to keep for my personal use.

Supplies include:

  • Recollections Pool-Riffic 6×6 paper pad
  • Recollections 8 1/2 x 11 pattern paper
  • Recollections cardstock
  • White 110lb paper (card base)
  • Craftsmart stamp and die sets
  • Tsukineko VersaFine Onyx Black ink
  • Memento Bahama Blue ink
  • Copic markers
  • Rhinestones
  • Pop-up dots
  • Recollections washi tape
  • Offray yellow ribbon
  • American Crafts pink ribbon
  • Spellbinders Nestabilities Large and Small Circle dies
  • Firefly Nested Banner dies
  • Marvy Uchida Scallop Circle punch
  • Double sided foam tape
  • ATG tape
Crafting Resolution

Crafting Resolution

With the holidays over, I’m getting back in to card making.  I was doing a little organizing in my craft room and… I have way too much paper.  I see a cute paper pad and can’t seem to resist.  So, my resolution for the year is to use up some of the older paper.  My goal is to use 1 old paper pad for every new paper pad I use (or purchase).

I’ll be donating most of the cards and as I have already made cards for the upcoming holidays, I decided to pull out an old DCWV 12×12 paper pad – Tahiti Beach stack.  It’s cute paper with many of the patterns having a shiny glittered finish.  I’ve used several sheets of paper over the years but still had about 14 12×12 sheets left.  After so many Halloween, Thanksgiving and Christmas cards it was nice to just do some cards with no sentiment or “generic” sentiments.  As the charity where I donate the cards will be sending them to different locations, I was also able to make multiples of the same card.

I wasn’t sure what to do with the “sand” paper, so decided to use it as the background.  One of the 12×12 sheets was several stripes of different patterns that coordinated with the paper pad.  I cut the stripes apart and was able to use them on several cards.  For this card, I added a red floral strip to break up the beach themed word paper.

For the next card I used almost 1 full sheet of the floral paper.  You can’t see it in the photo, but the white flowers have a shiny glitter finish.  Besides an overabundance of pattern paper, I have lots of one-off sheets of cardstock.  I found a single sheet of this light blue cardstock that coordinated nicely with the blue in the flowers.  To balance the busy floral print I added a simple “Thank You” sentiment.

I still had a full sheet of the beach themed word paper and decided to try it as a background.  I added a strip of the left-over blue cardstock, another strip from the 12×12 sheet of pattern stripes and a strip of glittered washi tape.  With all the words on the background paper, I decided to skip adding a sentiment.

There was a small piece of the pink-ish floral paper left.  I paired it with a diagonal stripe paper and another piece of the light blue cardstock.  For the first layout I added a “Thinking of You” sentiment stamped in light blue ink.  For some dimension I added a few gray flowers with blue brads as the centers. For the second layout I added some more of the glittered washi tape and skipped the sentiment.

For the next 3 layouts I used a taupe striped paper and another of the beach themed word papers.  For the first layout I added a strip of light blue cardstock and stamped a sentiment in Memento Bahama Blue ink.  For the second layout, I added a strip of the light blue cardstock and instead of a sentiment stamped some flip-flop sandals and colored them using Copic markers.  For the third layout I skipped the sentiment and added another strip from the 12×12 sheet of pattern stripes.

There was still more of the beach themed word paper, so I used that for a background again.  For the banner on the right side of the first card, I fish-tailed and matted a piece of the “sand” paper.  On top of the banner, I added a strip from the 12×12 sheet of pattern stripes.  I used a sailboat stamp, Copic markers and a die to create the embellishment.   For the second card, I cut the “sand” paper on the diagonal.  To cover the seam I added a pattern strip across the card.  To add some interest to the top of the card I added a small flag that coordinates with the color in the pattern strip.

I still had a 1/2 sheet of the striped paper and a full sheet of the aqua paper that I wanted to use.  I couldn’t find a color of cardstock that I liked with the papers, so decided to skip any matting.  I didn’t like the look of a straight line between the papers, so pulled out a Creative Memories wavy paper cutter.  I think the wavy edges add some interest.  Instead of a sentiment, I stamped the beach scene and colored it with colored pencil.  It’s a very simple card, but I think it’s my favorite of the bunch.

I used 12 different layouts and ended up with 38 cards.  I still have a few scraps left but I think I can call this paper pad “done”.


Pebbles Family Ties paper pad

Pebbles Family Ties paper pad

I decided to take a break from holiday cards and pulled the Pebbles Family Ties 6×6 paper pad out of my “collection”.  This paper pad includes lots of blues and greens (my favorite colors).  Other than a few sheets that didn’t work for cards, I was able to use the entire paper pad and ended up with 31 cards.  Here are a few of my favorites.

A couple sheets of paper were gingham and calico prints which I thought had a country feel.  For these cards I used Operation Write Home sketches #29 and #34.  I stamped the rooster in Tsukineko VersaFine Vintage Sepia ink or Ranger Archival Cobalt ink.  I am loving the rooster stamp and will be making several more cards using it.  To embellish 2 of the cards I added some small light blue and navy blue buttons.

The paper pad also includes a navy polka dot and a blue/white stripe which I thought had a nautical feel.  So, I chose a lighthouse stamp and stamped the image in Ranger Cobalt ink.

There were still several sheets of floral pattern paper.  I used the navy floral and the blue, green and yellow striped paper to create this card using OWH sketch #8.  The sentiment is from Ms. Sparkle & Co and is matted on a scalloped circle, which I thought looked a bit like a flower.  I added 3 blue enamel dots in the upper left corner to break up the stripes.

Many of the prints in this paper pad are very busy and not all of the colors match (especially the blues).  I wasn’t quite sure what to pair up with the plaid paper.  I ended up using some of the yellow gingham and yellow “stripe” papers.  In keeping with the country theme, I used a stamp featuring mason and milk jars.  The stamp is from the Stampin’ Up Country Morning set.  To balance out the stamped image, I added a couple Recollections butterflies.

I was having trouble figuring out how to use the light teal striped paper.  The teal color didn’t really match some of the larger print papers, so I combined it with a small print that looks like cross-stitch “x’s”.  I then dug though my stamps and found the Close to My Heart Cross Stitch Wishes stamp set, which was perfect with this paper.  To pick up on the color of the kraft cardstock used for matting, I added a few Recollections paper flowers.

Here are the rest of the cards created with this paper pad.   The sentiments are from several different stamp sets including Hero Arts, Studio G and Ms. Sparkle & Co.  Embellishments include rhinestones, enamel dots, ribbon, buttons, brads, paper flowers and wood veneer pieces.  I also used several card sketches as inspiration.


Autumn Cards

Autumn Cards

Autumn is my favorite time of the year.  I love all the colors and the cooler temperatures.

A few weeks ago I picked up a package of Bo Bunny autumn theme paper at a Tuesday Morning store.  The package included 25 sheets of 12×12 paper all the same pattern.  I wouldn’t normally purchase that much of the same paper, but…  As I’ll be donating most of the cards I make with this paper, having multiple cards using the same paper and layouts is not a problem.

With so much of the same paper, I looked for card sketches that use large pieces of paper for the focal point.

I used My Favorite Things card sketch #183 for the first card layout.  I modified the sketch a bit, changing the position of the embellishment and the length of the sentiment strip.  The embellishment is a leaf cut using a Cricut cartridge.  The cardstock used for the leaves is scrap pieces from past projects.

Supplies include:

  • Cricut Speaking of Fall cartridge
  • Studio G “Happy Harvest” stamp
  • Corner rounder

For the second layout I used TSC222 card sketch #1.   This sketch also uses a larger piece of the pattern paper.  I could also make use some of the scraps of the yellow cardstock from the previous card.  Although the sketch doesn’t include it, I added a piece of ribbon between the cardstock and pattern paper.  The ribbon is scraps from my stash – some dark brown, a leaf print, and a green and yellow stripe.  I’m not sure of the brand of ribbon as I toss scrap pieces into a box and pull them out when just a small piece is needed.  The acorns are colored using colored pencil.

Supplies include:

  • Cricut George and Basic Shapes cartridge
  • Studio G “Happy Harvest” stamp
  • Scrappy Cat Fall Icons “Acorn” stamp
  • Ribbon
  • Scor-tape
  • Colored pencils

For the third layout I used My Favorite Things card sketch #346.   I used a 4 x 5 1/4 inch piece of the Bo Bunny pattern paper and rounded the corners to match the sketch.  The vertical strip is cardstock from past projects that I embossed using a leaf embossing folder.  Once assembled, I thought the card needed “something”.  For some of the cards I wrapped bakers twine around the fold of the card and for others I wrapped the twine around the vertical strip.

Supplies include:

  • Cricut George and Basic Shapes cartridge
  • Scrappy Cat Fall Icons “Fall” stamp
  • Recollections brown and white baker’s twine
  • QuicKutz Leaves embossing folder
  • Corner rounder

For layout #4, I used Freshly Made Sketches sketch #274.  I used a 4 1/8 x 5 3/8 inch piece of the Bo Bunny pattern paper.  The small banners are cardstock from past projects.  For a little sparkle I added a few sequins around the sentiment.  

Supplies include:

  • Inkadinkado Harvest Expressions “Fall Colors” stamp
  • Sequins

For layout #5, I used an older Mojo Monday card sketch.  I was getting a bit bored using the same paper, so decided to check my stash for some different supplies.  I found the teal cardstock and washi tape which I thought were good matches for the colors in the pattern paper.  To bring some of the teal color down on the card, I added the thin strip of cardstock at the bottom.  For some sparkle, I added 3 rhinestones to the top of the card.

Supplies include:

  • Inkadinkado Harvest Expressions “So Thankful for You” stamp
  • Fiskars Parentheses Border punch
  • Gold rhinestones
  • Recollections Washi tape

The last layout is based on Operation Write Home card sketch # 120.  I had a few scraps of the pattern paper that were the exact size (3 1/4 x 4 inches) shown in the sketch.  I used some burlap pattern paper for an additional print and threw on a few sequins for color.

Supplies include:

  • Inkadinkado Harvest Expressions “Gratitude” stamp
  • Sequins

Supplies and tools used on all cards include:

  • Bo Bunny Dreams of Autumn Sweater Weather paper
  • Recollections brown cardstock
  • White 110lb paper
  • Tsukineko VersaFine Vintage Sepia ink
  • Scotch Advanced Tape Glider (ATG)
  • Tonic Studios Tim Holtz 12.25 inch guillotine trimmer
  • Misti Precision Stamping tool

So far I’ve made 30 cards using the Bo Bunny paper.  I still have 20 full 12×12 sheets and several smaller pieces left.  I’ll probably make a few more cards if I find sketches that looks interesting.  If not, I’ll keep a few sheets of the paper for my stash and donate the rest.

Graduation Cards

Graduation Cards

I thought I’d do one more post about past projects. A few years ago, my sister asked if I would make my nephew’s graduation announcements. Of course I said yes, and immediately started making a list of supplies that I might need.

I ended up with a few layouts, each including my nephew’s senior picture. I used the school colors – royal blue and white. I was able to find matching bakers twine at my local craft store to make the tassels. As the background was a bit plain, I stamped and then heat embossed graduation caps on the blue paper using Versamark ink and clear embossing powder (it looks blue in the pictures). I used my Cricut to die cut the year and hand cut the graduation cap used on one of the layouts.

I also created some coordinating Thank You cards sticking with the royal blue and white theme.  I kept the layout very simple and uncluttered to create a more masculine feel to the cards.

My first post…

My first post…

I wasn’t sure exactly how to get started or how I wanted my blog to look. I’m sure it will be a work in progress. For my first few posts I thought I’d share some of my past card creations.

This is an monogram card I made a few years ago for my sister. She requested several sets of cards that she could use as gifts for my niece and nephew’s teachers at the end of the school year.

This led to my “need” for several sets of alphabet stamps from tiny (1/2 inch) to large (2+ inch) letters.

Here’s a set of cards I made for my mom.

I usually include at least 5 cards in each set. If I know the recipient, I try to use their favorite colors or themes (flowers, stripes, etc.).

I like to finish the gift by tying up the cards with matching ribbon, yarn, raffia, etc. and adding a small gift tag.